Set up the Visitor Types
Level: Administrator
Your organization can use the Visitor Types to classify the visitors who attend your offices. When you have the visitor type set up, then you can create a customized email notification that can be sent out to the visitor.
Access Visitor Type Settings
- From the menu, navigate to Settings.
- From the Visitors section, click Visitor types.
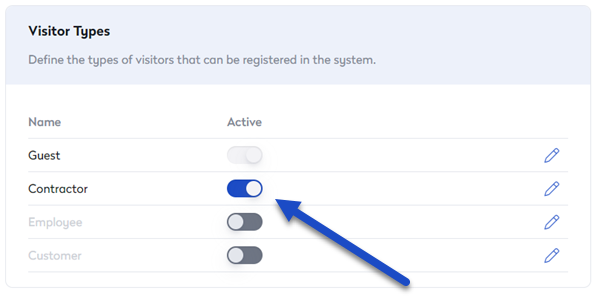
The Visitor Type settings display and you can see the following:
- Guest - This is the default visitor type and it is gray-out as it is always turned on.
- Contractor - These are external workers typically engaged for specific tasks or projects.
- Employee - These are people who arrive at your location but typically from other locations.
- Customer - These are visitors with a business relationship with your organization.

Step 1. Set up the Visitor Types
- For the visitor type you want to use, click the name toggle to ON.
- If you want to edit the name or details of the visitor type, click the Edit
 icon. The Edit Contractor dialog displays.

- In the Name field, change the name of the visitor type.
- In the Description field, change the description of the visitor type.
- From the Category drop-down, select either: Guest, Contractor, Employee, or Customer. The category is a useful way to keep track of the visitor types, especially when you rename a visitor type.
- Click the Save button.
Step 2. Set the default Visitor Types
For visits created from the dashboard, there will be an option for you to select a visitor type. All visits, including bulk and group visits, walk-ins, and those created outside the dashboard, will be automatically assigned the default visitor type.
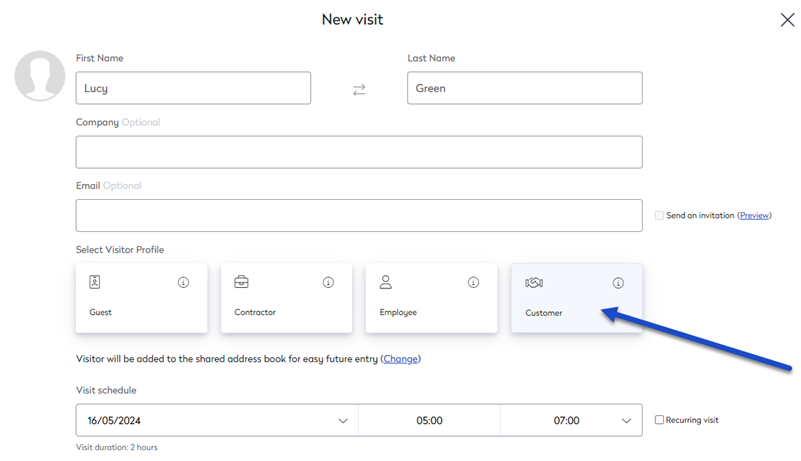
- From the Guest drop-down, select a default visitor type. Remember, the options that display in this list will depend on the visitor types you have turned on above. When the default visitor type is set up, then in the New Visit screen this will pre-select the visitor type. For example, in the screenshot below, Customer is pre-selected.
Step 3. Select the Visitor Type selection
From the option button, select either:
- Set a default visitor profile and allow hosts to change it.
- Hosts must always select a visitor profile.
The settings are saved automatically.