Implement SSO and User Provisioning through Google Suite
Setting up Google Suite in a single location
Step 1: Add and configure single sign-on (SSO)
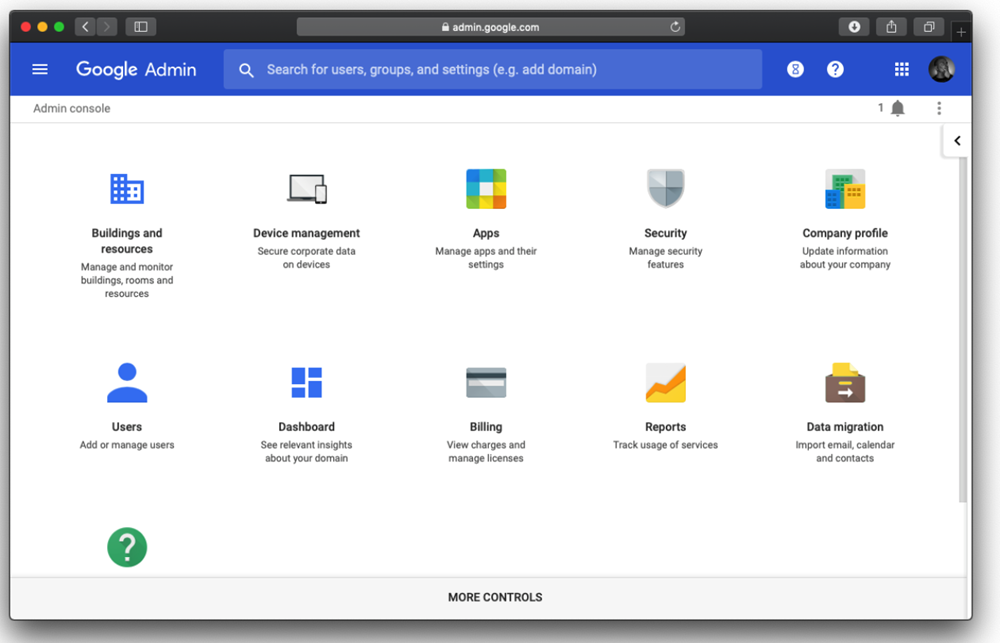
Log into your Google account as an administrator. Open the Google Admin console. From the Admin console Home page, go to Apps > SAML Apps.
.png?revision=1&size=bestfit&width=1000&height=641)
Click on the button to Add a service/App to your domain.
.png?revision=1&size=bestfit&width=1000&height=624)
Search for Proxyclick and click on Proxyclick.
.png?revision=1&size=bestfit&width=1000&height=650)
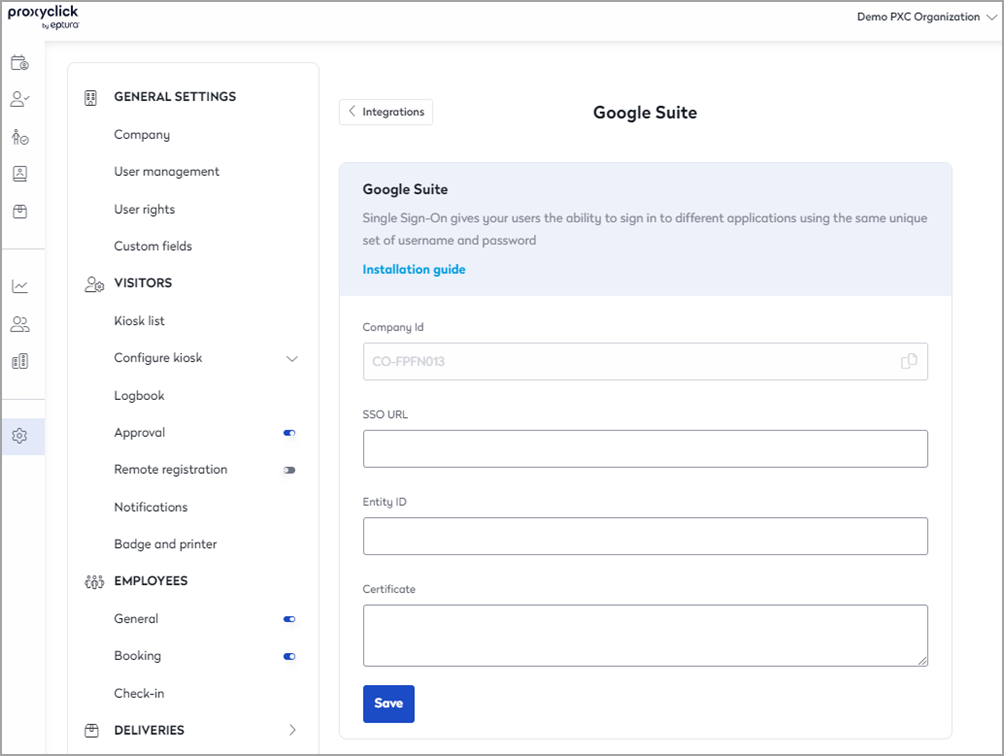
Copy the SSO URL, copy the Entity ID, and download the Certificate.
.png?revision=1&size=bestfit&width=1000&height=665)
In another tab or window, open the Proxyclick Integrations page and install the Google Suite integration.
Paste the SSO URL, Entity ID, and the content of the Certificate (including BEGIN and END header and footer) in the corresponding fields in Proxyclick.
Copy the Company ID from Proxyclick, you will need it next.
Back in Google Suite, click NEXT.
.png?revision=1&size=bestfit&width=1000&height=668)
Click NEXT again. Now you will need to paste the Company Id and replace the {uniqueid-provided-by-sp} in Google Suite by the Company Id value (format CO-XXXX).
.png?revision=1&size=bestfit&width=1000&height=680)
Click on OK (you can activate user provisioning later).
.png?revision=1&size=bestfit&width=1000&height=652)
Your Google Suite SSO connection is ready, but the service is OFF for everyone.
If you only need Google Suite SSO, you can enable the service for everyone or a group (see step 3).
When the service is ON you can use the URL: http://saml.proxyclick.com/init/CO-XXXX (where CO-XXXX is your Company ID) to log into Proxyclick using Google Suite SSO or log into your Google account as a user and choose the Proxyclick app in the list of available services.
But you will still need to add users in Proxyclick before you try to log in with SSO. You can do it manually, in bulk or via User Provisioning. See the next step to configure User Provisioning with Google Suite.
Step 2: Configure user provisioning
Once the Proxyclick service is added, you will see a User Provisioning section with a button to set User Provisioning up. Click on that button.
.png?revision=1&size=bestfit&width=1000&height=859)
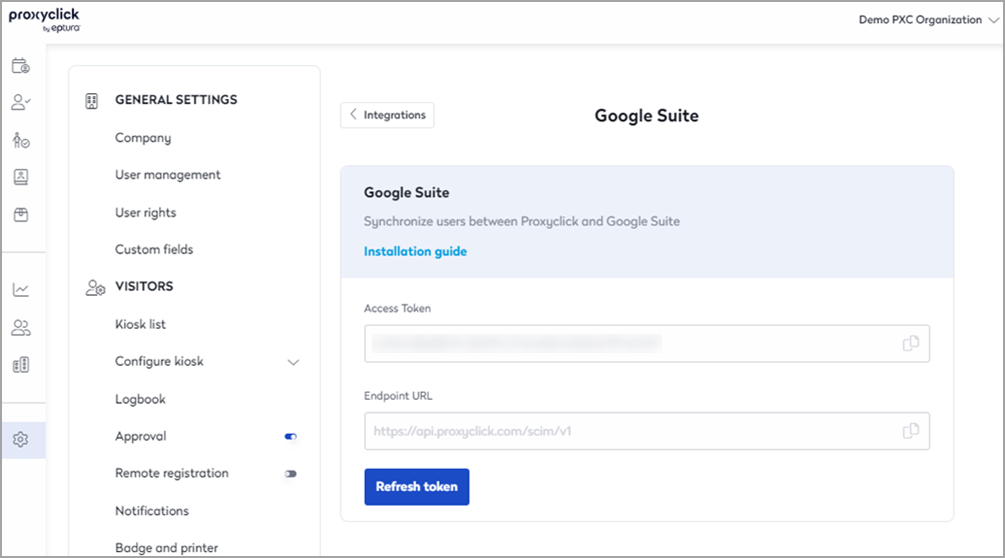
The first step is to authorize the app. To do this, copy/paste the Access Token you can find in Proxyclick’s Google Suite configuration page.
.png?revision=1&size=bestfit&width=1000&height=730)
Then, copy and paste the Endpoint URL that you find on Proxyclick’s Google Suite configuration page. It should look like https://api.proxyclick.com/scim/v1
Then click NEXT.
.png?revision=1&size=bestfit&width=1000&height=699)
You don’t need to change anything in terms of attribute mapping. You can click NEXT.
.png?revision=1&size=bestfit&width=1000&height=693)
You can set a provisioning scope, but it’s optional. You can click FINISH.
.png?revision=1&size=bestfit&width=1000&height=715)
You can only activate User Provisioning if the Proxyclick service is enabled (see next step).
Once activated, the users will be synchronized automatically with Proxyclick.
.png?revision=1&size=bestfit&width=1000&height=748)
Step 3: Enable the Proxyclick service
In Proxyclick’s service page on Googe Suite, click the EDIT SERVICE button in the top right.
.png?revision=1&size=bestfit&width=1000&height=742)
Then, set the Service Status to ON for everyone and click the SAVE button.
.png?revision=1&size=bestfit&width=1000&height=747)
You can now activate Google Suite User Provisioning, and your Google Suite SSO is now active.
Setting up Google Suite in many locations
User Provisioning
You can configure Google Suite and manage users across multiple locations from a single Proxyclick account.
-
Connect Google Suite in your main location (follow the steps above).
-
Click on Multi-location mapping on the Google Suite integration in your Integration List.
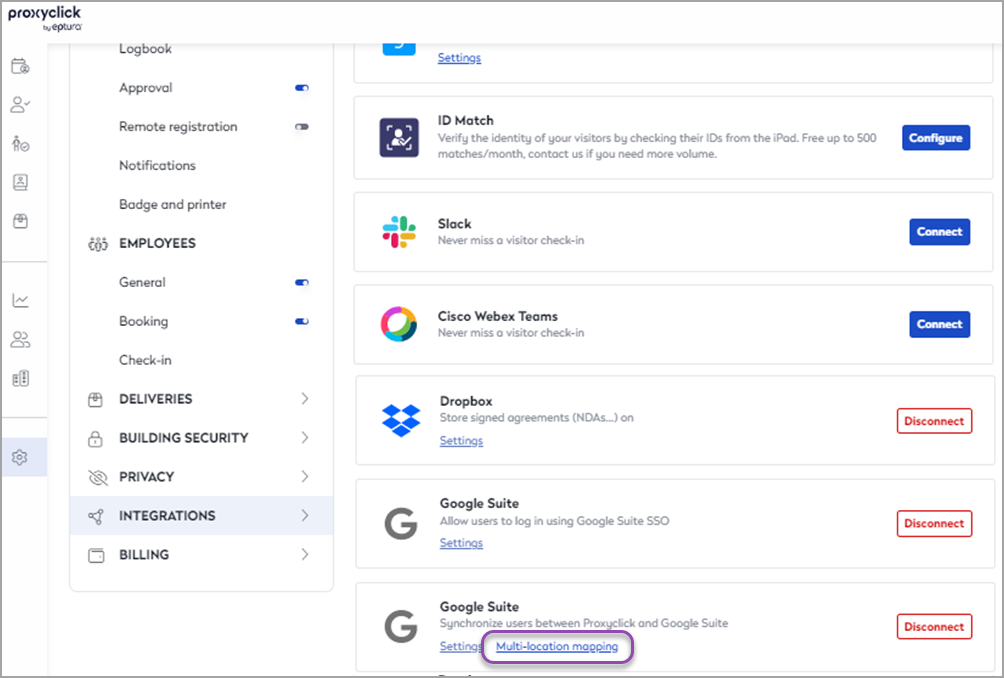
Important to note: If you do not see the Multi-location mapping button, then it means you are running on an older version of our Google Suite integration. All you have to do is disconnect the integration and then reconnect it before continuing with the remaining steps.
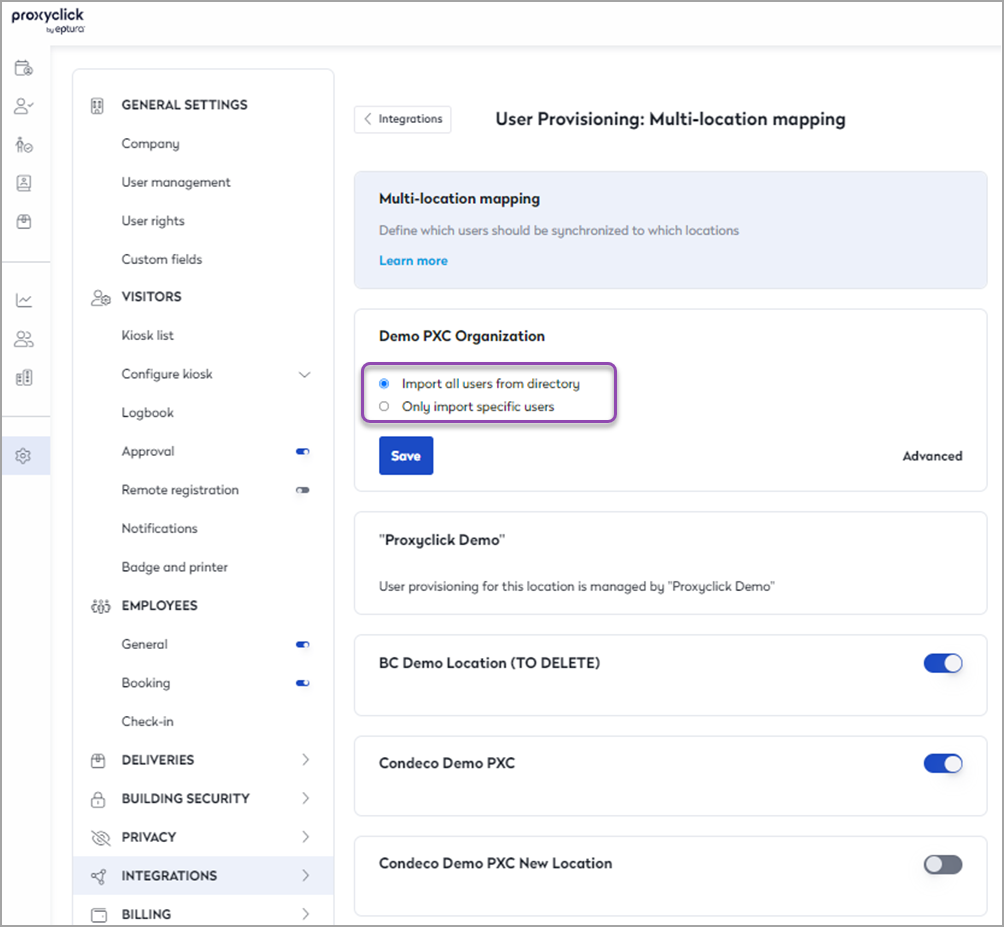
You will then see the list of all the locations for which you’re an Admin. You can enable/disable User Provisioning for each location from this list using the toggle button.
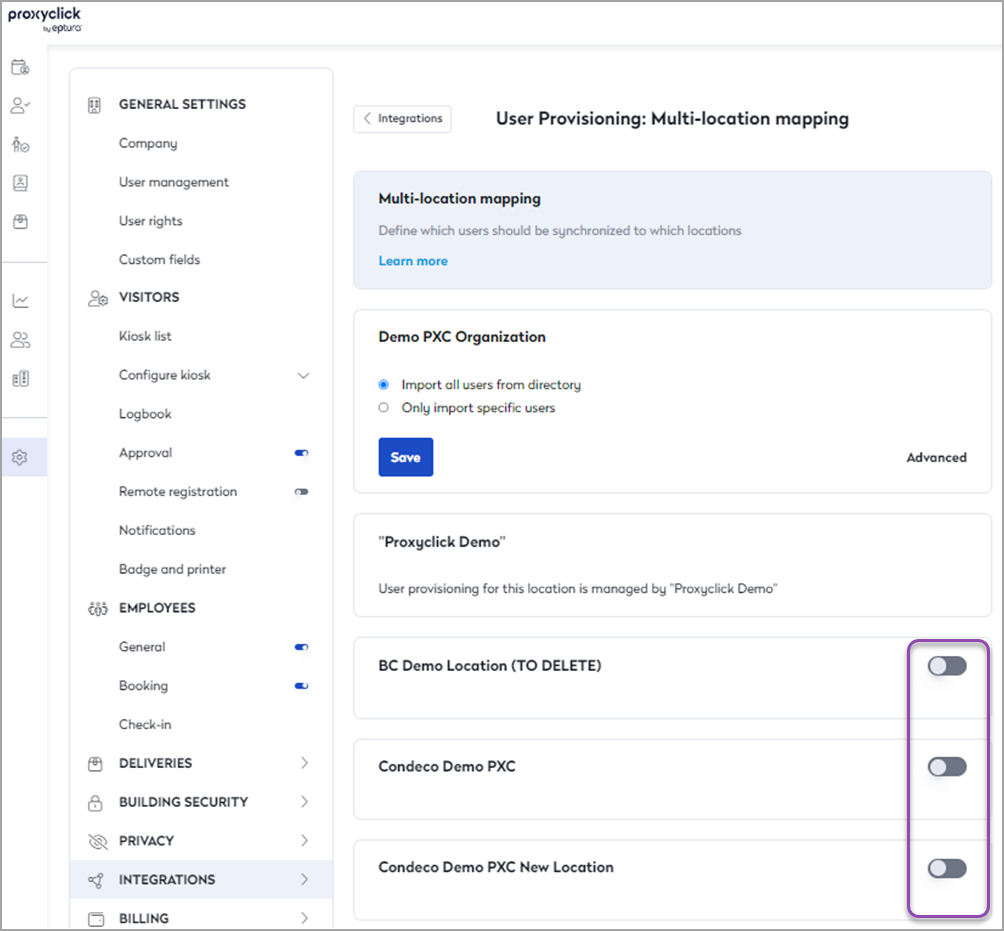
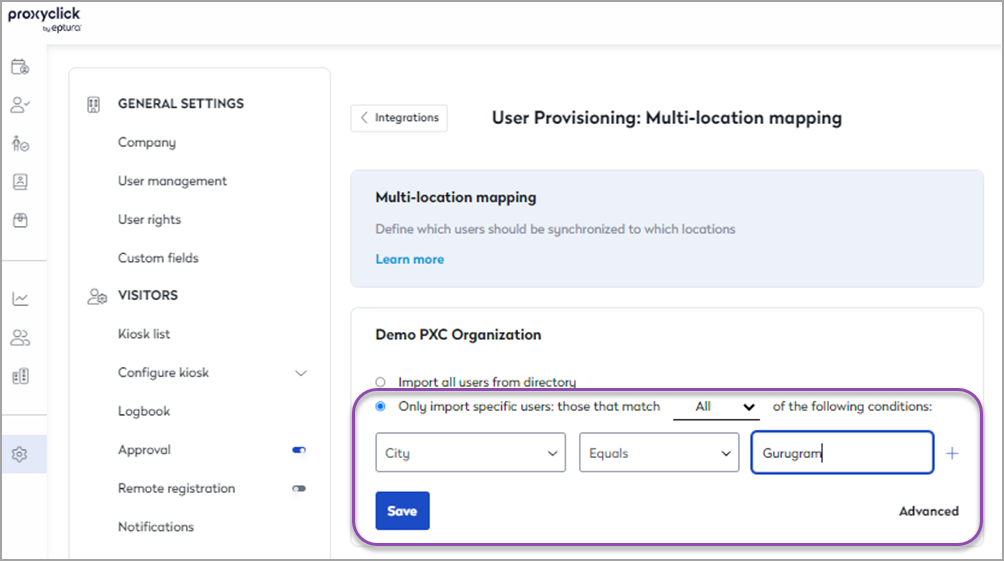
Once enabled, you will be able to either import all users for provisioning in that location or define your own filters for specific users.
You can filter users based on their city and language using the appropriate conditions for each.
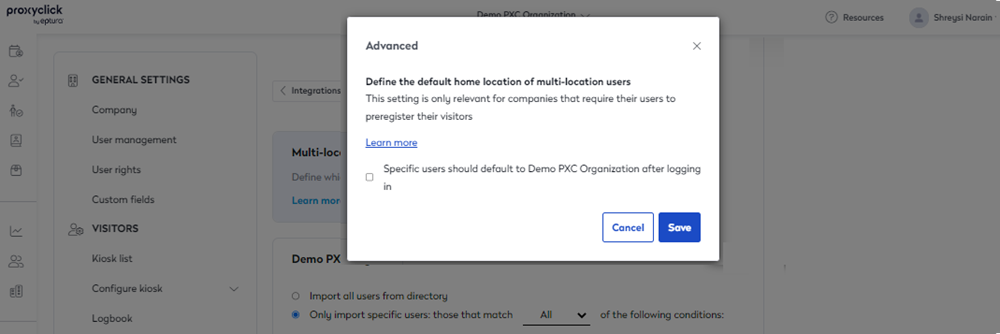
Advanced
If you are provisioning the same users in multiple locations, you can use the Advanced menu to force their “home location.” Proxyclick would then use this as the default location for new visits created (e.g. when using the Generic Calendar Integration).
This integration requires the corresponding add-on to your subscription.