User Management
Level: Administrator
The User Management area allows Admin and other user roles to enter users to operate as hosts and receive visitor notifications. Users can be added and managed individually, in bulk, or automatically via user provisioning.
- Manually - add or edit an individual.
- Import users in bulk - update a large user base. (No input from your IT team required).
- User Provisioning - ideal for automatic updates. (Requires implementation by your IT team).
See also:
Watch the Video
Audio: Sound Length: 1:00 mins
Manually add a user
You can manually add a new user to Eptura Visitor from either the Settings module or the Employees module. Here we'll explain how to start the process from the Settings module.
- Select the Settings icon from the left menu.
- Click User management then Add users.
- From the 'Add users' page under 'Add manually', click Add user.

The 'Add a user' popup is displayed. You can now follow the same process as when adding a new user from the Employees module, as described below.
Add a new user
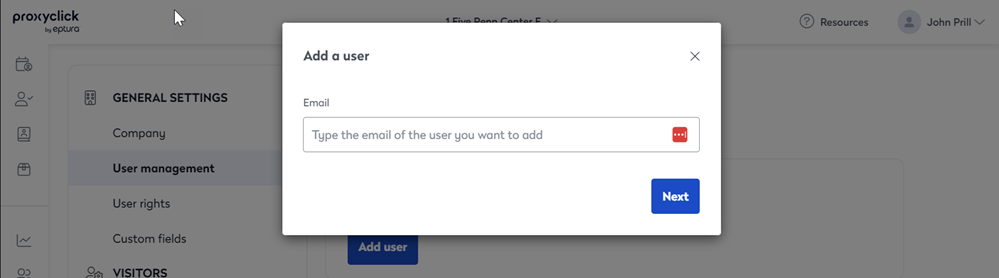
- Enter the new user's email address in the 'Add a user' popup. Click Next.
- The 'Add a user' popup expands to reveal more options:
- First name/Last name: Enter the user's first and last names.
- Mobile phone: Click the country drop-down to select the appropriate country code and then enter the mobile phone number. Hyphens and spaces are not required.
- Phone: Enter phone number.
- Assistant: Start typing the name of the user's assistant. The field is automatically filled if the person exists in the system.
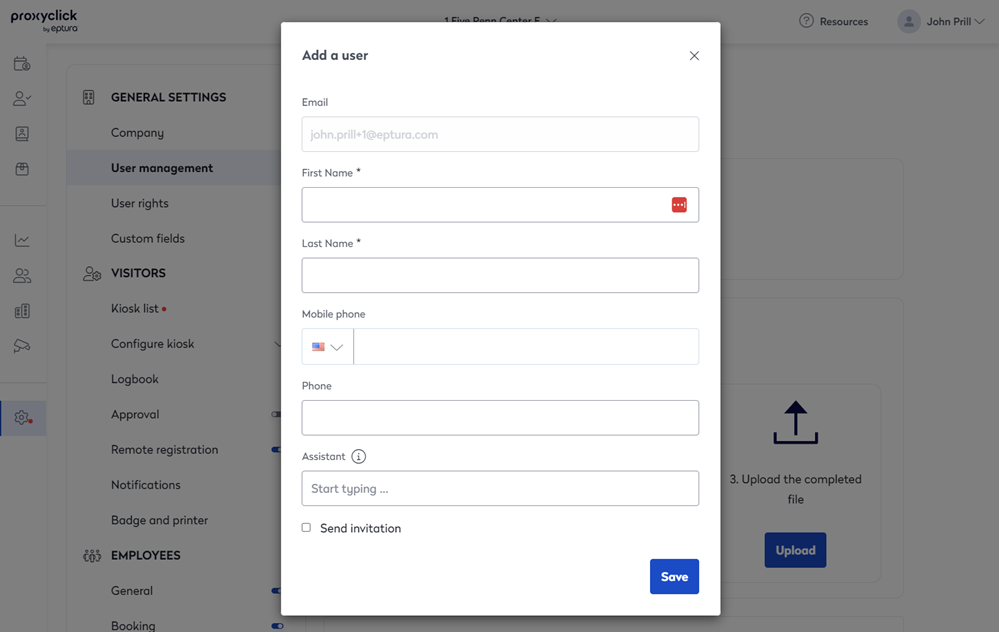
- Send invitation: If the new user needs to log into Eptura Visitor, select Send invitation to reveal the User rights drop-down list and select the appropriate permissions for the user or leave as 'Default' to create a default user account.

- Click Save to save the new user.
Good to know
- If 'Send invitation' was selected, an Invitation to join Eptura Visitor email is sent to the user with an activation link. The user must click the 'Join your team on Eptura Visitor' button to activate their account and set a password.

- If 'Send invitation' was not selected (or the user did not click the link to activate their account) the user can still be a host but they will not be able to log into Eptura Visitor.
Import users in bulk
You can import user in bulk to Eptura Visitor from either the Settings module or the Employees module.
Download existing user data first: It is important to upload your entire user list, including existing users, to ensure no current user data is lost.
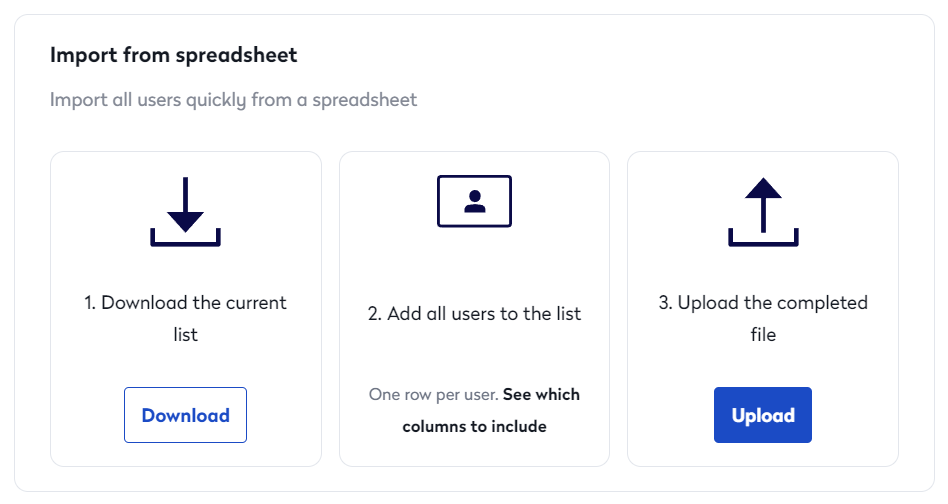
The bulk upload process
- Click the Bulk upload button from either the Employees page or Settings > User management.
- Click Download to download your existing user data to user_export.xlsx.
- Open user_export.xlsx in Microsoft Excel and read the instructions on the 'Read Me' tab. Instructions are provided in English and French.
- Add your new user data to the Users tab in the Excel file. The following fields are available:
Firstname Lastname Email Language Function Phone Mobile Invitation - Save the Excel file which should now contain both current and new user data.
- Return to the Bulk upload of users in Eptura Visitor and click Choose file. Select the updated user_export.xlsx which contains both current and new user data and click Upload.
Upload your entire user list: The uploaded user list replaces the existing user list in Eptura Visitor so make sure the upload file contains both existing and new user data before uploading.
- Review the number of changes to ensure it reflects the number of expected changes. If you have any concerns, click the X at the top right to cancel the import and check the upload file. If you are happy to proceed, click Import to upload the user list to Eptura Visitor.

- The bulk upload is confirmed. Click Close.

User Provisioning
User Provisioning allows you to manage users (additions, deletions, updates) automatically. Learn more: User identification and management.