Configure the Ascent Temperature scanner
Setting up the hardware
First, connect cables as shown in the picture below:
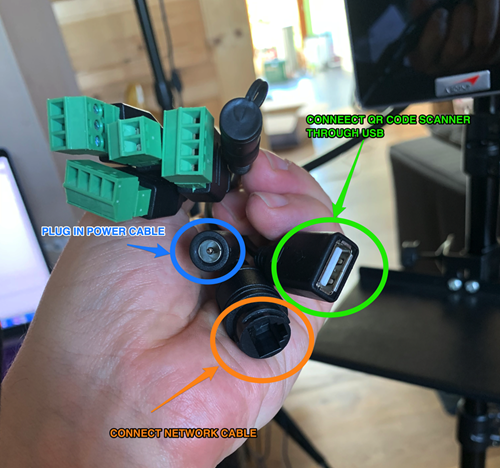
When the power cable is plugged in the device will startup.
Configure the Temperature Scanner
-
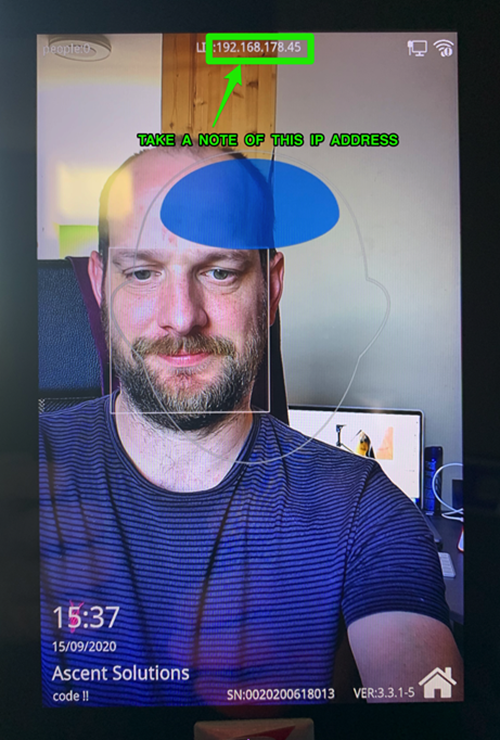
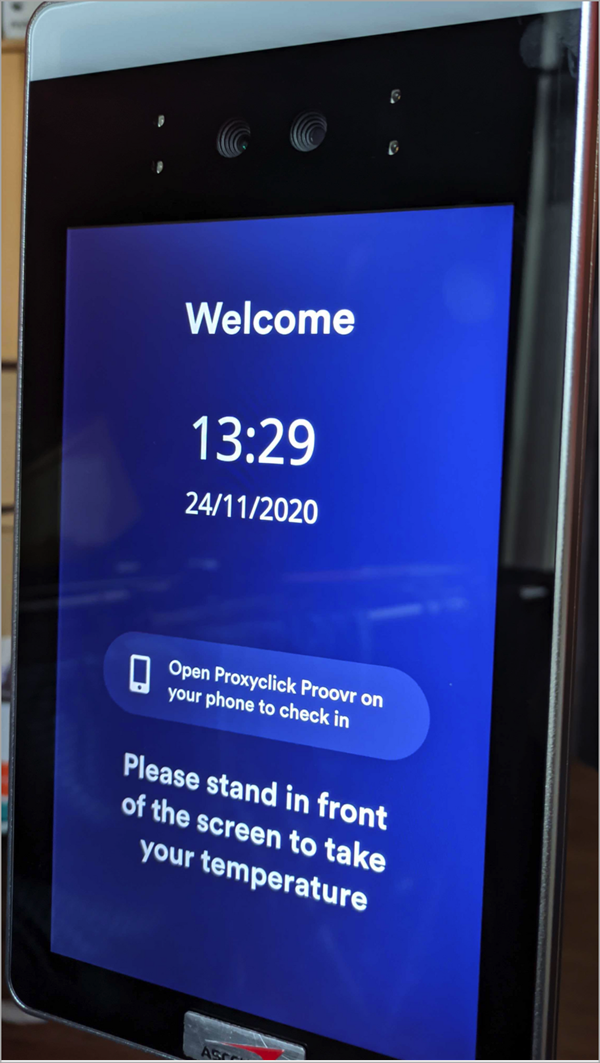
Power up the temperature scanner and note the IP address shown at the top of the screen as illustrated in the picture below.
-
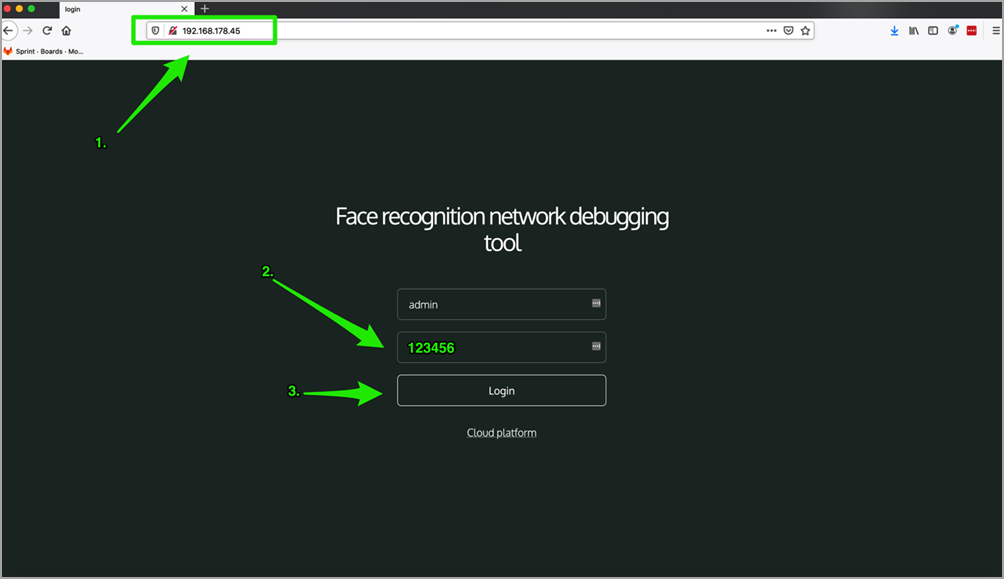
Open a web browser (i.e., Chrome or Safari) and enter the IP address (found in step 1) in the address bar of your browser, and then hit enter. This will load the login page to the admin console of the temperature scanner. Enter "admin" as a user and "123456" as a password, and then click the login button as shown in the illustration below:
-
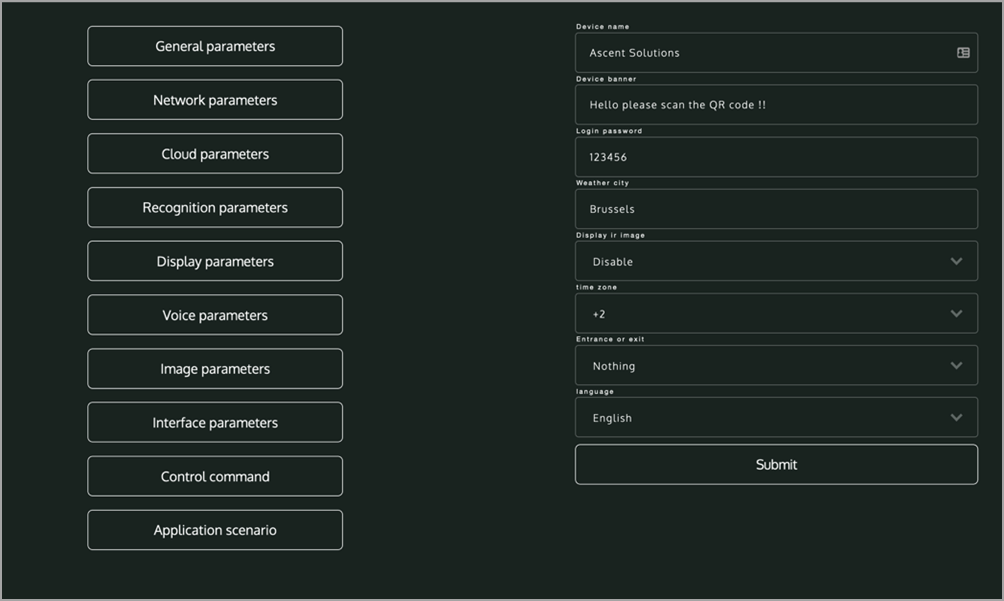
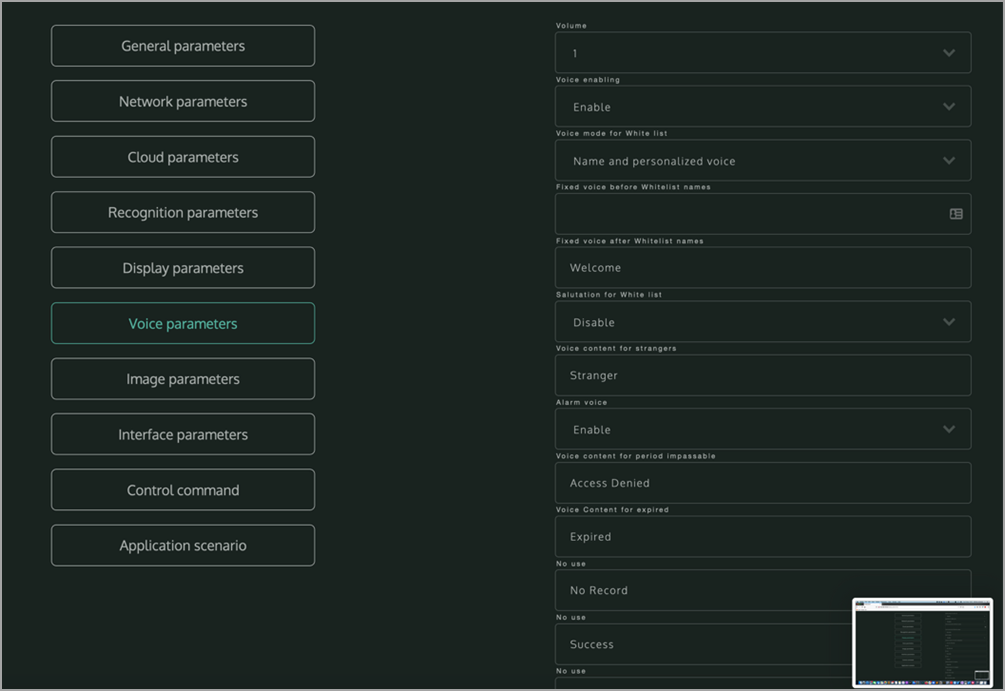
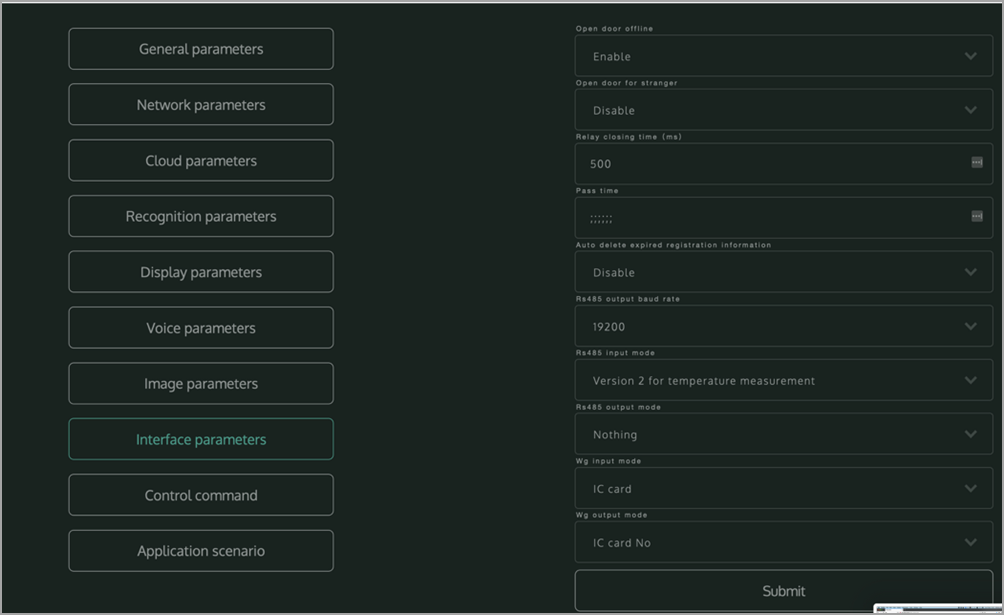
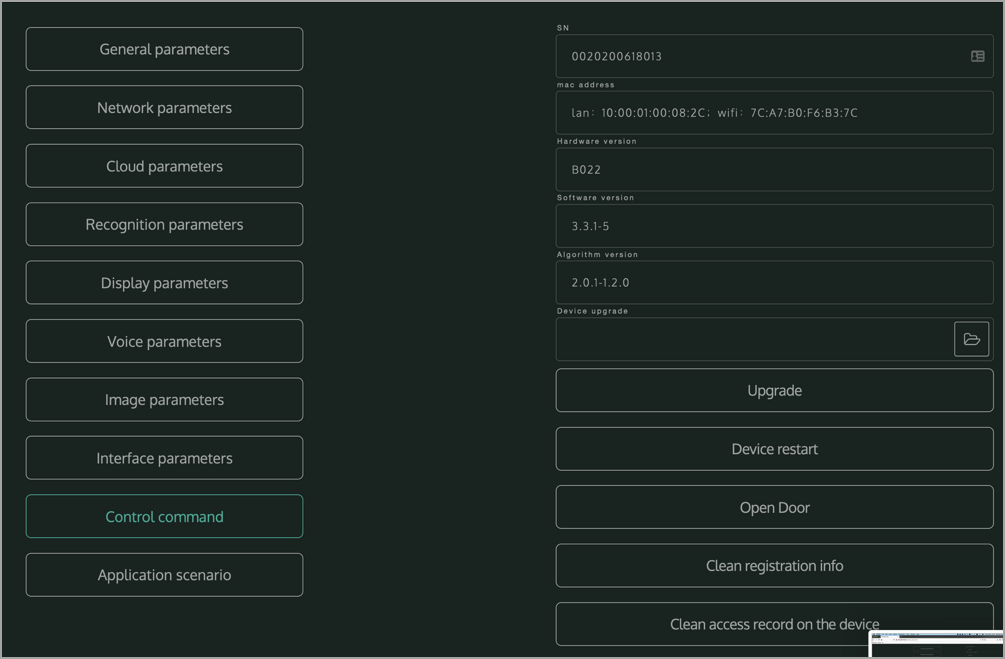
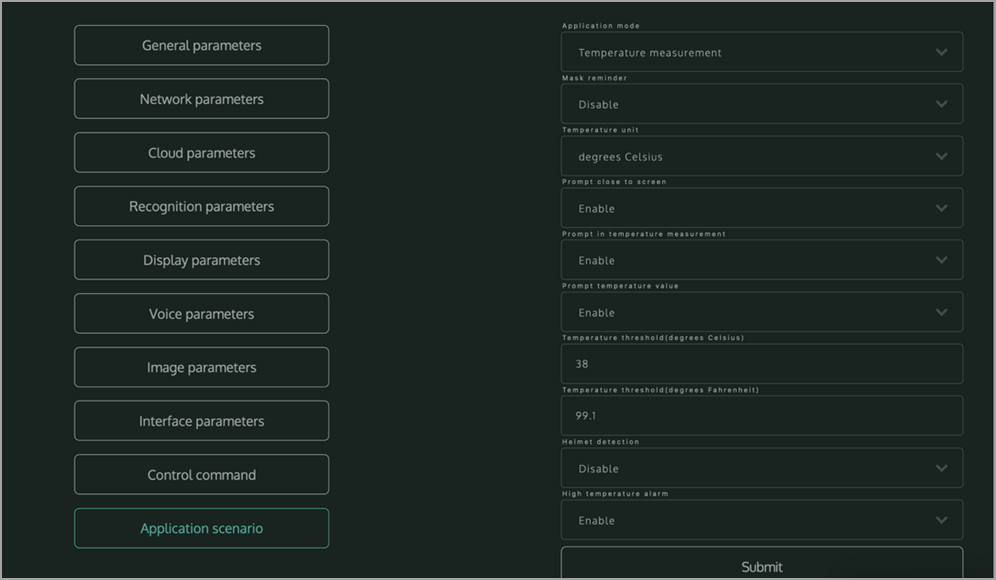
Configure all the parameters as shown in the illustrations below:
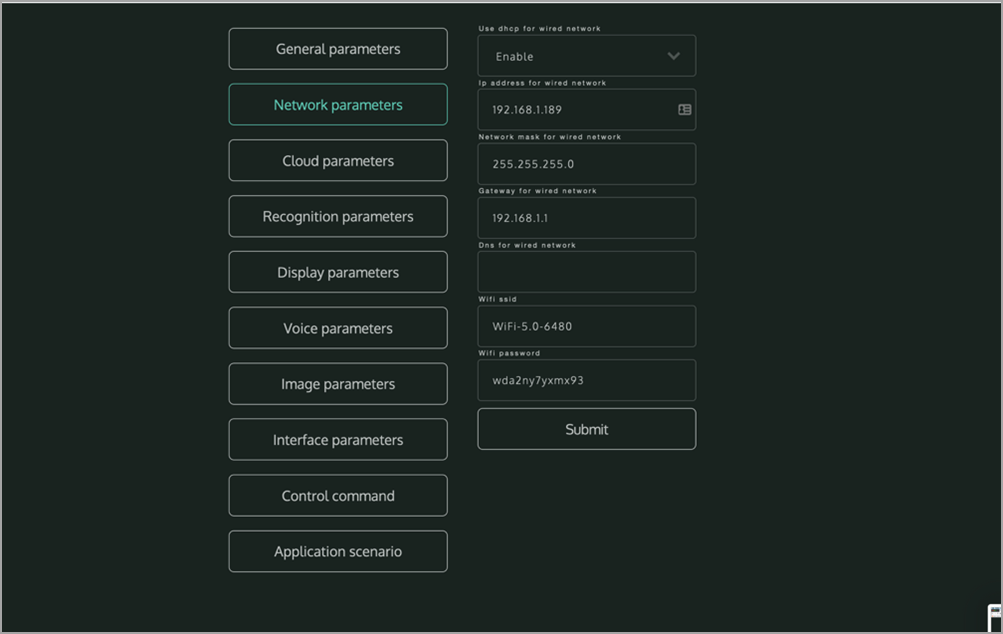
-
Add a HTTP URL in the Cloud parameters: https://proovr.proxyclick.com/temperature
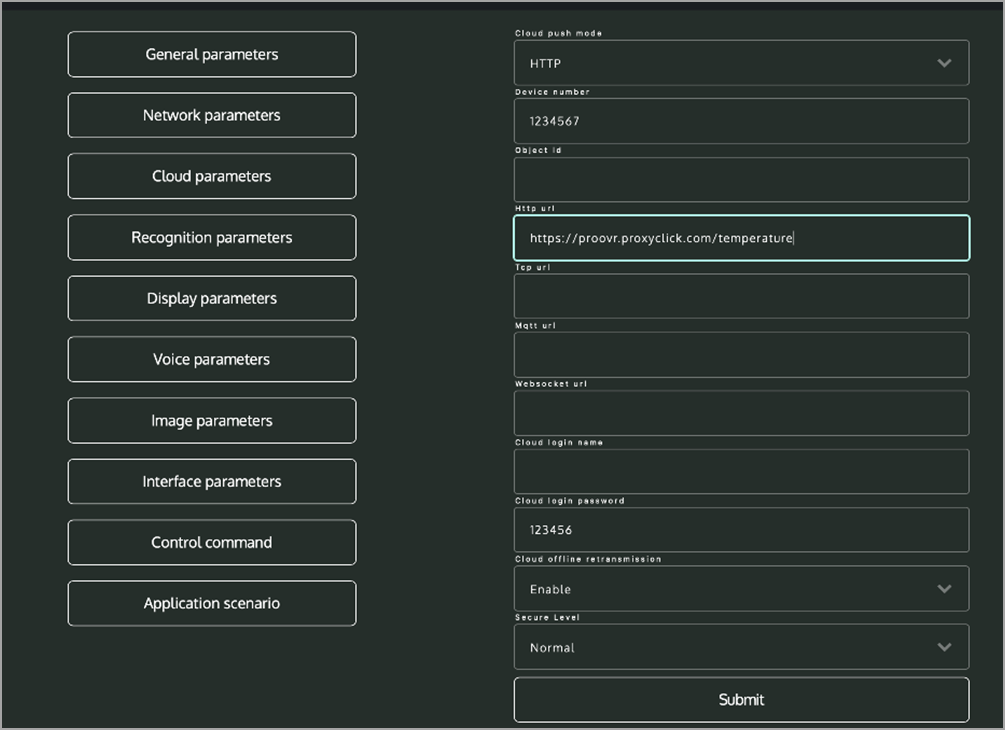
-
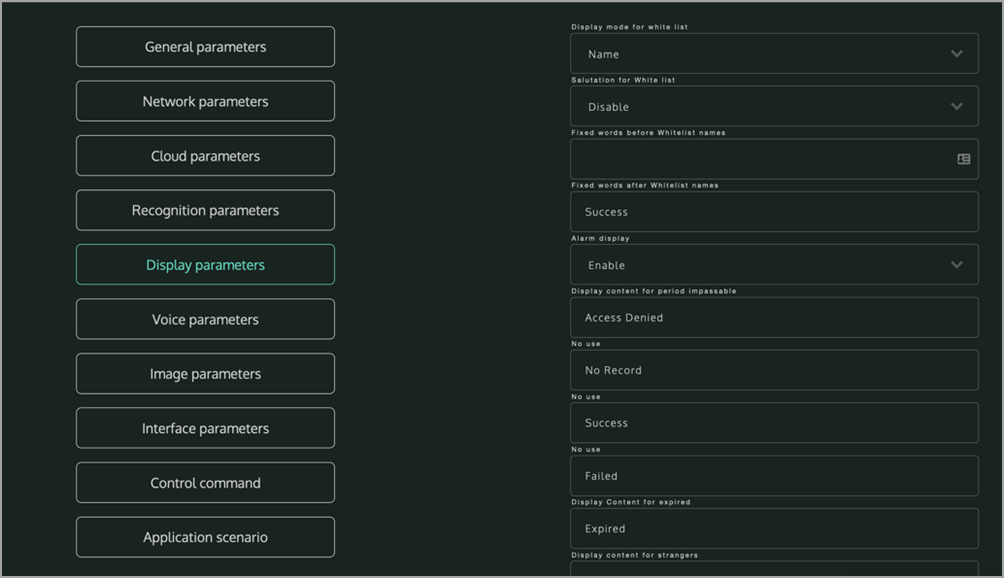
Add the .zip file below as a screensaver as listed below in the display parameters:
Screensaver.zip
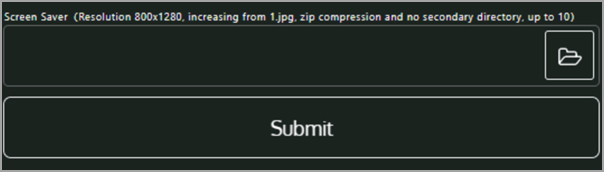
The result ideally will look like this when the device has not detected a face nearby for +/- 30 seconds.
-
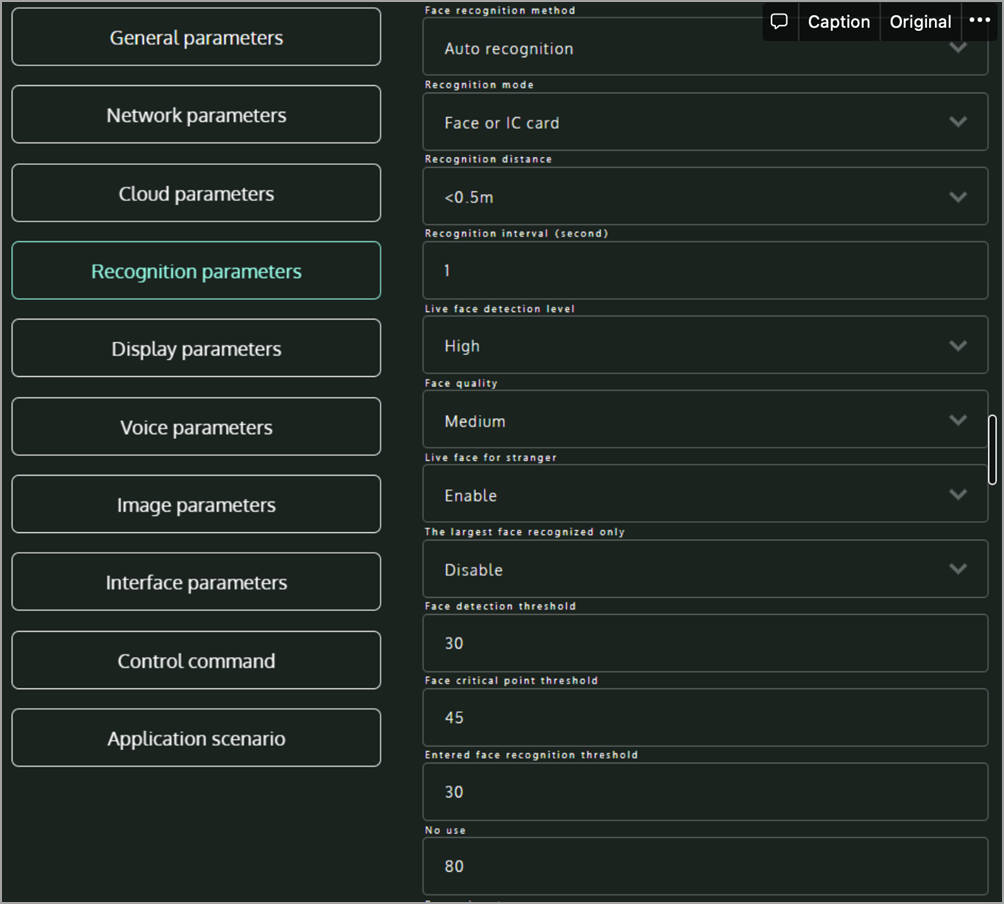
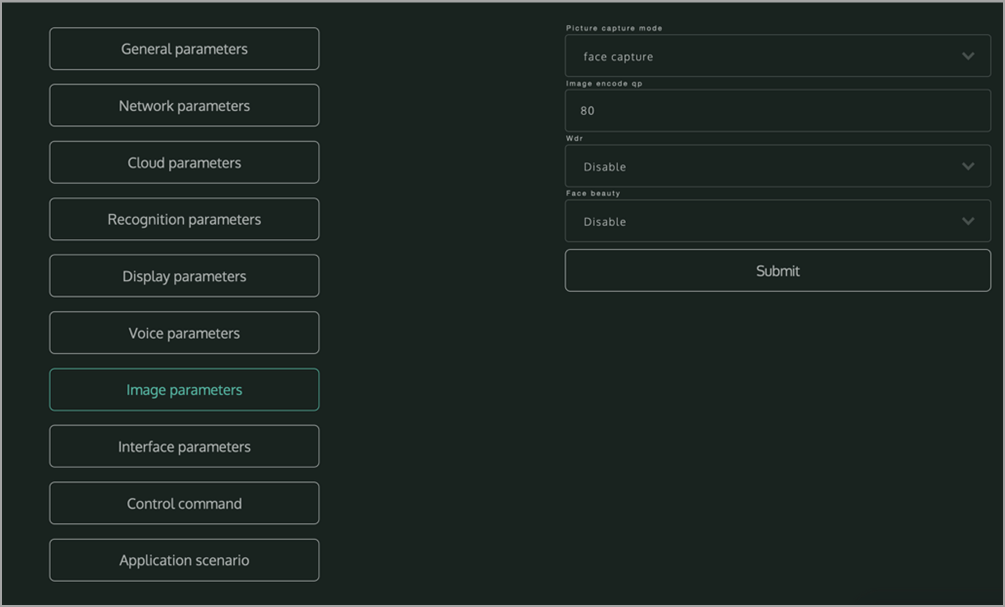
Configure the remaining of the parameters as shown in the following screens:
You are all set!
Please ensure you have activated the feature and enabled the integration in your location before testing the flow.