Client Setup
The below information can be ignored if using a cloud-based access control system as no client software will be required. Connections to cloud-based access control systems vary per system. Instructions will be shared during deployment.
For on-premise access control systems:
Proxyclick will provide a link to the client installer that is suitable for your access control system. This is a simple installation process and is a part of your setup process.
For reference, the installation process will begin with a window similar to this:

Once the license terms have been accepted, the installer will proceed to install the Proxyclick access control client to its default location of:
C:\Program Files (x86)\Proxyclick\access control client name
After installation, the Proxyclick access client must be connected to the access control system. You can enter the required details under the “Connection Settings” tab.
The client will display all green connections (the connection to the ACS and the network). Any connection issues displayed in red - perhaps a URL blocked by the firewall — must be resolved before you proceed.
A subscription ID and Thumbprint are displayed in the access client and will need to be shared with us:
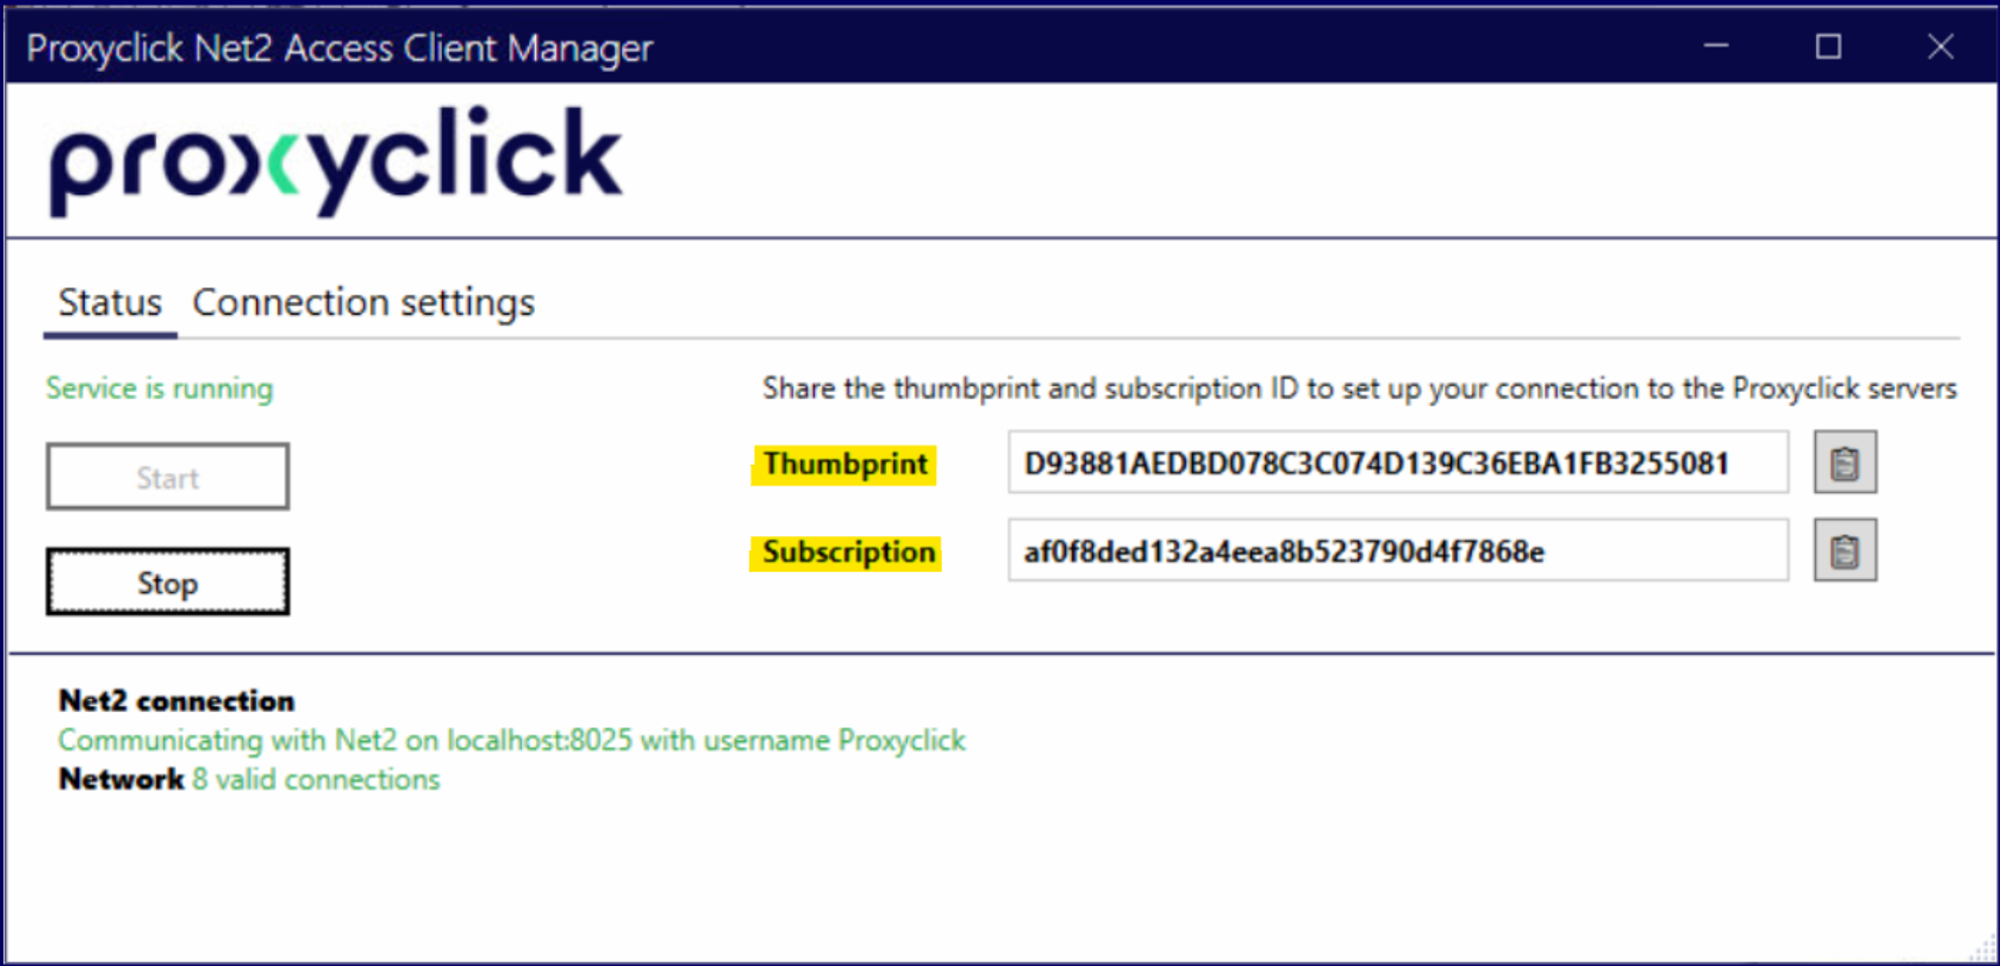
Proxyclick will then pair the client with the Proxyclick servers to establish a secure connection as part of the remote setup process.