Historical Bookings API Power BI integration
Prerequisites
The following items are required before deploying the Historical Bookings API:
- The historical booking storage extension should already be deployed.
- An active Power BI account or trial. Learn more at https://powerbi.microsoft.com/en-us/.
- The Azure Table Storage URL and account key.
Download and install Power BI desktop
To connect to the data mart, you need to download and install the Power BI desktop.
- Visit https://powerbi.microsoft.com/en-us/desktop/.
- Click download free.
- When the download has finished, double-click PBIDesktop.msi to open the installation wizard and follow the steps.
- Open Power BI desktop from the desktop shortcut or Start Menu.
- Log in to the Power BI account when prompted.
Connect to Azure table storage (data mart)
- Connect to the data mart.
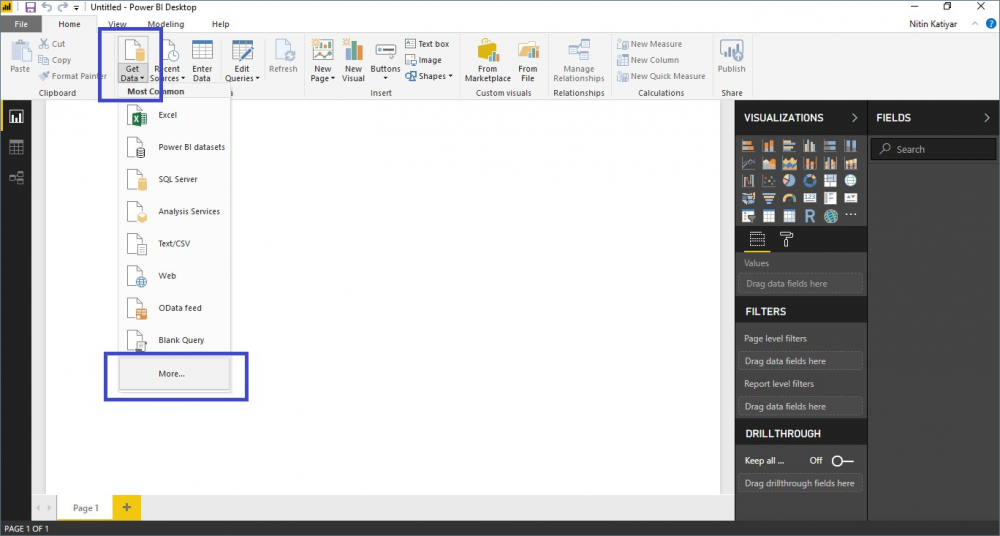
- Click Get Data > More.
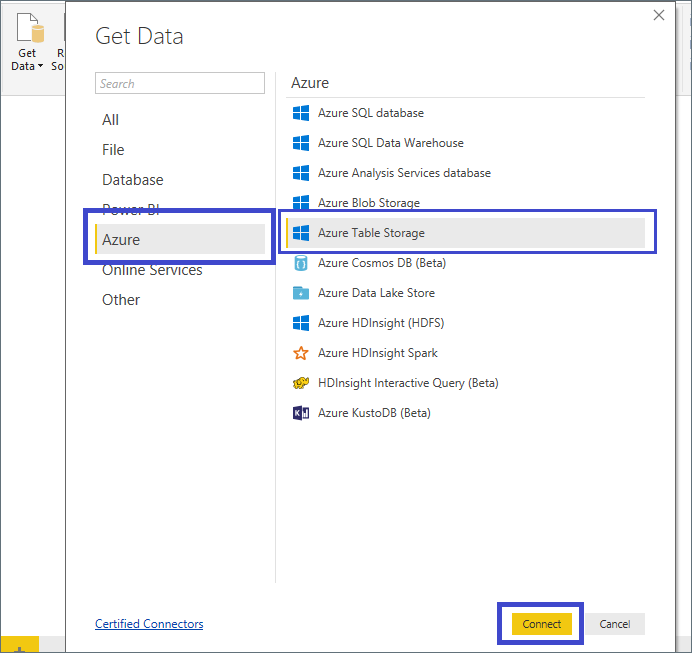
- Click Azure > Azure Table Storage. Click Connect.
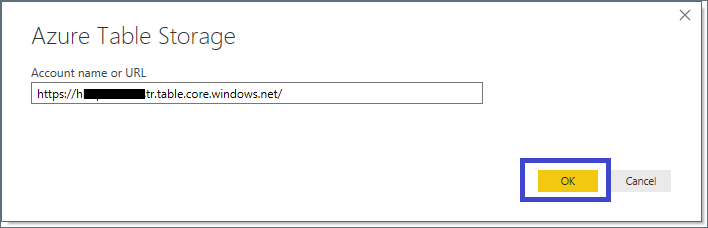
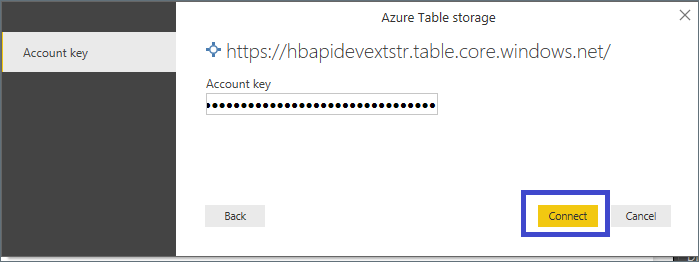
- Enter the Azure Table storage URL and Access Key.
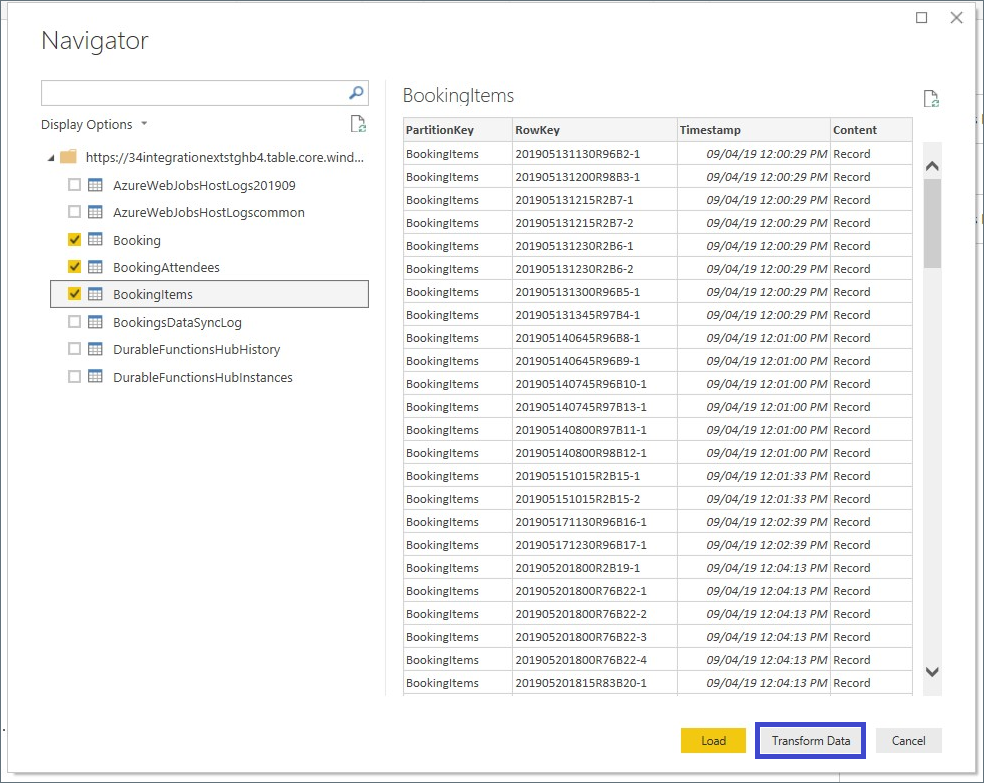
- In the Navigator select Booking, BookingAttendees and BookingItems tables then click Transform Data.
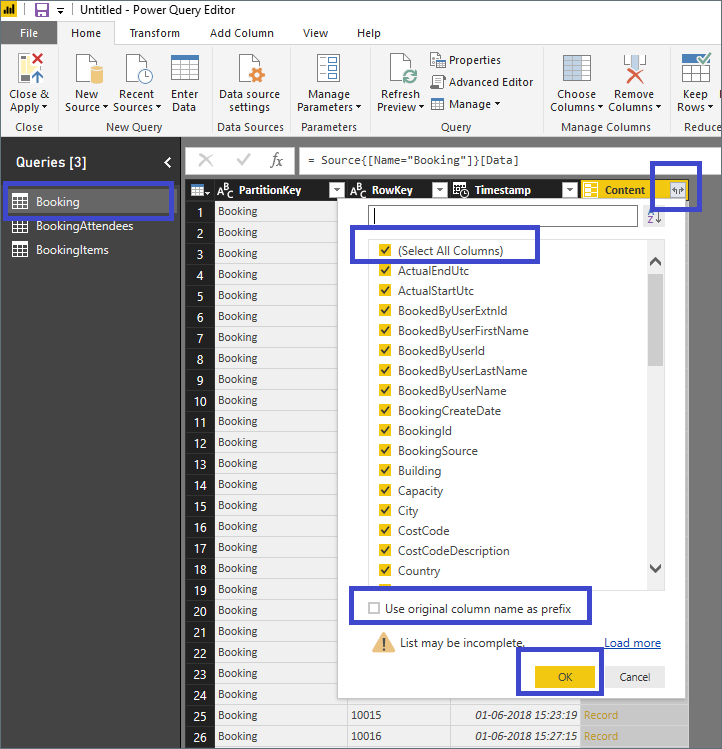
- Select the Booking table from the left sidebar.
- Click the Edit properties button in the Content column. Ensure all columns are selected then deselect (untick) Use original column name as prefix and click OK.
For optimal use, provide the appropriate data type for each column.
- Select the desired column by clicking the column header, then click Data type drop-down menu to select the appropriate data type for the column (see table below for appropriate data types).
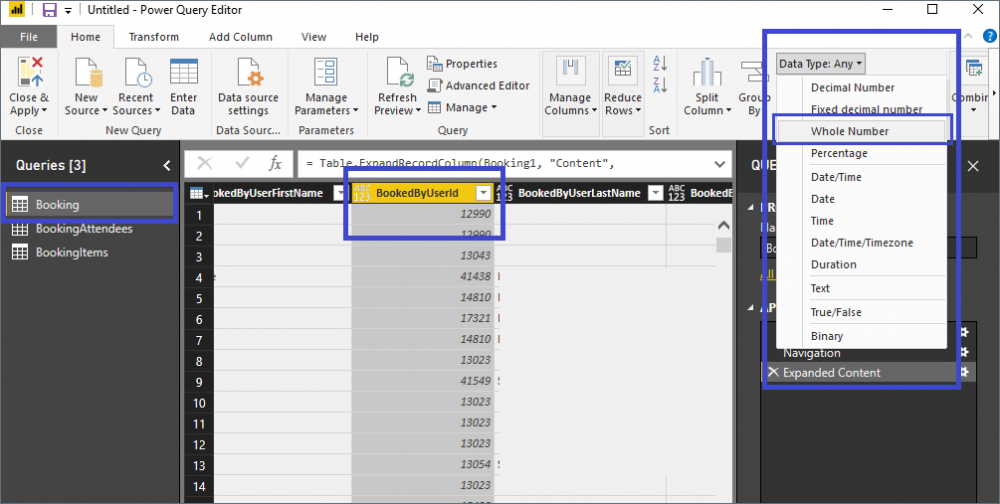
Booking Data type BookedByUserId Whole Number BookingCreateDate Date/Time BookingId Whole Number Capacity Whole Number FloorNo Whole Number HostUserId Whole Number IsDeleted True/False (logical) IsPrivateMeeting True/False LocationId Whole Number NumberOfAttendees Whole Number RecurrenceId Whole Number RequesterUserId Whole Number RoomId Whole Number ScheduledEndUtc Date/Time ScheduledStartUtc Date/Time WasBumped True/False
- Select the BookingAttendees table from the left sidebar.
- Repeat steps 7 and 8. The data types for BookingAttendees are shown in the table below.
BookingAttendees Data type BookingId Whole Number IsInternal True/False UserId Whole Number
- Select the BookingItems table from the left sidebar.
- Repeat steps 7 and 8. The data types for BookingItems are shown in the table below.
BookingItems Data type BookingId Whole Number Quantity Whole Number ScheduledEndUtc Date/Time ScheduledStartUtc Date/Time
- When finished, click Close & Apply button on the ribbon.
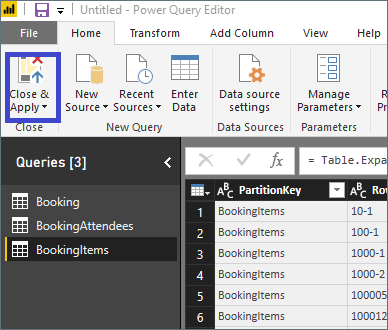
- Your query changes will now be applied and data will be downloaded locally for reporting.
This could take some time depending on the number of records and the speed of the connection.
When loaded, check and edit the relationships between tables as described in the next section.
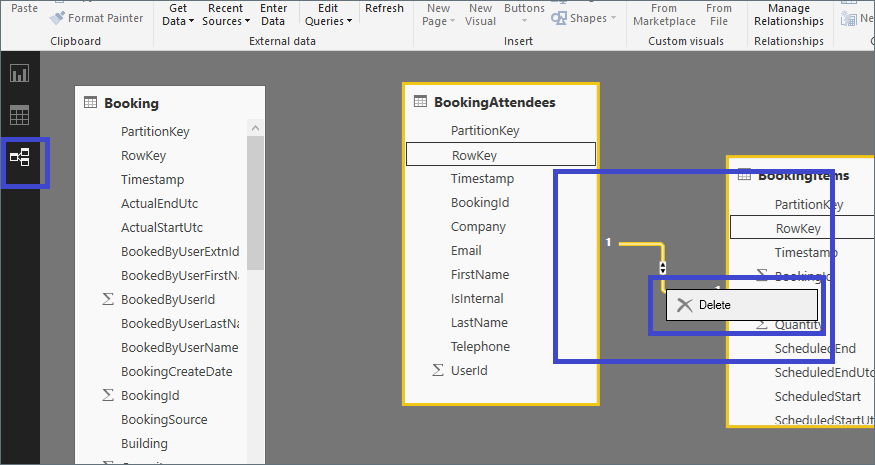
Manage relationships
The relationship between the tables BookingID is many-to-many. This is because recurring bookings share the same BookingID and fixed and flexible desk booking records do not have a BookingID, making the BookingID non-unique in the booking table.
Check and edit the relationships between tables.
- Click Relationships tab from left panel. Delete any existing relationship – right-click and click Delete.
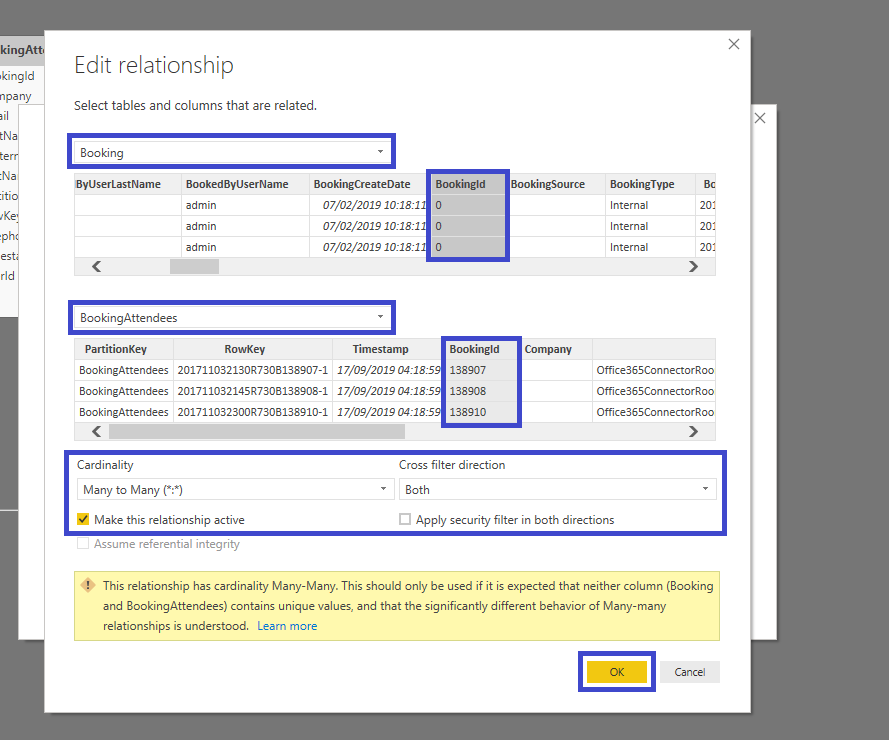
- Click Manage Relationships on the ribbon and click New.
- Select the tables and columns that are related – Booking.BookingId → BookingAttendees.BookingId – tick Make this relationship active then click OK.
- Click Close.
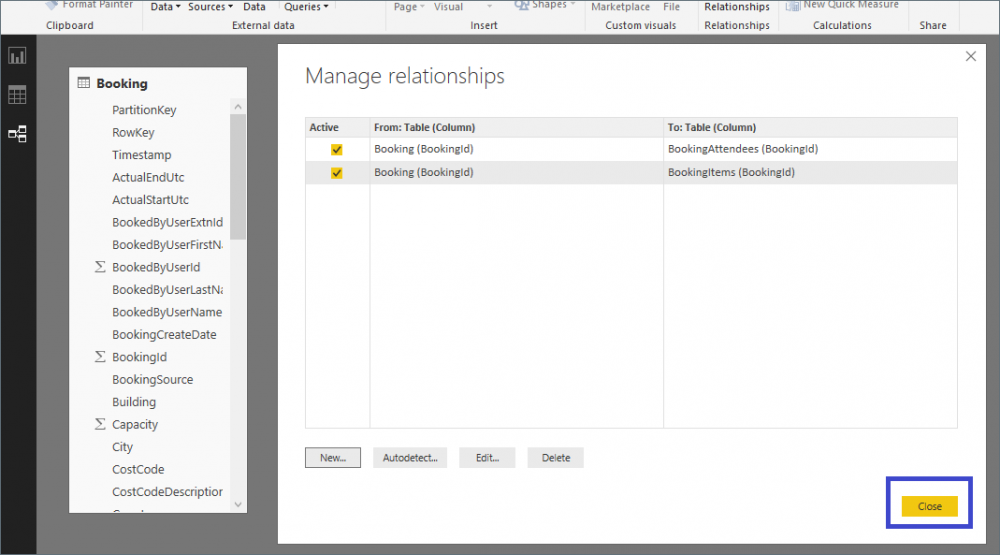
Your final relationships should look like this:

All three tables are now set up. Switch to the Report tab to create your first report.
Create sample report, save and publish
Multi-Row Card
- Select Multi-Row Card Icon from Visualizations Tab.
- Select Columns need to show in the report.
- Resize and move the Card as per need.
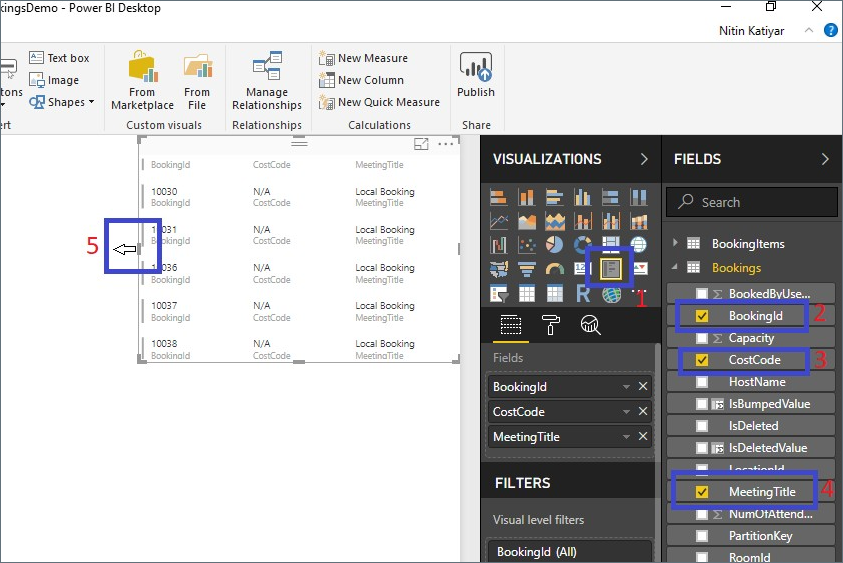
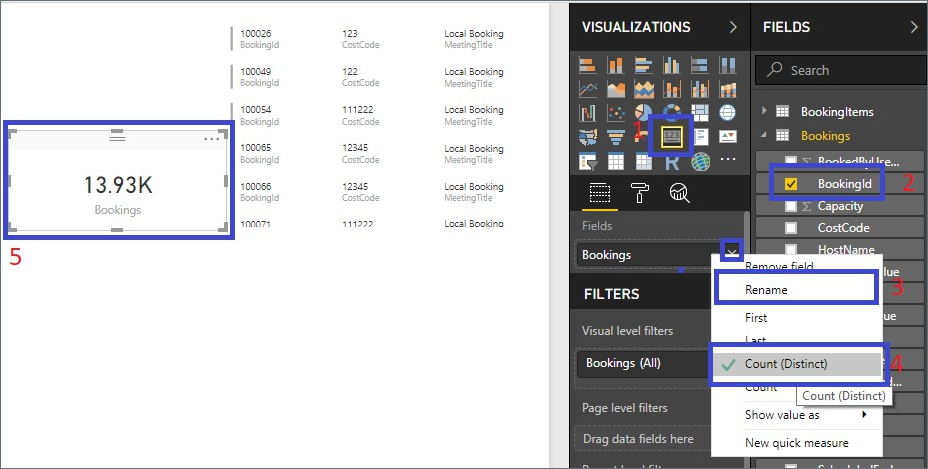
Card
- Select Card Icon from Visualizations Tab.
- Select Column need to show in the report. For eg: BookingId.
- Click on the Down Arrow located on the right side of Fields.
- Rename to Bookings.
- Select Count (Distinct).
- Resize and move the Card as per need.
Slicer
- Select the Slicer Icon from Visualizations Tab.
- Select the Column from which you want to filter the report. For eg: IsDeleted.
- Resize and move the Card as per need.
- Select True/False to see the report filter as per selection.
Learn more
Visit these websites to learn more about Power BI and how to design your reports:
- Designing your report: docs.microsoft.com/en-us/power-bi/report-server/quickstart-create-powerbi-report#step-3-design-your-report/
- Publish desktop report to portal: docs.microsoft.com/en-us/power-bi/create-reports/desktop-upload-desktop-files/
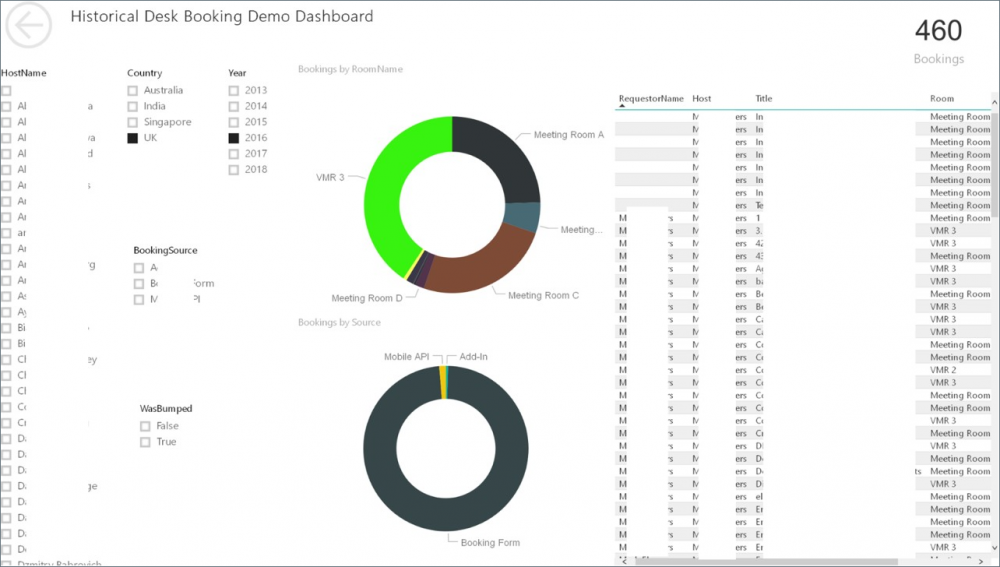
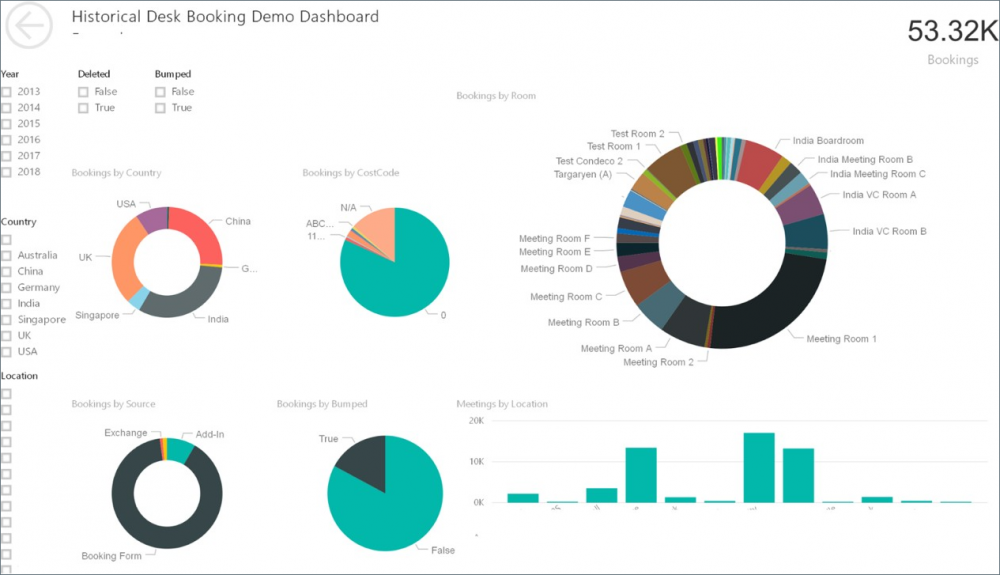
Example of reports created with Power BI.
Scheduled refresh
Apply a scheduled refresh in Power BI portal to keep the report up-to-date.
Refreshing data can take a considerable amount of time and should be done as infrequently as it makes sense for your reporting needs.
More information is available on the following websites:
- How to configure scheduled refresh: docs.microsoft.com/en-us/power-bi/connect-data/refresh-scheduled-refresh/.
- Incremental refresh for Power BI Premium users: powerbi.microsoft.com/en-us/blog/power-bi-desktop-may-2018-feature-summary/#premium