Activate an Eptura Room Screen v3 for Condeco
Eptura Room Screen v3 for Condeco - Setup Guide
Before you start
Before activating a room screen, check the prerequisites have been completed on the Eptura Device Hub. Learn more: Eptura Device Hub and meeting room screens
Before starting the setup, the screen must be connected to an active network connection with access to the internet.
Process overview
When setting up an Eptura Room Screen v3 for the first time, you are prompted to configure the language, network, time zone, and NTP server. When a successful network connection is established, the screen checks for and installs any updates. When the configuration and software update are complete, the screen can be activated.
Activate an Eptura Room Screen v3
Unless the screen is already mounted to the wall, the following is best done in front of a computer as you will be interacting with the Device Hub as well as the screen.
Power up the screen the same way it will be powered when in its final position. The Welcome screen displays briefly before the setup process starts.

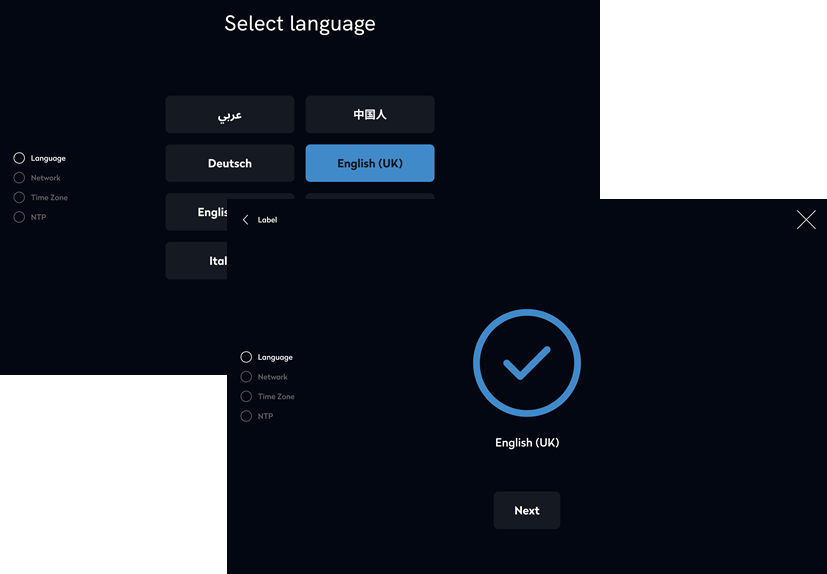
- Language:
When prompted, tap the language to display on the screen then tap Next.
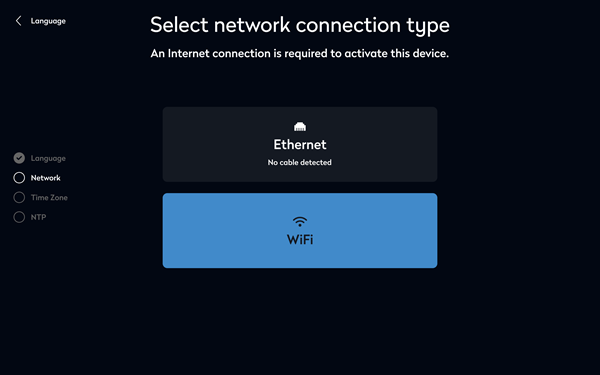
- Network:
Select the network connection type, either Wi-Fi (a) or Ethernet (b).
- Wi-Fi:
Select your Wi-Fi network from the list or tap Add Wi-Fi network manually to connect to a private network.
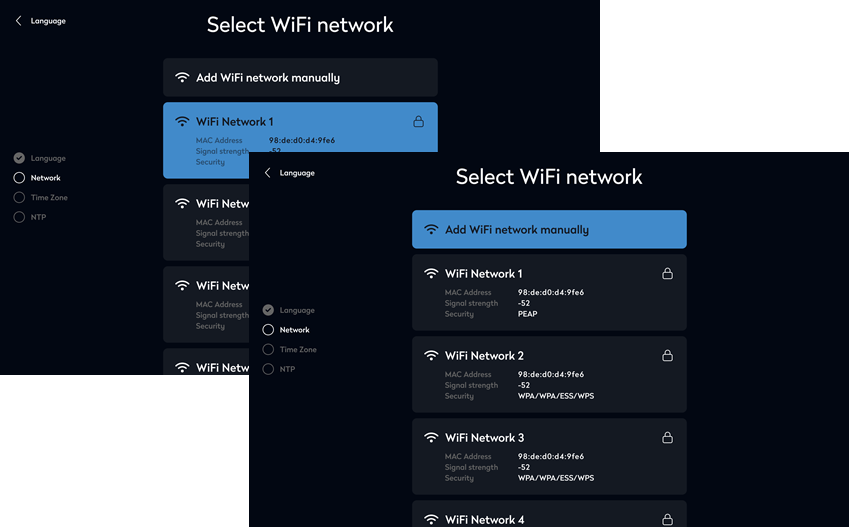
Add Wi-Fi network manually: Enter the name of the private Wi-Fi network and tap Find.
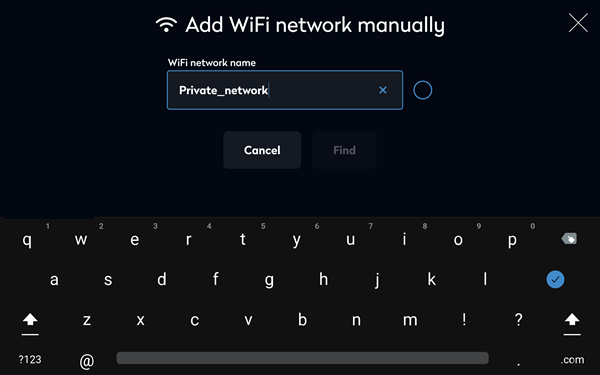
If connecting to a PEAP secured network, enter the username and password, for all other Wi-Fi networks, just enter the password.
To enable a static IP and/or proxy, tap Enable advanced network settings. Learn more about advanced settings
Tap Connect.
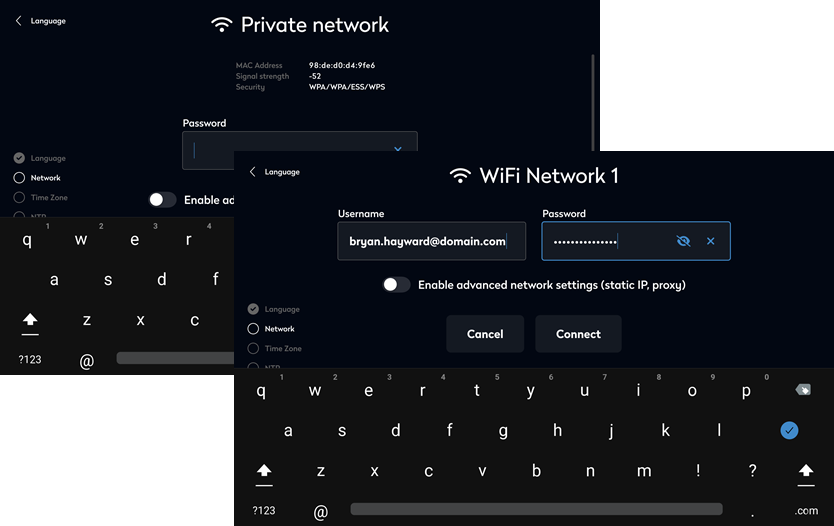
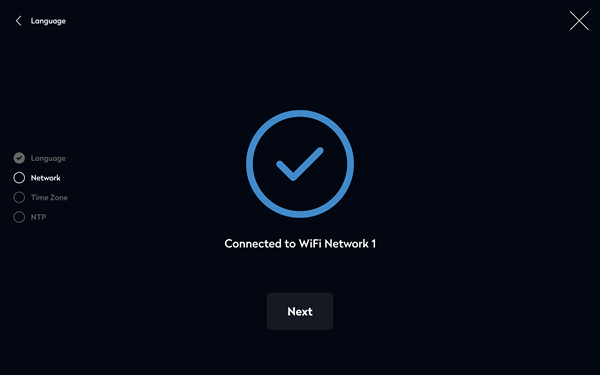
When connected to the Wi-Fi network, tap Next.
- Ethernet:
Tap Ethernet. (The Ethernet option is disabled if no active network connection is detected).

If required, tap the options to enable a static IP and/or proxy. Learn more: Advanced settings
Tap Connect.

When connected to the Ethernet network, tap Next to continue.
- Wi-Fi:
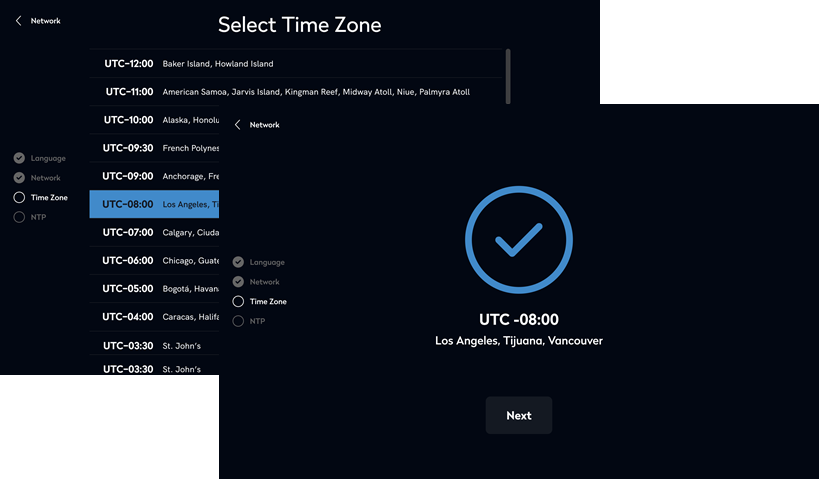
- Time zone:
Select your time zone from the list and when set, tap Next.
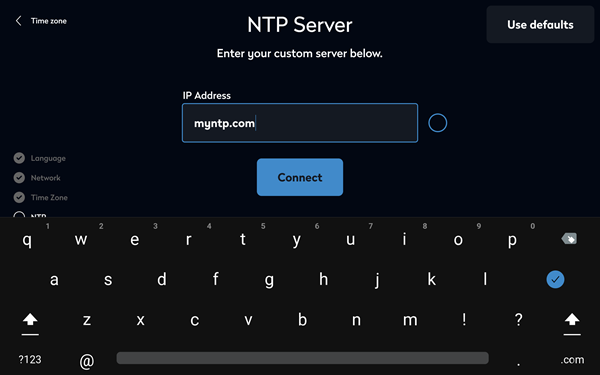
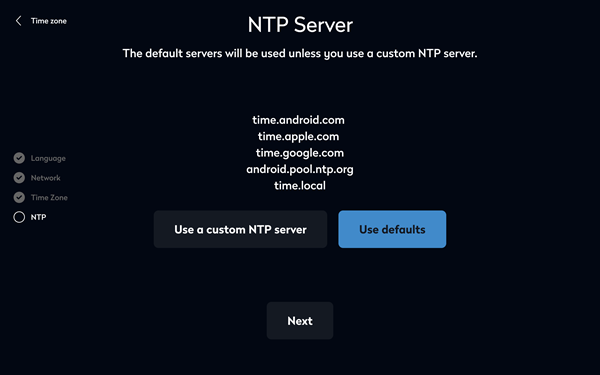
- NTP server:
Choose whether to use a custom NTP server or use the default NTP servers displayed on the screen.
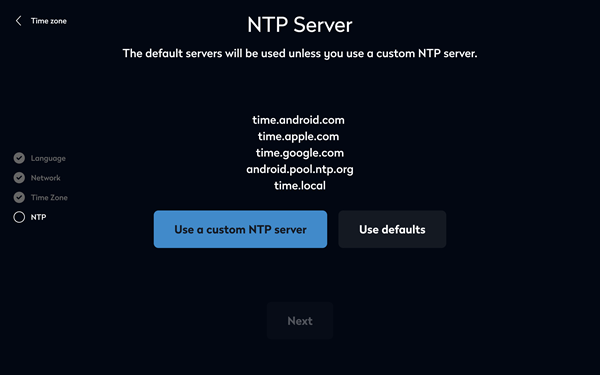
- Custom NTP server: Enter the FQHN (fully qualified host name) or IP address of your NTP server. Tap Connect.
- When connected to the custom or default NTP servers tap Next.
- Custom NTP server: Enter the FQHN (fully qualified host name) or IP address of your NTP server. Tap Connect.
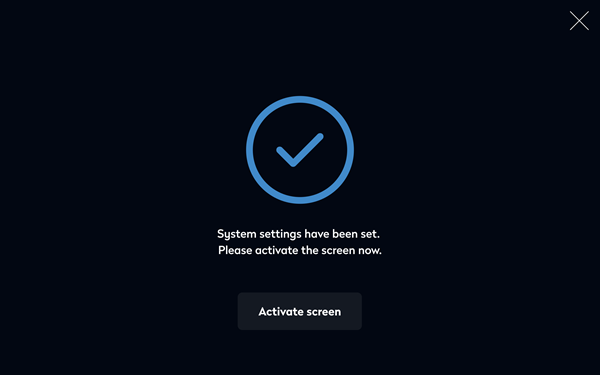
- When the system settings have been set, tap Activate screen.
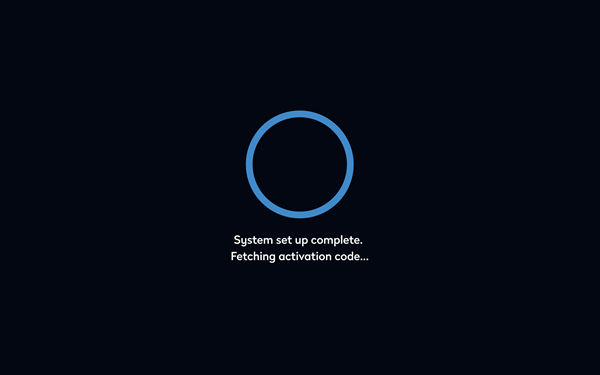
- The screen now retrieves the activation code for the Device Hub.
- The screen displays a QR code and an activation code. (Scanning the QR code with the camera on your mobile device displays the activation code on the device. Additional QR code functionality is coming soon).
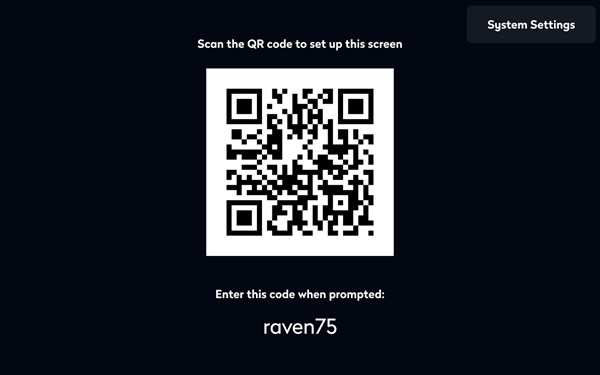
- The code is valid for 5 minutes. If it expires, click Refresh code to generate a new code.
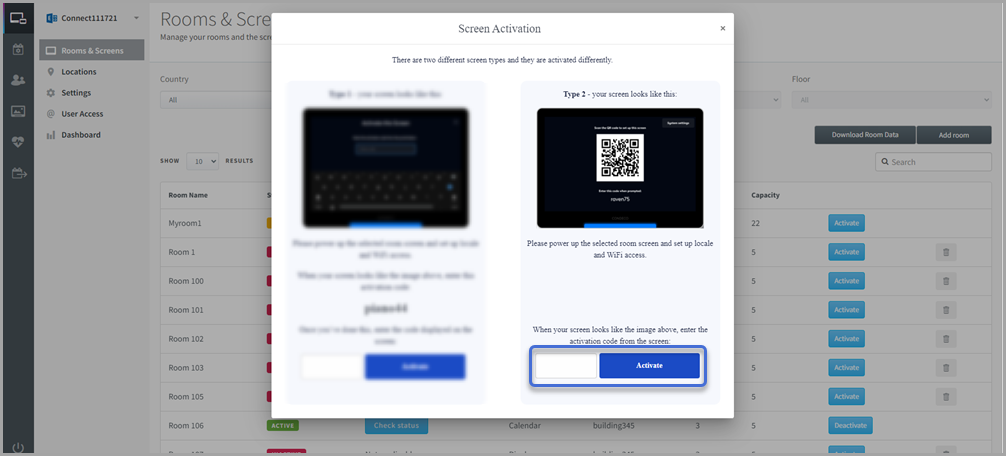
- Now pair the Eptura Room Screen v3 with the room resource in the Eptura Device Hub:
- Sign in to the Eptura Device Hub.
- Navigate to Rooms & Screens from the menu on the left.
- Find the room resource to pair with the room screen and click the light-blue Activate button on the right.

- Enter the activation code from the room screen and click Activate.
- The screen waits for the calendar settings and confirms when successfully activated. Tap OK.
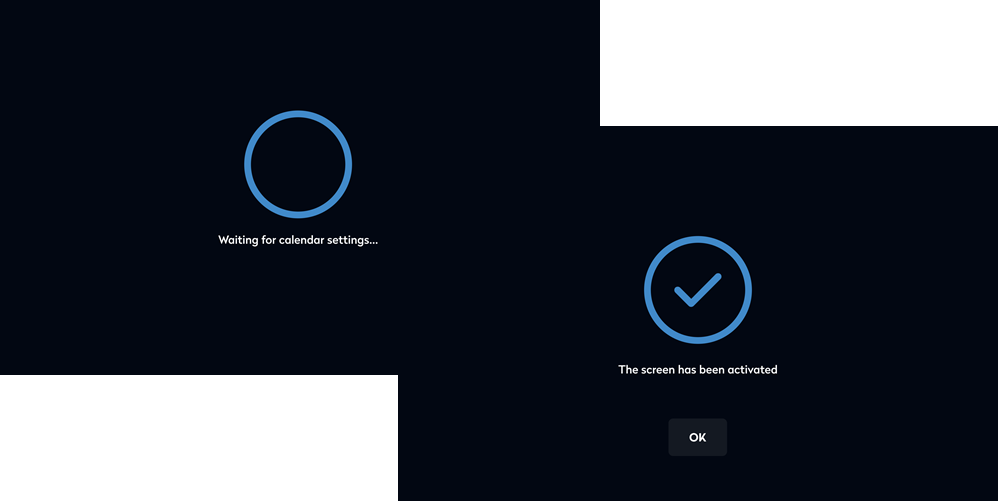
Congratulations! Your Eptura Room Screen v3 for Condeco is now activated and is ready for use.
If not already mounted you can unplug the screen and mount it at the desired location. Learn more: Mounting the meeting room screen