Eptura Flash Utility tool
THE INFORMATION ON THIS PAGE IS FOR INTERNAL USE ONLY
Use the Eptura Flash Utility tool (RKDevTool v2.86) to upgrade your Eptura Room Screens v3 to the latest version of Android and the latest release of Condeco. The Eptura Flash Utility makes it easy to quickly upgrade one screen after another.
Prerequisites
- Eptura Flash Utility: RKDevTool v2.86 (Contact Eptura Support to request access to the downloadable zip file)
- Microsoft Windows drivers: RK Driver Assistant v5.1.1 (Contact Eptura Support to request access to the downloadable zip file).
- Firmware image file. (Contact Eptura Support to request access to the downloadable rar file)
- USB A-A crossover cable.
- Microsoft Windows PC.
Optional: In normal operation, the Eptura Room Screens are powered by PoE, however, for this upgrade process you can power the screen using a standard 12V power cable (not provided). Learn more: Eptura Room Screen technical details
Before you start
Before starting the upgrade process, follow the steps below to download/prepare the compressed files, install the Windows drivers, connect the USB cable, and remove the rear covers from the screens.
Meeting room screens must not be paired with a resource in the Device Hub when upgrading the Android version using the Flash Utility tool.
- If a device is paired with a resource in the Device Hub, sign in to the Device Hub, find the associated resource, and click Deactivate to unpair the device.
- Download and unzip the RK Driver Assistant v5.1.1.
- Install the RK Driver Assistant v5.1.1 on a Microsoft Windows PC.
- Download and unzip the RKDevTool v2.86 files to a folder on the PC and set the required language (either Chinese or English):
- Find and edit the config.ini file.
- On the 4th line of the config.ini file, edit the 'Selected' value as appropriate for the required language: 1=Chinese, 2=English.
- Save the config.ini file.
- Download and unpack the compressed firmware image file to the PC. (Use 7zip or RAR archive tool to unpack the compressed .img file).
- Connect the USB A-A cable to a USB port on the PC.
- Power OFF the Eptura room screen and remove the two screws holding the port cover in place, to access the USB port and the On-The-Go (OTG) button.
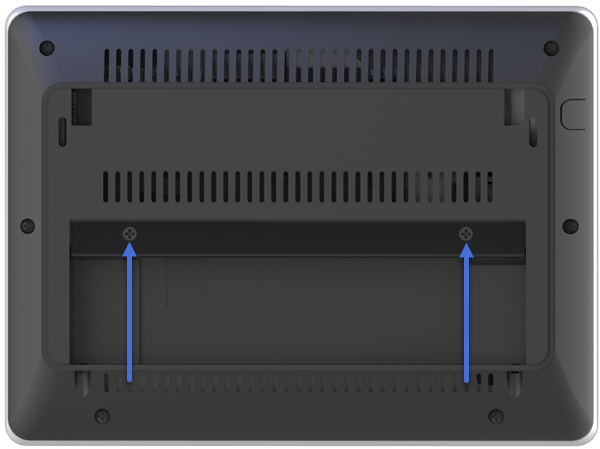
Remove the 2 screws indicated to access the ports
How to use the Eptura Flash Utility to upgrade an Eptura Room Screen v3
Before following these steps, make sure you have prepared the files and screens as described in Before you start.
- Navigate to the folder on your Windows PC that contains the extracted RKDevTools v2.86 files.
- Right-click RKDevTool.exe and click Run as administrator to launch the Eptura Flash Utility (RKDevTool v2.86).
- Check the screen is powered OFF then, on the edge of the circuit board next to the USB connectors, press and hold the OTG button.
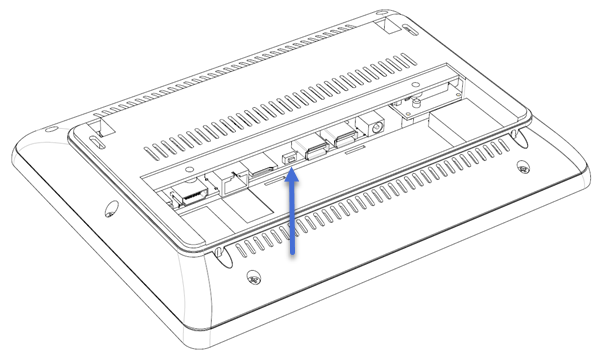
On-The-Go (OTG) button
- While pressing the OTG button, connect the USB A-A cable (connected to the PC) to the USB port on the rear of the screen and power UP the screen.
- Wait for 'Found One LOADER Device' to display at the bottom of the screen and then release the OTG button.
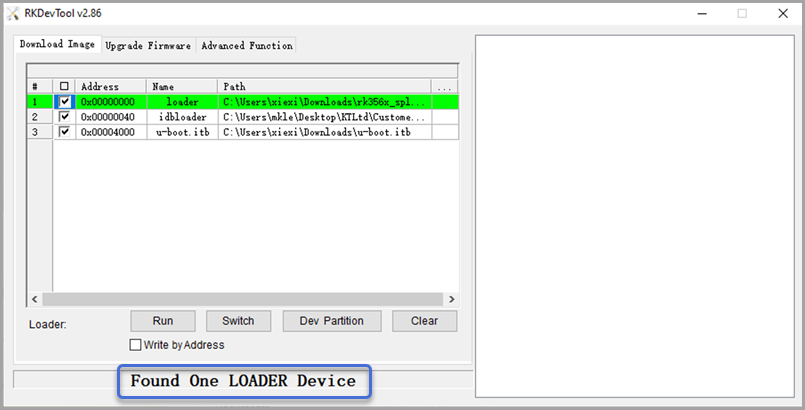
If the device is not found: Check the cables are connected. Check the drivers are installed on the Windows PC. Check the version of the RKDevTool is 2.86 (noted in the title bar of the tool). See also Before you start
-
Click the Upgrade Firmware tab.
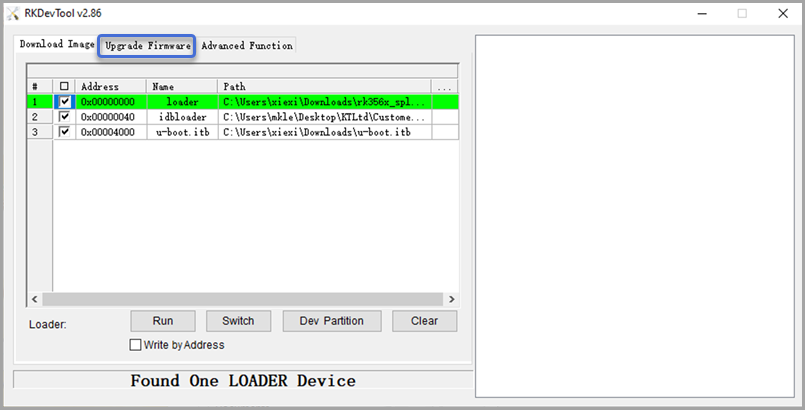
-
Click Firmware.
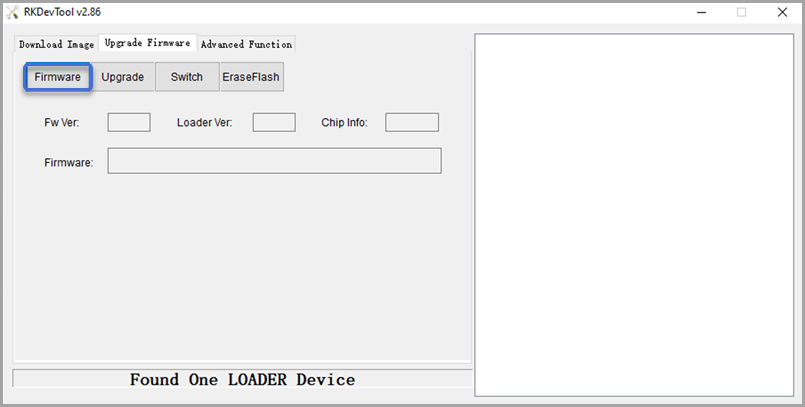
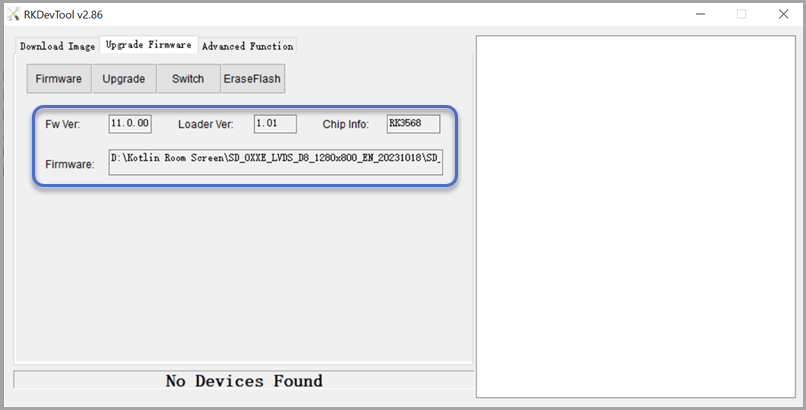
- Navigate to the firmware image (.img file) extracted to your PC and select it.
- Details of the firmware image are displayed.
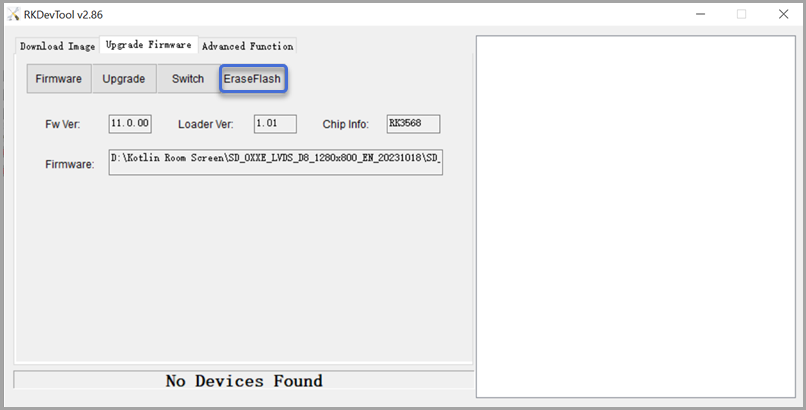
- Click EraseFlash.
- When the Erase Flash process is complete, the Erase Flash Success message is displayed.
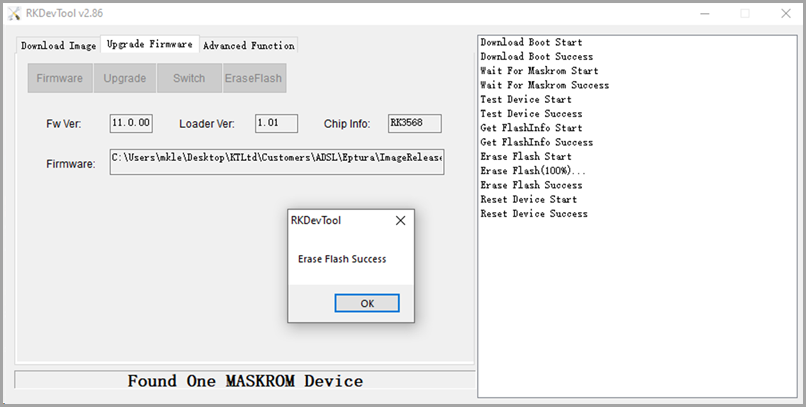
If the Erase Flash process fails, press and hold the OTG button on the circuit board and remove and reseat the power cable. When the RKDevTool displays MASKROM device, release the OTG button and click EraseFlash to retry the process.
- Click Upgrade. The upgrade process can take about 3 minutes to complete.
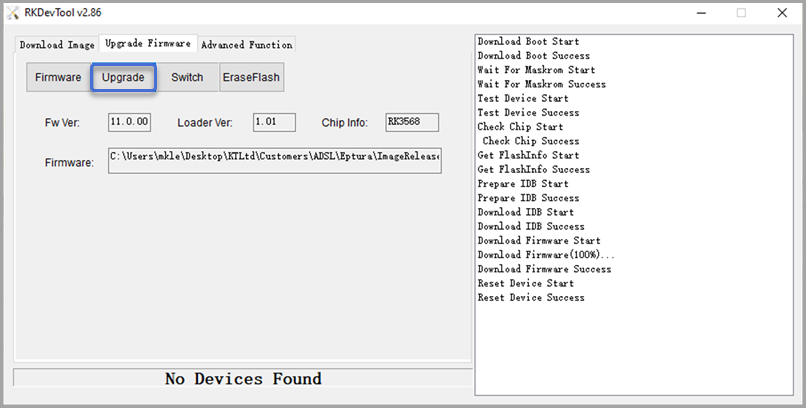
- When the upgrade is complete, the Eptura Room Screen automatically reboots with the new firmware.
