Screen settings and booking rules for meeting room screens
About screen settings profiles
Create screen settings profiles to manage the behavior of screens linked to the profile. You can set the days of the week and time of day the screens are active; when users must authenticate; the time format; supported RFID card types; booking policy; privacy settings; etc.
Max no. screens per profile: A maximum of 1,000 meeting room screens should be added to each screen settings profile to maintain efficient page load times when opening a profile and saving changes. There is no limit to the number of profiles that can be created.
Manage screen settings profiles
- Sign in to the Eptura Device Hub.
- Click the Device Management icon in the left navigation.
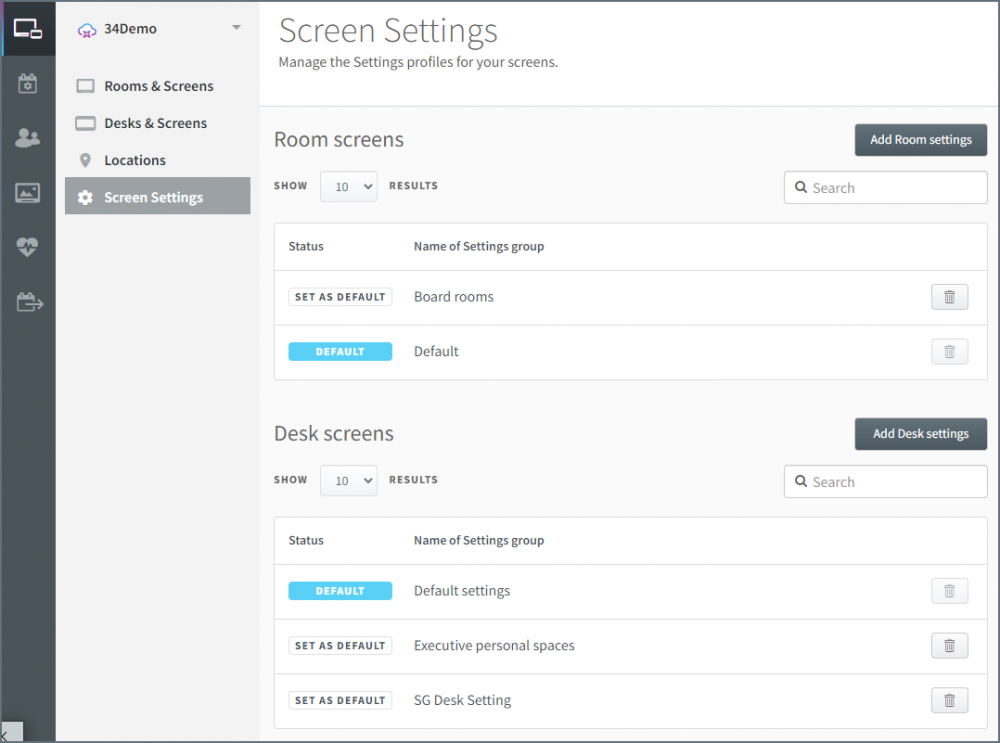
- Click Screen Settings to display the lists of screen settings profiles for desk booking screens and meeting room screens.

Screen Settings Profiles
Room screen profiles are listed first followed by desk screen profiles and the default profiles are highlighted BLUE in the status columns.
Set the default profile
To change the default profile, click Set as default next to the profile you wish to make default.
Delete a profile
Click the bin icon to the right of a profile to delete it.
Search
If you have several settings profiles, you can use the search box at the top of each list to quickly find the profile you wish to edit.
Rename a profile
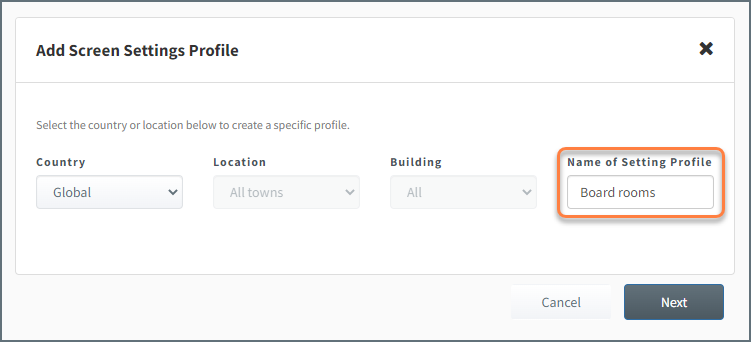
- Click the profile then edit the name in the Name of Setting Profile box.

- Click Next to open the settings page and edit as required.
- Scroll to the bottom of the Screen Settings page and click Save.
Create or edit a screen settings profile for meeting room screens
- Sign in to the Eptura Device Hub.
- Click the Device Management icon in the left navigation.
- Click Screen Settings to display the lists of screen settings profiles for desk booking screens and meeting room screens.
Customize meeting room screen settings and booking rules
Create a new profile: To create a new profile, click Add Room settings from the Screen Settings page. Enter a name for a new settings profile and click Next to open the profile.
Edit existing profile: To edit a profile, click the Name of Settings group from the Screen Settings page and click Next to open the profile.

Settings profile for meeting room screens
Create as many settings profiles as you need. We recommend a maximum of 200 meeting room screens are managed by each profile to maintain efficient page load times when opening a profile and saving changes.
Available options depend on your calendar service.

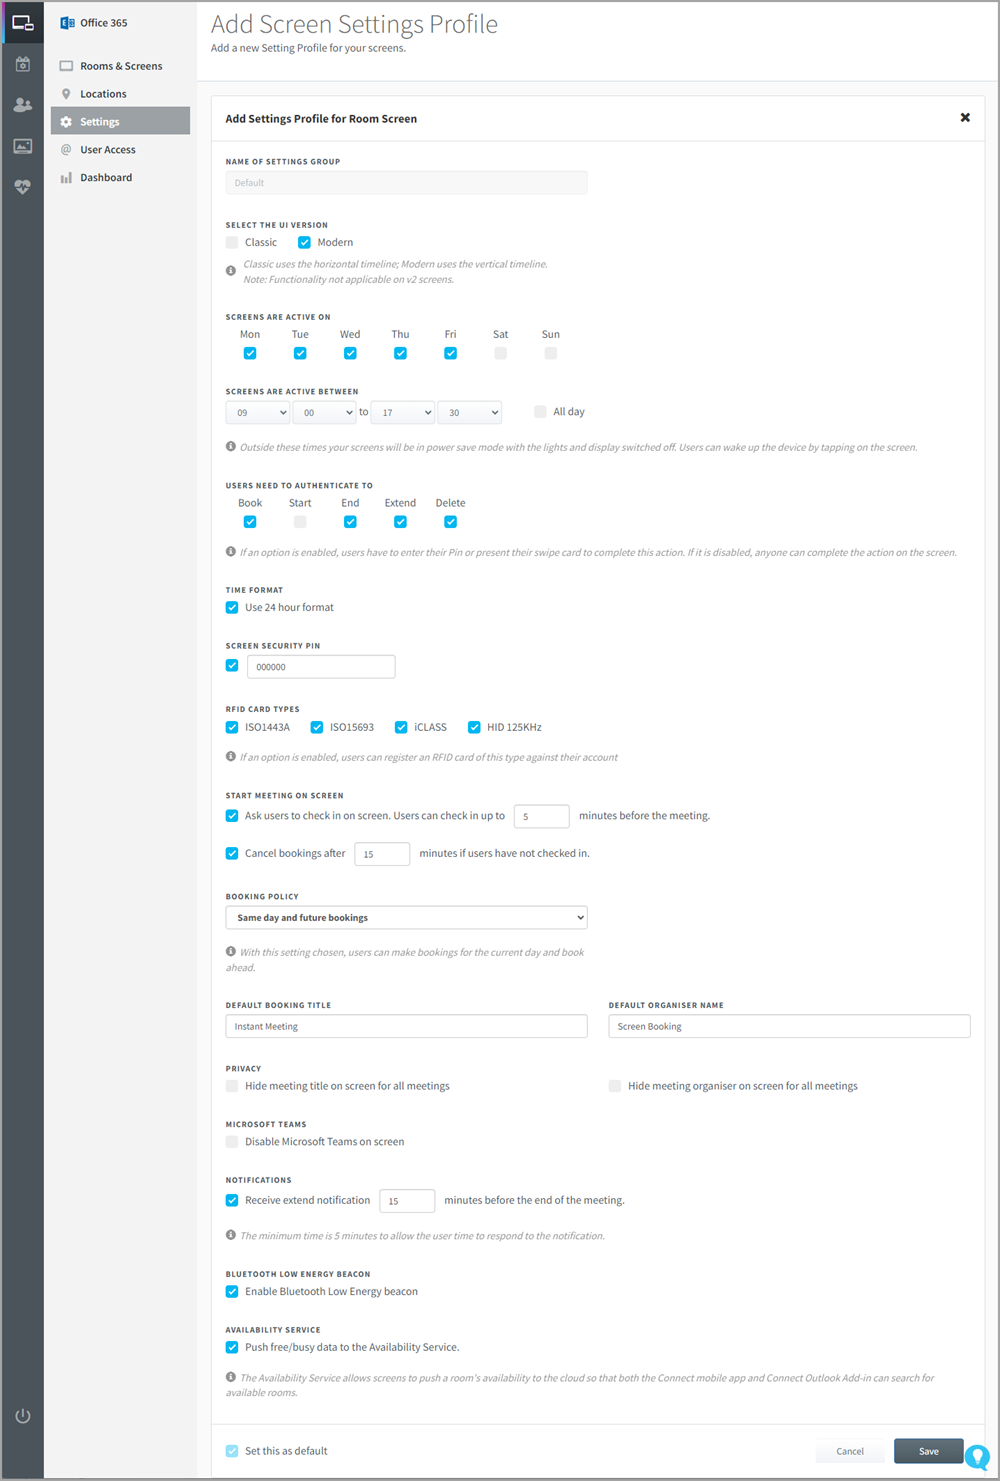
Screen settings profile for meeting room screens.
Select the UI version
For Eptura Room Screens v3 only.
By default, the Eptura Room Screens v3 run the new Modern UI. If you have both v2 and v3 room screens installed, you can set your v3 room screens to run the Classic UI to provide a common interface for your users.

Learn more: Compare Modern and Classic UI
Name of Settings Group
Displays the name of the Screen Settings Profile.
Edit the profile name on the previous page.
Screens are active on
Eptura screens move to power-save mode outside of the business hours defined in the desk and room settings profiles. You can set the active days and times (business hours) in the Device Hub.
Select the days of the week the screens will be active.

Screens are Active Between
Set the time the screens will be active. Outside of these times, the screens are in power-save mode and the lights and display are switched off. Users can wake up the screens by tapping on the display.

If All Day is selected the screens will not check for updates and if the inactive time is too short, updates may not complete.
Users need to Authenticate to
Tick the actions that require a user to authenticate using a PIN or presenting their RFID card. If an action is not enabled anyone can complete the action on the screen.

The following actions can be set to require authentication:
- Book
- Start
- End
- Extend
- Delete
Time format
By default, the 24-hour time format is set. To change the display to AM/PM disable the option.

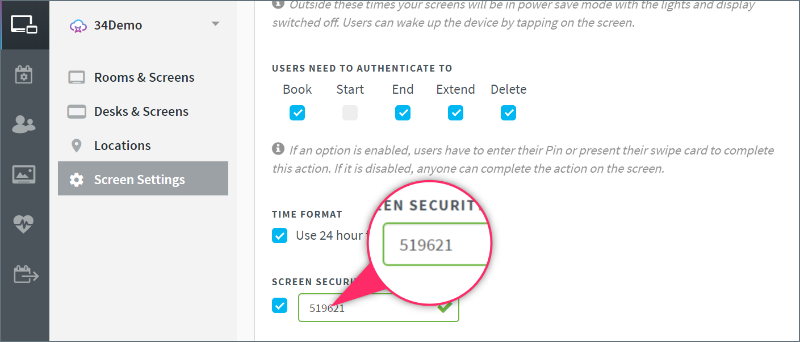
Screen security PIN
Enter a custom PIN for the on-screen setup.
We recommend changing this from the factory default to avoid unwanted tampering with the screen settings.

RFID card types
Select which RFID card types can be registered to use the screen.

The following card types are supported:
- ISO1443A
- ISO15693
- iCLASS
- HID 125KHz
Start meeting on screen
Enable Ask users to check in on-screen to display the CHECK-IN button on the meeting room screen. When enabled, enter the number of minutes in advance of the booking the screen displays the CHECK-IN button (typically 15 minutes).

Eptura Engage Cloud: Automatic cancellation from the screen is not applicable for Eptura Engage Cloud.
Tick Cancel booking after … minutes to allow the screen to automatically cancel bookings if not checked in. When enabled, enter the number of minutes to wait for check-in before canceling (typically 15 mins).
Booking Policy
The screens can be set up in different ways to enable or disable booking directly from the screen.

The following options are available:
- Same day and future bookings: Allows users to make bookings for the current day and to book ahead.
- Same day bookings only: Users can only make bookings for the current day.
- Current time only: Users can only book at the current time.
- No booking on-screen: With this setting selected, the screens are for display only – no bookings can be made on screen. An additional option to hide the time bar is also displayed.
- Hide time bar: When the Hide time bar option under No booking on screen is enabled, no time bar is displayed on the meeting room screen. Only the meeting in progress is displayed.

The hide time bar feature is currently only available for Condeco calendar services.
The Booking Policy settings should mirror the setup of Eptura Engage Cloud.
Default booking title and Default organizer name
Enter the text to display on the screen when making a booking (the default booking title is “Instant Meeting”) and enter a name for the organizer when bookings are made without any authentication (the default organizer name is “Screen Booking”).

Privacy
Choose the privacy settings if required.

The following privacy options for booked meetings can be selected:
- Hide meeting title on the meeting room screen for all meetings.
- Hide meeting organizer on the meeting room screen for all meetings.
Meetings that are marked as private have the title hidden by default.
Microsoft Teams
Only for MS Exchange calendar service using OAuth, and with Microsoft Teams access authorized. Learn about authorization for Microsoft Teams
When a Teams meeting is associated with a booking, a notification is displayed on the meeting room screen prompting the user to start the Teams meeting in the room, when checking in from the screen.

Tick Disable Microsoft Teams on-screen to remove the option to start the Teams meeting from the screen.
On-Screen Registration
Only available for the EMS calendar service.
Tick Disable user registration on-screen to disable the option to register from the meeting room screen. When this option is selected, the ‘Register’ button is not displayed on the screen.
Notifications
Not applicable for Eptura Engage Cloud.
Tick Receive extend notifications to display the ‘Extend’ button on the screen towards the end of a meeting so the meeting can be extended beyond the original end time. Enter the number of minutes before the end of a meeting the button is displayed. The minimum number of minutes allowed is 5.

Bluetooth Low Energy Beacon
Not applicable for Eptura Engage Cloud.
Enable the Bluetooth Low Energy Beacon to allow mobile devices with the Condeco Connect app installed to communicate with the meeting room screen when in close proximity.

Set as Default
Tick to make this profile the default settings profile.
Click Save to update the settings. It typically takes a few seconds for the new settings to be applied to your screens.
