
Meeting room screens
Setting up room screens
This guide is for the following room screens:
- Eptura Room Screen v3
- Eptura (Condeco) Room Screen v2
- Third-party devices running the Eptura Room Screen app
Follow this process to set up your room screens:
- Review the deployment guidelines
- Check and set your domain allowlists.
- Exchange and Google Calendar services only (For Eptura Engage Cloud rooms, skip to step 4):
- Create Screen Setting Profile(s) to customize behaviors.
- Configure rooms to correspond to your meeting room screens:
- Activate your room screens:
See also...
- Eptura room screen v3:
- For administrators: Eptura room screen v3 setup guide
- For users: Eptura room screen v3 user guide
- Eptura room screen app for third-party devices:
- For administrators: Eptura room screen app setup guide
- For users: Eptura room screen app user guide
- Eptura (Condeco) room screen v2:
- For administrators: Eptura (Condeco) Room Screen v2 setup guide
- For users: Eptura (Condeco) Room Screen v2 user guide
View and manage room screens
To view and manage room screens, click Device Management in the icon menu on the left and select Rooms & Screens.

From the Rooms & Screens page, you can filter devices by Country, Location, Building, and Floor, or search for a specific device by entering the room name in the Search box on the right.
Apply new theme and/or settings to:
You can apply a new theme or settings to all active rooms or selected rooms. To select specific room(s), you must first select the Country, Location, and Building where they are located, then click either Selected # activated rooms or All activated rooms as appropriate to open the theme and settings options.

Tick Screen Theme and/or Settings, and select the required theme or settings profile from the drop-down lists. Click Apply to save the changes and update the rooms.
You can only select multiple (active) devices to apply a new theme and/or settings to when a Country, Location, and Building are selected in the filters.
View or edit a room
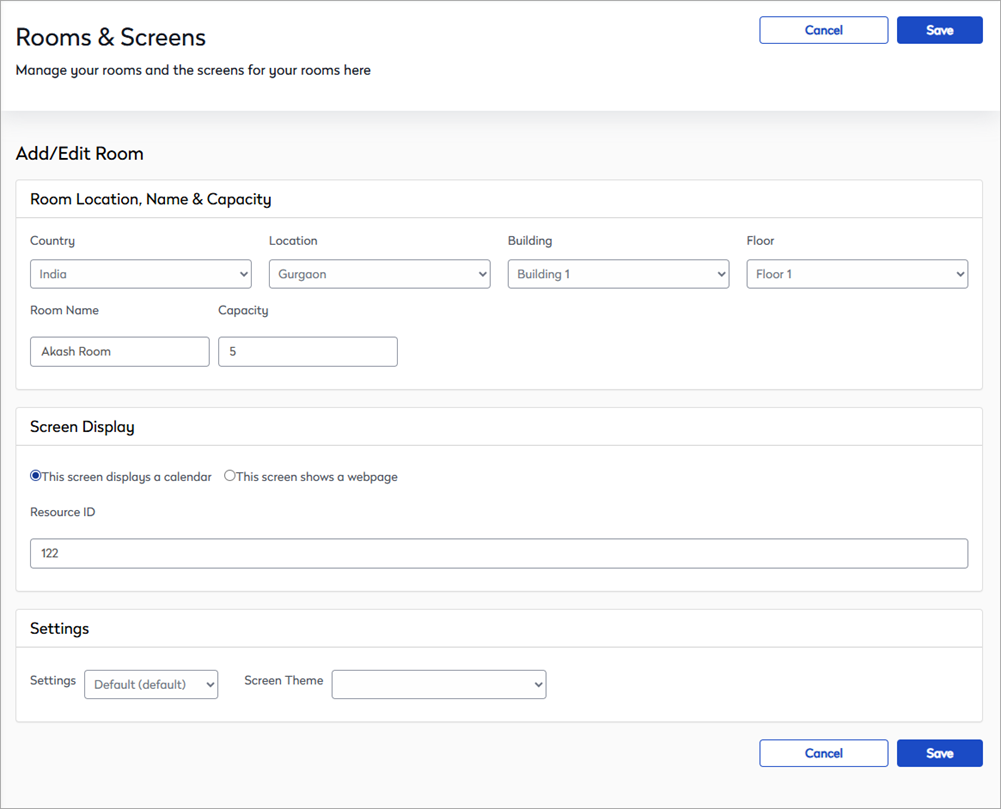
Click a room in the list to view or edit a room. From here, you can edit the room name, set the capacity, and choose whether the screen displays a calendar or a webpage.
Non-platform services customers can also change the Settings profile and/or Screen Theme for the room when editing a room. (When platform services are enabled, the Settings and Screen Theme can only be changed from the main Rooms & Screen page).
Activate a room
To activate a room, follow the steps for your device type:
- Activate Eptura (Condeco) Room Screens v2
- Activate Eptura Room Screens v3
- Activate Third-party device running the Eptura Room Screen app
Download room data
The entire room list can be downloaded as a CSV file.
- Click the Download Room Data button above the list on the right.
- A message is displayed to confirm the download request has been received "We've received your download request. We will send you an email once your file is ready".
- The email arrives from 'no-reply' with the subject "Your Exported Room Data is Available" and contains a link to download the report. The download link is valid for 24 hours.

- Click the Download button to download the report to your default download folder.
- The report is a comma-separated variable (CSV) file format with the name - RoomReport_[date and ref number].csv
-
The report contains the following fields as columns:
- Name
- RoomStatus
- Mailbox
- Location
- ScreenThemeName
- ScreenThemeAccessLevel
- ScreenSettingsName
- ScreenSettingAccessLevel
- Capacity
- Type
If numeric-only resource names convert to date format
We recommend including letters or other non-numeric characters in resource names. Numeric-only names can be automatically converted to dates when room data is exported to CSV. For example, use Room 1-23 instead of 1-23.
If your resource names convert to a date (or other format) when the CSV is opened in Excel, you can convert the values to a Text format as explained below.
The following steps assume an understanding of Microsoft Excel and might differ depending on the version of Excel in use.
- Open Microsoft Excel.
- Go to Data > From Text/CSV.

- Select the downloaded Room or Desk Report CSV file and click Transform Data.

- The Power Query Editor opens with the Room or Desk Report CSV displayed.
- Select the Name column, then click the data type icon (ABC/123 or calendar icon) in the column header and select Text.

- If a Changed Type step already exists in the Applied Steps pane on the right, delete it.
- Click Close & Load.
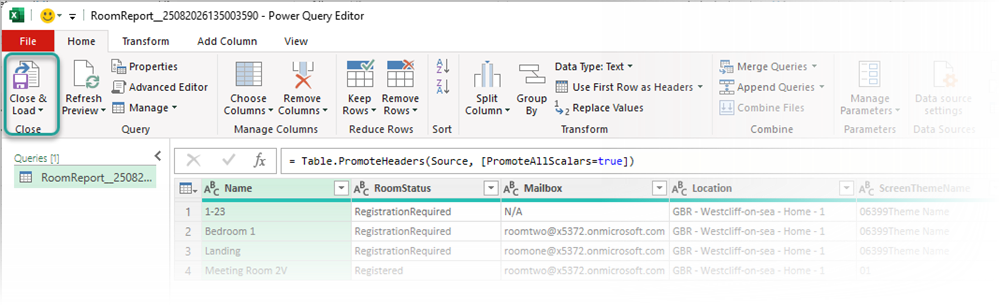
The name values are now saved in text format and show the applied room resource names in the Microsoft Excel workbook.