Okta SSO configuration
Configure Okta SSO for Eptura Engage
Required: Admin permissions to your Okta organization’s account.
- Sign in to Okta with your admin account and open the Okta admin interface.
- Select Applications from the Applications menu on the left then click Create App Integration.
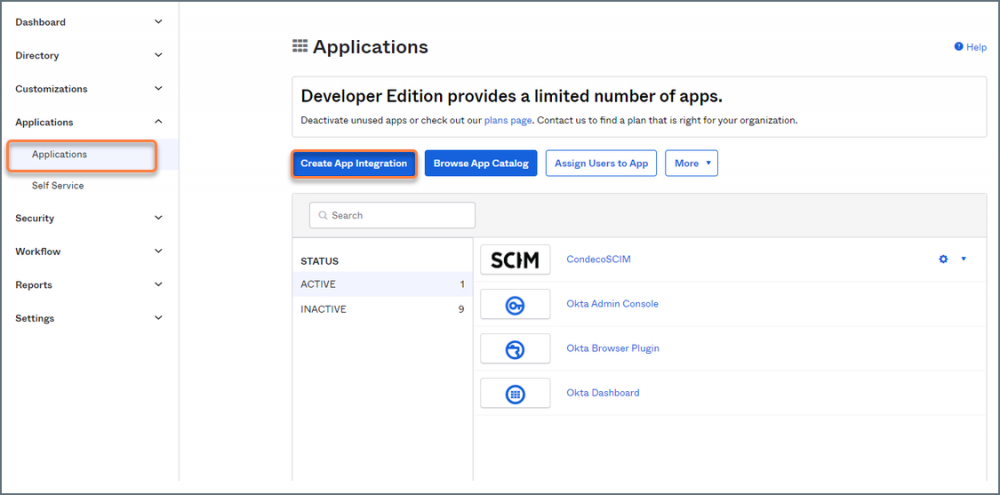
Okta admin portal
- Select SAML 2.0 on the Create a new app integration pop-up and click Next.
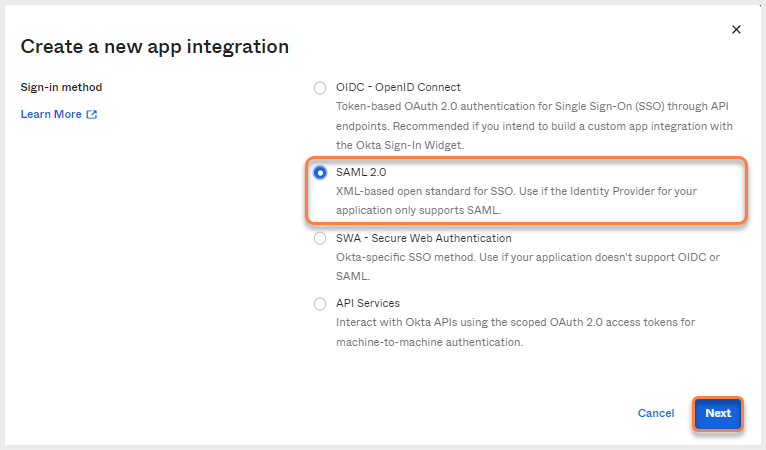
Create a new app integration - SAML 2.0
The SAML Integration page is displayed.
- Enter a name for your app in 1. General Settings and click Next.
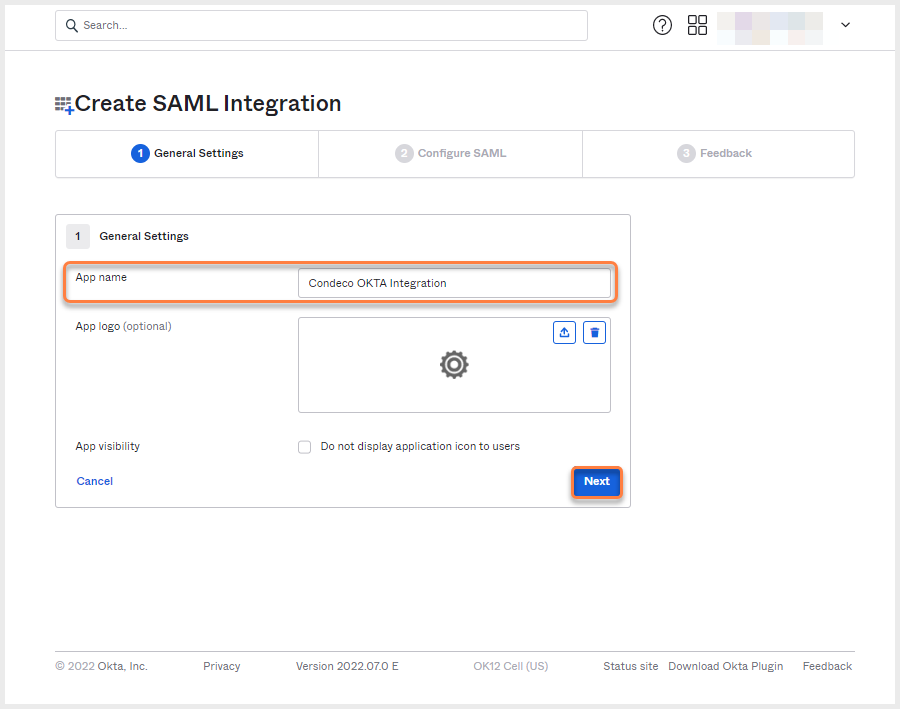
SAML integration - General Settings
- In 2. Configure SAML, complete the fields as follows:
- Single sign-on URL: Enter
https://sso.condecosoftware.com/sp/ACS.saml2(or other value provided to you by Eptura Engage) and tick Use this for Recipient URL and Destination URL. - Audience URI (SP Entity ID): Enter
PING-CONDECO(or other value provided to you by Eptura Engage). - Default RelayState: Enter your Eptura Engage URL e.g.
[yourcompany].condecosoftware.com - Name ID format: Click the drop-down and select Transient.
- Application username: Click the drop-down and select Okta Username (or other value as defined by your organization policy).
- Update application username on: Click the drop-down and select Create and update.
- Single sign-on URL: Enter
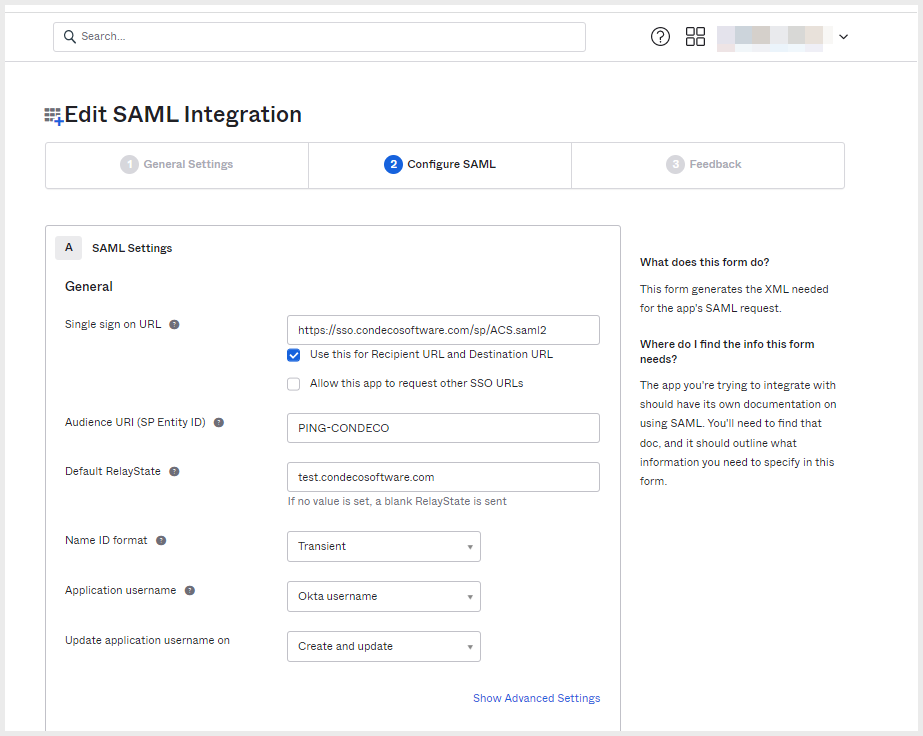
SAML integration - Configure SAML
- Click Show Advanced Settings and check the settings are as follows:
- Response: Signed.
- Assertion Signature: Signed.
- Digest Algorithm: RSA-SHA256.
- Assertion Encrytion: Unencrypted.
- Enable Single Logout: Not checked.
- Assertion Inline Hook: None (disabled).
- Authentication context class: PasswordProtectedTransport.
- Honor Force Authentication: Yes.
- SAML Issuer ID: http://www.okta.com/${org.externalKey}
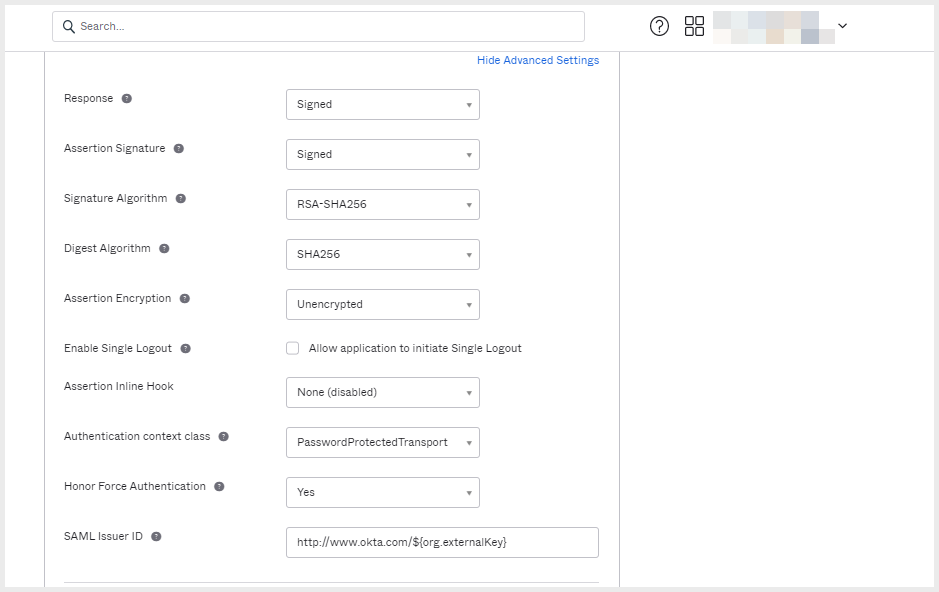
SAML integration - Advanced settings
- No further changes to this section are required. Scroll down the page and click Next at the bottom.
- In 3. Feedback click Finish. Your new application is displayed.
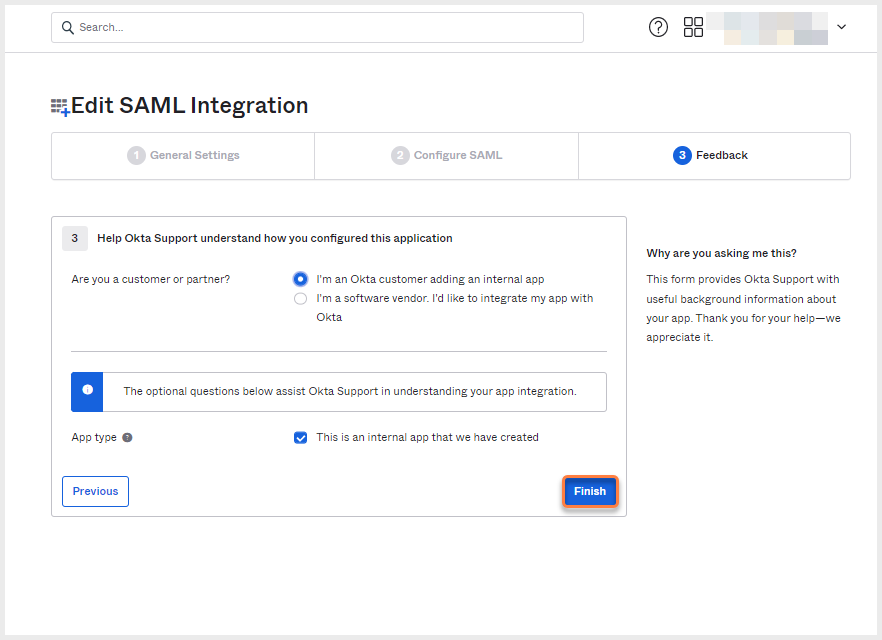
SAML integration - Feedback
- In the application you just created, click the Sign On tab and scroll down to SAML Signing Certificates.
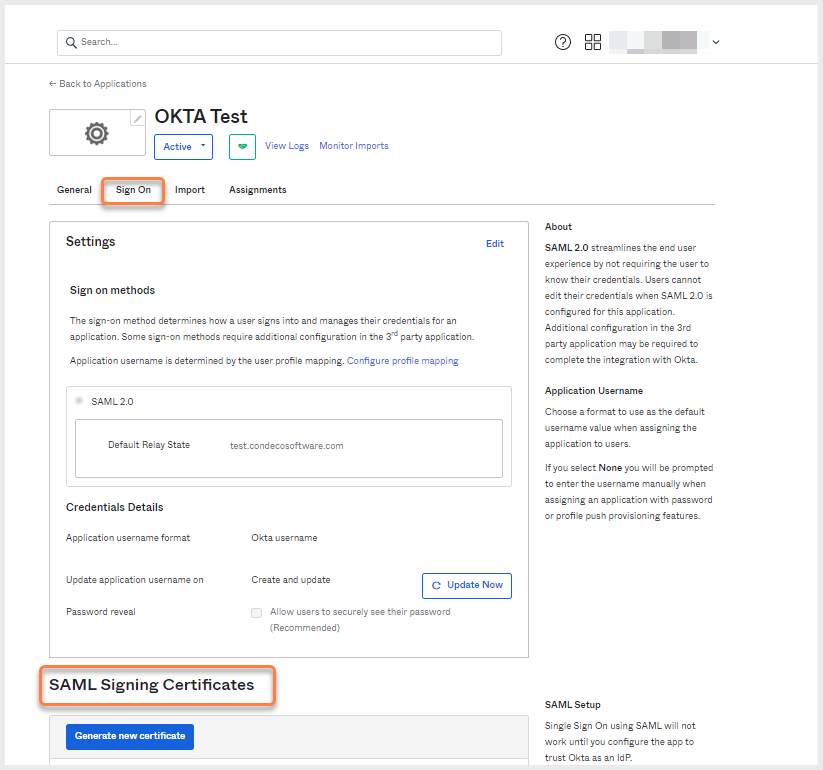
SAML signing certificates are on the application's Sign-in tab
- Under SAML Signing Certificates click the Actions drop-down and select View IdP metadata.
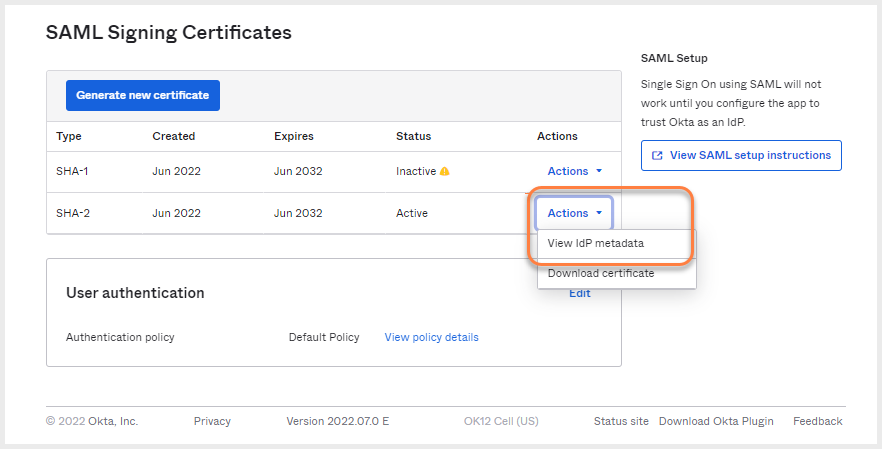
SAML signing certificates
- The metadata opens in a new tab. Right-click the tab and select Save As to save the metadata XML file.
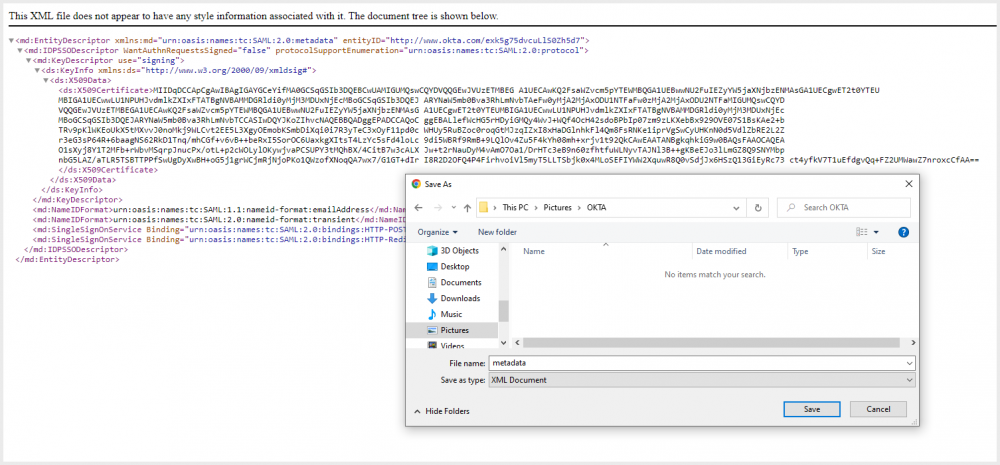
Save the metadata XML file
- Now send the Metadata XML to Eptura Engage:
- Existing customers: Create a support ticket in the customer support portal https://support.condecosoftware.com/ and either attach the XML file in a secure zip file or request another secure way to send the data – via secured email or shared drive, for example.
- New Eptura Engage installations: Your Eptura Engage project manager or technical consultant will advise how to securely send the XML file.
