Floor plans
|
Eptura platform services If your organization is using Eptura's platform services, your locations, workspace types, resources, and users are centrally managed from Eptura Home:
Other settings are also affected, such as floor plans, zones, advanced setup, and global settings. Learn more
|
Good to know
- The floor plan images must be in either JPEG or PNG format.
- The recommended maximum resolution is 1080×1920px.
- For best performance, the file must not exceed 2 MB.
- The file name must not contain any special characters or spaces.
Watch the video
Audio: Sound Video Length: 2:35 minutes
Watch the video in ...
French (FR)
German (DE)
Simplified Chinese (ZH)
Disclaimer: These videos are translated from English using an AI tool; you might notice the speech is slightly out of sync with the recording.
How to upload and configure floor plans
|
Eptura platform services Uploading a floor plan is disabled if your organization has enabled Eptura platform services and a floor plan has been published via the platform services AutoCAD integration. Learn more
|
Upload floor plan images for each floor at a location. For each floor, there is a 'main' floor plan and additional floor plans for groups of 'all-day' personal spaces:
- Main floor plan: Your resources for meeting spaces, hourly personal spaces, and delivery points, are all positioned directly on the main floor plan, along with a box representing a group managing 'all-day' personal space resources.
- Group floor plans: For all-day personal spaces, the Groups managing the resources are placed on the main floor plan in the general area where the resources are located, and a second floor plan image is uploaded for each group. This allows an image of a magnified section of the floor to be uploaded, making it easier to position 'all-day' personal space resources on the floor plan and find the desired space when making a booking.
Upload and configure floor plans
- Navigate to Application Setup > Floor Plans.
- Select the Country, Location, and Floor for the floor plan you are uploading.
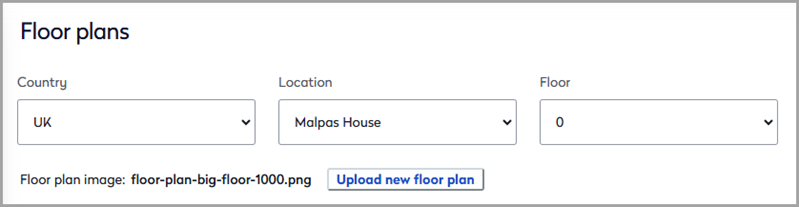
- Click Upload new floor plan to upload the main floor plan. Select the PNG or JPEG floor plan image from your computer and click Open. Any existing floor plan is replaced with the uploaded image.
- The floor plan image is displayed (replacing any existing image). Resources assigned to the location and floor, and groups managing 'all-day' personal space resources assigned to the location and floor, are initially displayed under Unpositioned items on the left.

Only resources located on the floor are available to add to the floor plan. If you can't see your groups, check if they have been added to the location in Location Admin.
- Position resources and groups on the floor plan:
- Meeting spaces; Hourly personal spaces; Delivery points: To position meeting spaces, 'hourly' personal spaces, and delivery points on the floor plan, drag each resource onto the floor plan and place them at their location. Green squares represent meeting spaces; green circles represent 'hourly' personal spaces, and larger gray circles represent delivery points.
- Groups for 'All-day' personal spaces: Drag a group box onto the floor plan and place it in the general area where the resources managed by the group are located.

- To position your personal spaces, click Edit group floor plan in the group box.

- Select Upload image for.. Web then click Upload new floor plan.
- Select the PNG or JPEG floor plan image to upload from your computer and click Open.
- To position your personal spaces, click Edit group floor plan in the group box.
This is the floor plan displayed when users search for personal spaces. You can upload the same floor plan used above or upload an image of a specific section of the floor.
- Drag the unpositioned 'all-day' personal space resources (green circles) and place them at their locations on the floor plan.

Changes to the floor plan are saved automatically