Email templates for meeting spaces
The name and email address that notifications are sent from are configured in Advanced > Global Setup > Email
How to edit the email notifications for meeting space bookings
- Navigate to Application Setup > Groups.
- Select the Country and Group and select Meeting spaces for the Resource Type.
- Select Email templates from the Select an action drop-down to open the Email template page.
- Email template: Select the template to edit from the drop-down. The templates are described in the table below.
Template |
Behavior |
Description |
|---|---|---|
|
Booking confirmation |
Sends confirmation and details of booking. |
|
|
Meeting invitation |
Sends meeting invitation email. |
|
|
General notification |
Sends a notification with details of services confirmed for a booking. |
|
|
Notification of cancellation |
Sends notification of a canceled booking. |
|
|
Change of booking |
Sends notification of an amended booking. |
|
|
Visitor Arrival |
Notification that a visitor has arrived. |
|
|
Booking rejection |
Sends a declined notification. |
|
|
Booking request |
Sends a received notification. |
|
|
Booking notifications |
Automatic email reminder of a forthcoming booking. |
|
|
Vendor notification – amendment |
Sends a notification when a service has been amended. |
|
|
Vendor notification – cancellation |
Sends a notification when a service has been canceled. |
|
|
VC Vendor – notification |
Sends a notification when a VC service has been requested with a booking. |
|
|
VC Vendor – amendment |
Sends a notification when a VC service has been amended. |
|
|
VC Vendor – deletion |
Sends a notification when a VC service has been canceled. |
|
- Default fields: The default fields drop-down list contains tags that can be used in the TO, CC, or BCC fields, as well as the Subject and Message fields.
- Attach ICS File: Tick to send an ICS (Internet Calendar Scheduling) file with the email notification. (Not applicable to the Visitor Arrival template).
- Add ICS reminder: When 'Attach ICS File' is enabled, you can also add an ICS reminder event to the user's calendar. Select from the drop-down list the amount of time before the start of the booking to send the reminder. Options are: No reminder; 15 or 30 minutes; 1, 2, 24, or 48 hours. (Not applicable to the Notification of Cancellation or Visitor Arrival templates).
Automate event creation for users
To automate the calendar event creation/action on receipt of an ICS attachment, navigate to Advanced setup > Global setup > Email and set the ICS with Attachment option to FALSE. If this option is TRUE the ICS attachments must be opened and actioned manually to add or cancel events in the calendar.
Benefits of enabling ICS
-
An ICS file is automatically added to the user's calendar (Outlook, Google Calendar, Apple Calendar, etc.), ensuring they don’t forget the event.
-
ICS events seamlessly synchronize across all linked devices (phone, tablet, laptop).
-
Users receive reminders via pop-ups on their PCs and push notifications on mobile devices.
-
No need to search through email threads - the ICS stores all relevant details within the calendar entry itself.
-
Eptura Engage can dynamically update ICS events when changes occur.
ICS (or iCalendar/iCal) is a standardized way to share calendar information, such as events, to-dos, and journal entries, over the internet.
We do not recommend enabling ICS files if the Eptura Engage Outlook Com+ plug-in is in use. However, no such limitation applies with the Eptura Engage Outlook add-in. Learn more about Eptura Engage and Microsoft Outlook.
- Disable email: Tick to disable this email notification.
- To, CC, and BCC fields: Use the default fields to select the email recipient. See below for more information about recipient fields.
- Click the Default fields drop-down and select the required tag from the list.
- Place your cursor in the To, CC, or BCC field and click INSERT FIELD.
- Subject: Edit the subject field to suit your requirements. HTML code can be applied to the subject and default fields can be included.
- Click the Default fields drop-down and select the required tag from the list. See below for more information about email tags.
- Place your cursor in the Subject field and click INSERT FIELD.
- Message: Edit the email message to suit your requirements. HTML code can be applied to the message and default fields can be included.
- Click the Default fields drop-down and select the required tag from the list. See below for more information about email tags.
- Place your cursor in the Message field and click INSERT FIELD.
- Applies: Choose whether to apply the email template to this group only, to all groups in the country, or globally across all countries, locations, and groups.
- Click Save when done.
Recipient fields
The following recipients can be set in the To, CC, or BCC fields.
Recipient |
Default field |
Description |
|---|---|---|
| Booked by | <booking:bookedby:emailaddress> |
The user logged onto Eptura Engage making the booking. |
| Requestor | <booking:requestor:email> |
The booking requestor. |
| Host | <booking:host:email> |
The meeting host. |
| Attendees | <booking:attendees:email> |
All attendees are added to the Attendees tab on the booking form. |
| Vendor contact | <resource:contact:emailaddress> |
The Vendor contact. |
Email tags
Global Administrators can view a full list of email tags in Advanced setup > Tag headings.
Add a link to cancel a booking
Add the <booking:OneClickDelete:Link> field to notification emails to include a 'Click here to cancel booking' one-click link for the user to delete a booking directly from the email.
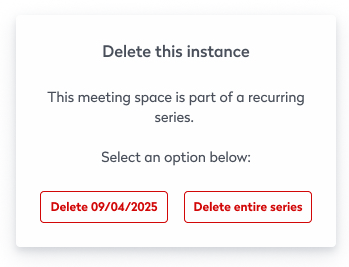
When the link is clicked from the email, a confirmation message is displayed in the default web browser. When the user confirms, the booking is canceled. For recurring bookings, the user has the option to delete the specific instance or the entire series.