Meeting space booking form
About the booking form
The booking form opens when a space has been booked following a search. Alternatively, the booking form can be opened by clicking the edit icon next to the booking on the Your bookings page, or by clicking the booking from either of the booking grids.
The available fields depend on your organization’s configuration.
Before switching tabs, you must enter a title for the meeting and complete the mandatory fields marked with an asterisk ( * )
The top section of the booking form
- Untitled Booking (A): Enter a meeting title. This field initially displays 'Untitled Booking'.
- Edit (B): Click Edit to amend the date/time and also create/amend recurrences and click Update Booking to save. If your chosen space is not available in a recurring series, alternative spaces are offered. Includes spaces for both meetings and conferences across multiple locations.
You must enter a meeting title before you can edit a booking.
- Private (C): Tick Private to hide the meeting title from other users on the booking grids and on the Eptura Engage meeting room screens.
- Workspaces and Connections (D): See Workspaces and Connections
- Summary (E): See Booking summary
- Tabs on the booking form (F): Click the tabs to navigate the booking form. Learn about the options on each tab below.
- Open all sections (G): Click Open all sections to change how you view the booking form. Toggle between a tabbed view and a one-page view.
You must enter a meeting title before you can toggle the view.
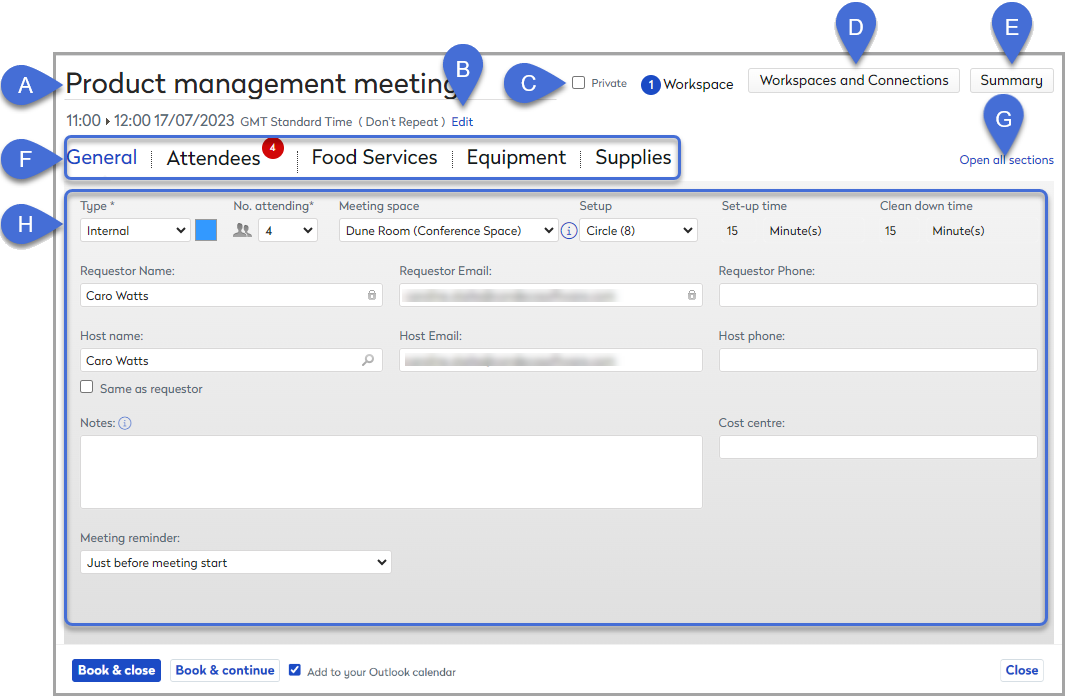
General tab (H)
Enter details for the booking on the General tab. Mandatory fields are indicated by a black asterisk (*) after the field name.
- Type: Choose a meeting type from the drop-down list. Usually, the options are 'internal' and 'external' but they might differ depending on your organization’s setup.
- No. attending: Enter the number of attendees. Note you may need to enter their contact details on the Attendees tab.
- Meeting space: The name of the booked meeting space is shown. Click the blue ‘ i ‘ symbol to view an overview of the space and an image of the meeting space and its location highlighted on a floor plan (if available). Note that floor plans for meeting spaces are not interactive. Browse the tabs to find out more about the meeting space and the provided services.
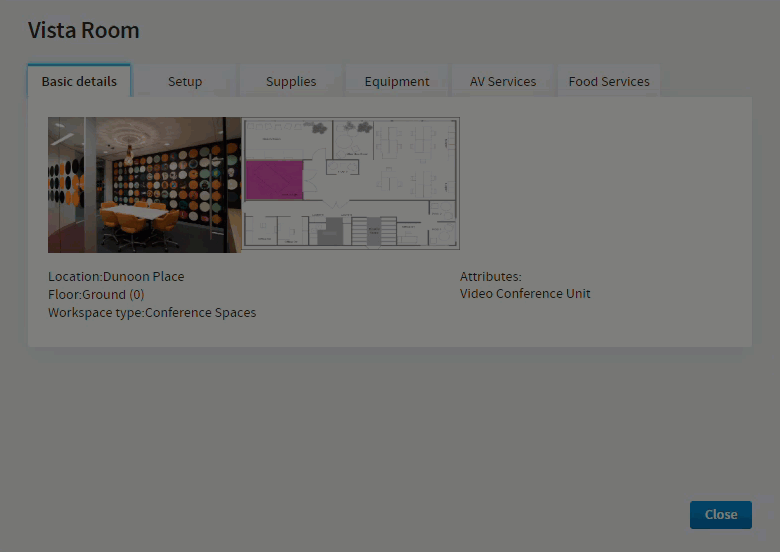 Click 'i' next to the meeting space name on the booking form to open the information popup window |
The tabs and other information in the popup window may vary depending on your organization's configuration and the meeting space settings:
Report Issue button: Report a problem with the meeting space. Learn more: Report an issue with a meeting space |
- Setup: Shows the default seating layout for the space and you can choose a different seating style for the space if required. The maximum number of attendees for a seating style is indicated in brackets.
- Setup time / clean-down time: The time required for setting up a space prior to a meeting and/or cleaning down after a meeting.
- Requestor Name: By default, the name of the user creating the booking is the requestor. To edit, delete the name and start typing the required name until the user appears. Click the user to select.
- Requestor email and phone: The email and phone fields automatically populate from the Requestor Name. Edit if required.
- Host Name: If the meeting host is different from the requestor, start entering the name here. When the required name appears, click to select. If the host is the same as the requestor, tick Same as requestor.
The meeting host is automatically set as in the workplace (unless they have manually set themselves as working remotely or not working on that day).
✨ Intelligent booking: If Intelligent booking is enabled, Eptura Engage automatically books a personal space when your status is set to be in the workplace. Learn more: Intelligent booking for personal spaces
- Host email and phone: Email and phone fields are propagated automatically but it is possible to edit both fields.
- Notes: Enter any notes for the meeting. Notes are visible to anyone with access to the meeting. The following characters are not allowed and will be removed <, >, ¬, +, |
- Cost center: Enter the cost center if required.
- Meeting reminder: Select the amount of time before the meeting you would like the reminder notification sent.
- Admin support required?
Attendees tab
Click the Attendees tab to enter the attendee details for the meeting. The number of rows displayed matches the number of attendees set on the General tab. To add more rows, click Add another attendee.

Attendees tab
- Type: Click the drop-down list to set the if the attendee is Internal or a visitor from outside your organization (External).
- External visitors: Select External for visitors who are from outside your organization. When you have typed the last name of the attendee a popup will invite you to add the attendee as a new contact (Create new entry.) When saved, the contact will appear when you start to type their name in future bookings.
- Internal attendees: Use Internal for attendees inside your organization. Start typing their name into the First and/or Last name field to select a name from your organization’s directory.
- Email on arrival: If checked the Requestor/Host is sent an email when the visitor has arrived.
- Directions email: Send an email with directions to the attendee.
- Visitor notes: Click Notes to add information about the visitor for the reception staff.
Food Services / Equipment / AV / Supplies tabs
The remaining tab(s) on the booking form depend on your organization’s configuration and the options available for the meeting space. The layout and process for each tab are the same. The example we are using in this guide is the Food Services tab.
Click the Food Services (or Equipment / AV / Services) tab to select services for the meeting.
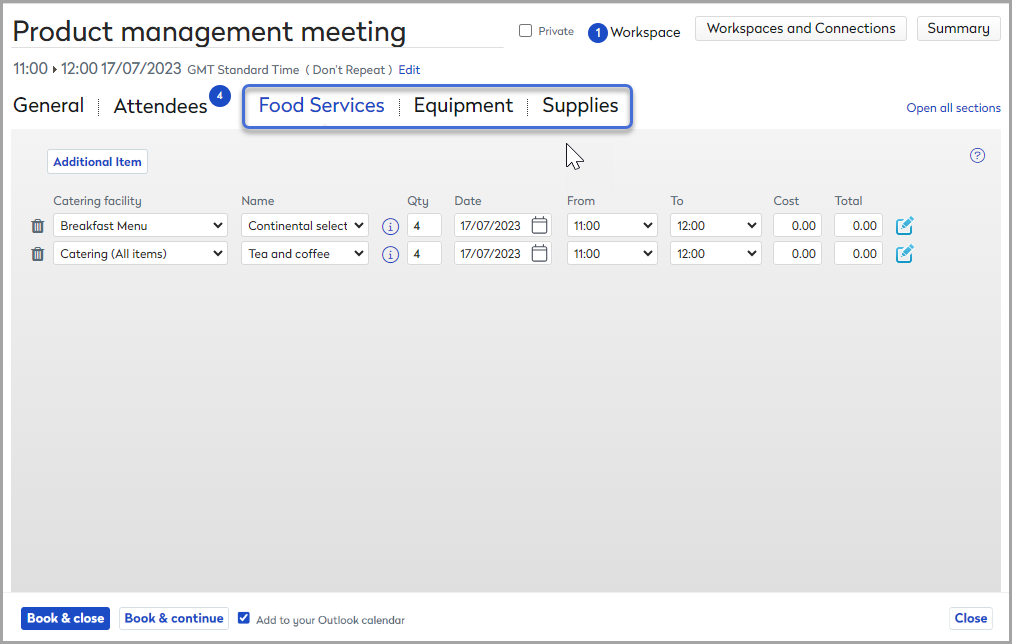
- Name: Click to select an individual item. Click the ‘ i ‘ to view more information about the item, such as the notification time required, cost per unit, and a minimum or maximum number that can be ordered.
- Qty: Enter the quantity required. The number of attendees is entered by default.
- Date / From / To: Select the times you would like the item delivered to the meeting space and then collected. By default, these are the start and end times of the booking.
- Cost / Total: If the item is chargeable, the per item and total costs are displayed.
- Note: Click the pencil icon to leave a note for the service provider.
Workspaces and Connections (conferencing)
Book multiple meeting spaces from different locations on the Workspaces and Connections tab.
Workspaces
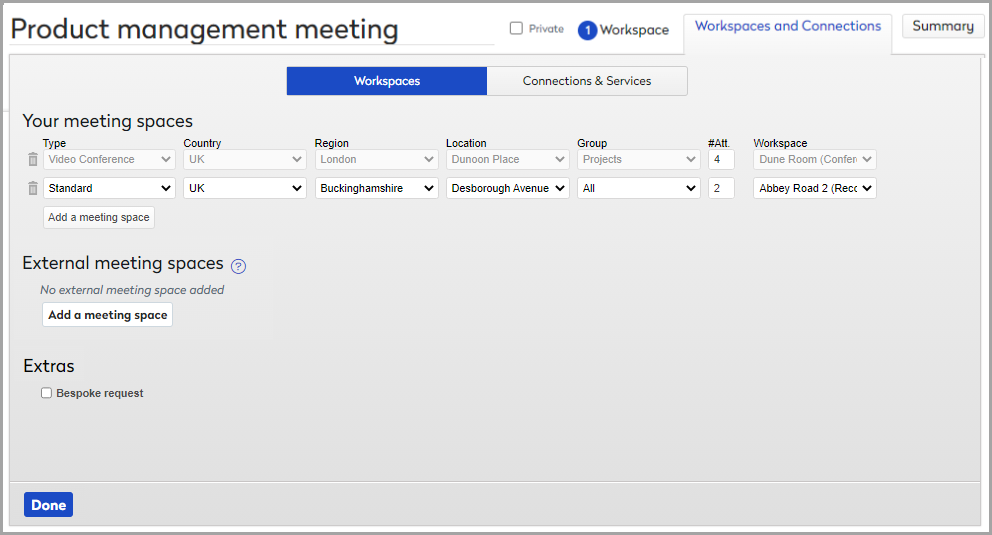
Workspaces page of the Workspaces and Connections tab
The existing meeting space is listed first and cannot be edited. You must return to the booking form if you wish to change this selection.
Add additional meeting spaces to a booking
To add a meeting space, click Add a meeting space to add a new row. Click Type to set the meeting space as VC enabled or Standard. Select the required Location and Group and add the number of attendees for the location you are adding. Press Enter on the keyboard (or wait a few moments for the Workspace drop-down to appear) and select a meeting space.
External meeting spaces
If enabled, the External meeting spaces option allows an approved external video endpoint to be added to the booking. These meeting spaces are made available by your local video administrator.
Adding an external meeting space does not create a confirmed booking, it only notifies the vendor.
Connections & Services
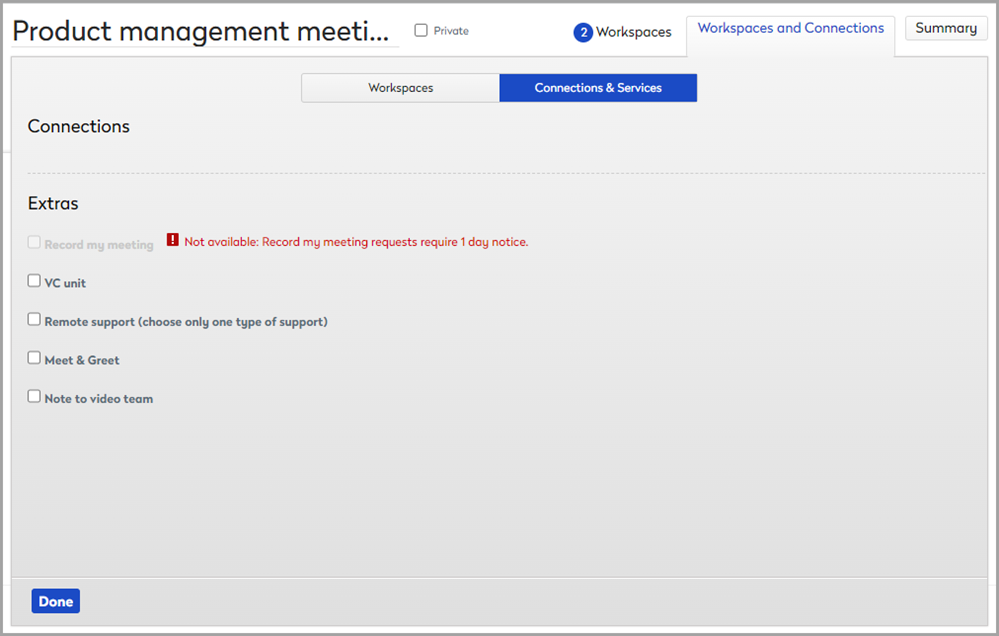
Connections and Services page of the Workspaces and Connections tab
Request extra services from the Connections and Service section of the Workspaces and Connections tab.
Options depend on your organization's configuration.
Multiple meeting spaces booked
When a booking spans multiple meeting spaces, each space is displayed on its own tab. Click a tab to display the options for the space.

Booking summary
The booking summary displays the booking details in a printer-friendly format. Click Summary from the top-right of the booking form to open the page.
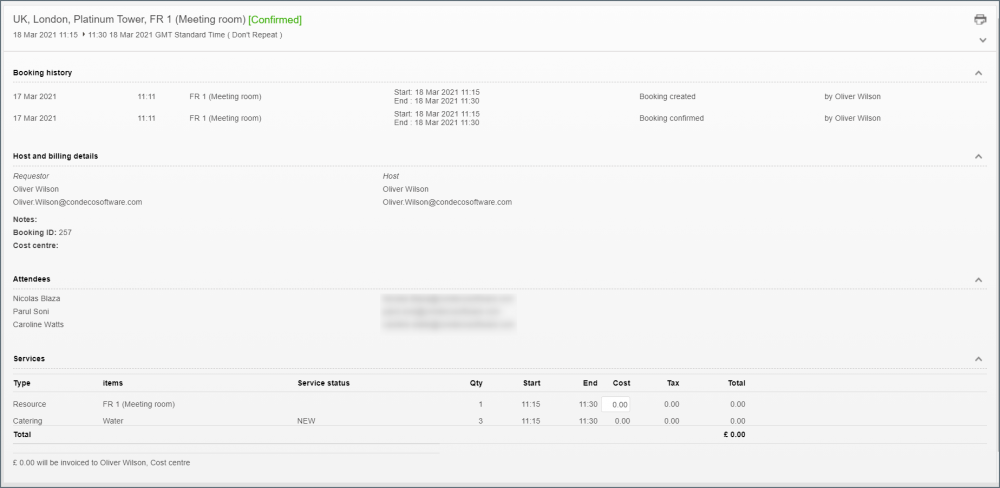
The booking summary includes the booking history and the status of any booked services. The service status is automatically updated as the vendor (facilities/reception/catering team) carries the task(s) through to completion.
Click Done to return to the booking form or Print Summary to print the summary.
Completing the booking
Microsoft 365 integrations only: Tick or untick Add to your Outlook calendar as required (your selection cannot be changed for this booking later). Learn more: Synchronizing bookings with Microsoft Outlook
Synchronizing bookings with your Microsoft calendar is available with our Microsoft 365 integration. Learn more: Eptura Engage for Microsoft Outlook
To secure the meeting space before completing the entire form, click Book & Continue. The space is booked and you can continue adding attendees, services, etc. to your booking.
Alternatively, click Book & Close to book the meeting space and close the booking form.
A pop-up message asks if you want to send email notifications to your attendees about the booking.
Start or end a meeting space booking
If you create a new booking that starts imminently, you can start the meeting immediately from the booking form. This is useful if your organization has a rule in place where meetings must be started within 15 minutes of the start time, or else they are automatically canceled.
When a meeting space is selected and the mandatory fields are completed on the booking form, click Book & Continue then click Start meeting
When the booking has been started, a red End meeting button replaces the green Start meeting button on the booking form.