Getting started
Prerequisites
Eptura Engage can integrate with Outlook using an Outlook plug-in that does not require any integration with Microsoft Exchange and connects to Eptura Engage via HTTPS. The Condeco Outlook Com+ plug-in is based on the add-in Express technology.
Desktop requirements
- Microsoft Outlook for Windows 2016 and above (excludes the new Outlook for Windows*).
- .NET Framework v2.0 for the installation package
- .NET Framework v4.0 for the add-in
- Latest version of MSXML
- Access to Eptura Engage via port 443
The Condeco Outlook Com+ plug-in only works with Microsoft Outlook for Windows.
*New Outlook for Windows: The Condeco Outlook Com+ plug-in is not supported by Microsoft's new Outlook for Windows which does not provide support for Com+ add-ins. Read more: https://support.microsoft.com/en-us/...b-ba7822bc7627
Install the Eptura Engage Outlook Com+ plug-in
The Eptura Engage Outlook Com+ plug-in is installed by an administrator through Group Policy, or manually using an MSI package.
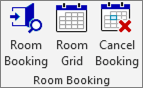
You can see if it is installed by opening Outlook and creating a new Appointment. If installed, you will see a Room Booking section on the Appointment ribbon with three buttons, Room Booking, Room Grid, and Cancel Booking.
If these buttons are not visible, contact your Eptura or IT administrator.
Configure and sign-in
The Eptura Engage Outlook Com+ plug-in is pre-configured by your administrator depending on your business requirements and your authentication type. If you are unsure which authentication type you are using, follow the instructions for Forms authentication and check Step 2 for the login settings.
To log in using Forms authentication
- From the main Outlook window (not within a new appointment), click File > Options > Add-ins and click Add-in Options…
- At the bottom of the popup, you should see Login Settings where you can put your username and password.
Note: if you do not see Login Settings, then you are using SSO authentication. - Enter your username and password and click Save. Check that your credentials are confirmed.
- Click OK to close the window.
- Open a New Appointment from the aOutlook calendar. Ensure that the date and time of the appointment are in the future and that it is not an ‘all day’ appointment.
- Click Room Booking from the toolbar.
- If you have not logged in previously, you will be taken to your organization's SSO login page.
- Enter your credentials and continue.
- If you have authenticated successfully, you should now see the Find a room page in your appointment window.
To log in using Single Sign-On (SSO) authentication
- Open a New Appointment from your Outlook calendar. _Ensure that the date and time of the appointment are in the future and that it is not an ‘all day’ appointment.
- Click Room Booking from the toolbar.
- If you have not logged in previously, you will be taken to your organization's SSO login page.
- Enter your credentials and continue.
- If you have authenticated successfully, you should now see the Find a room page in your appointment window.