Network settings
Eptura Room Screen v3 for Condeco - Setup Guide
Contents
The room screens can connect to your network using both Wi-Fi and Ethernet at the same time, and will automatically switch over to Wi-Fi if the Ethernet connection is lost. The Wi-Fi SSID for the device is displayed in the Eptura Device Hub. Learn more: Device Health
Ethernet connection
Connect a room screen to a LAN via a shielded Ethernet cable, and set a static IP and/or proxy server if required.
Connect to a LAN
- Connect an active shielded Ethernet cable to the RJ45 network port at the rear of the room screen.
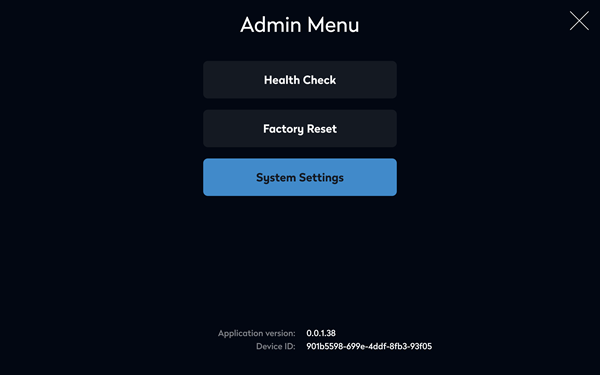
- To open the Admin menu, hold your finger on the top right of the screen until you are prompted for the screen security PIN. Enter the PIN to continue.
- From the Admin menu tap System Settings.
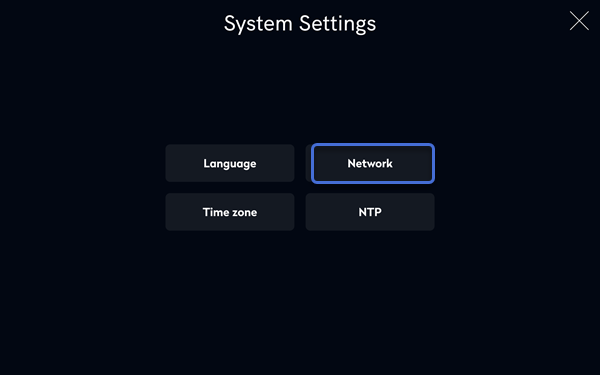
- Tap Network from the system settings menu.
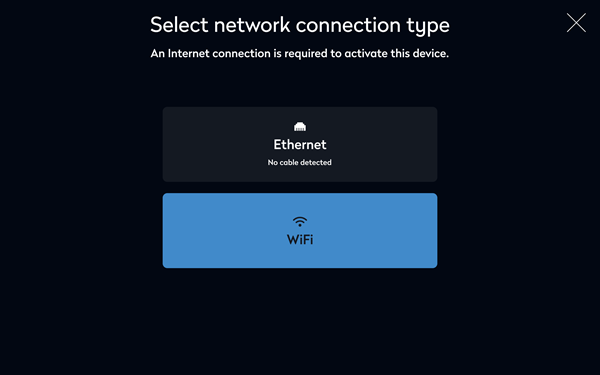
- Tap Ethernet. (The Ethernet option is disabled if no active network connection is detected).

- If required, tap the options to enable a static IP and/or proxy. Learn more: Advanced settings
Tap Connect. 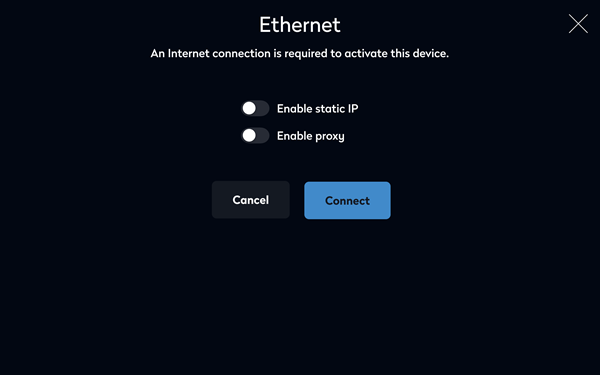
Not supported: Proxy is not supported with Google and EMS calendar services.
Wi-Fi connection
Connect a room screen to a Wi-Fi network, and set a static IP and/or proxy server if required.
Connect to a Wi-Fi network
- To open the Admin menu, hold your finger on the top right of the screen until you are prompted for the screen security PIN. Enter the PIN to continue.
- From the Admin menu tap System Settings.
- Tap Network from the system settings menu.
- Tap Wi-Fi.
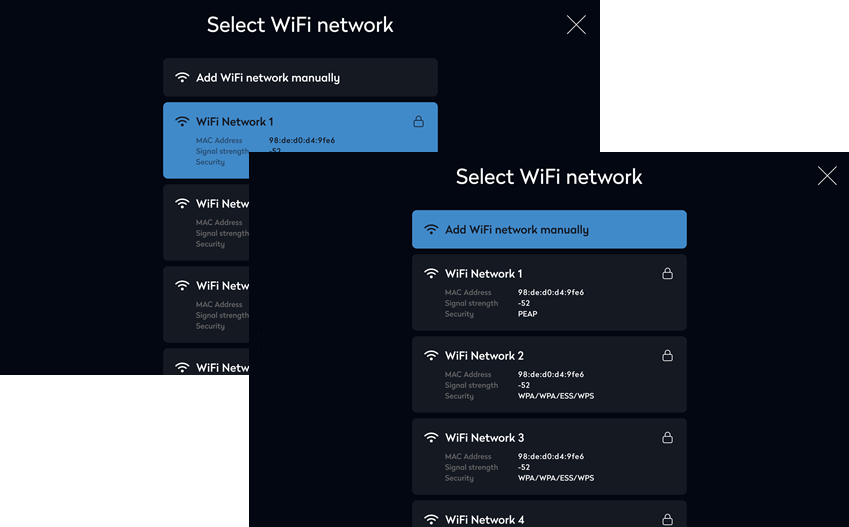
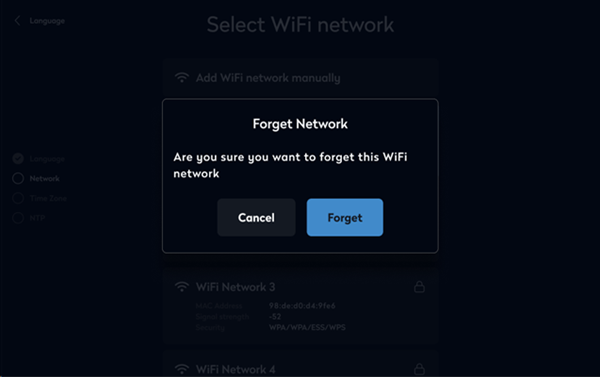
- Select your Wi-Fi network from the list or tap Add Wi-Fi network manually to connect to a private network. (To forget a Wi-Fi network, tap and hold the network and tap Forget).
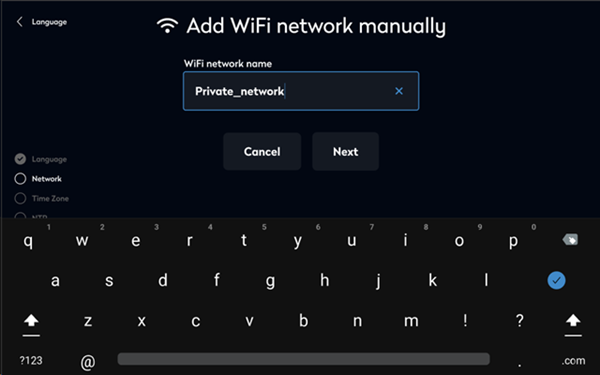
If connecting to a private network, tap Add Wi-Fi network manually and enter the name of the private Wi-Fi network. Tap Next.
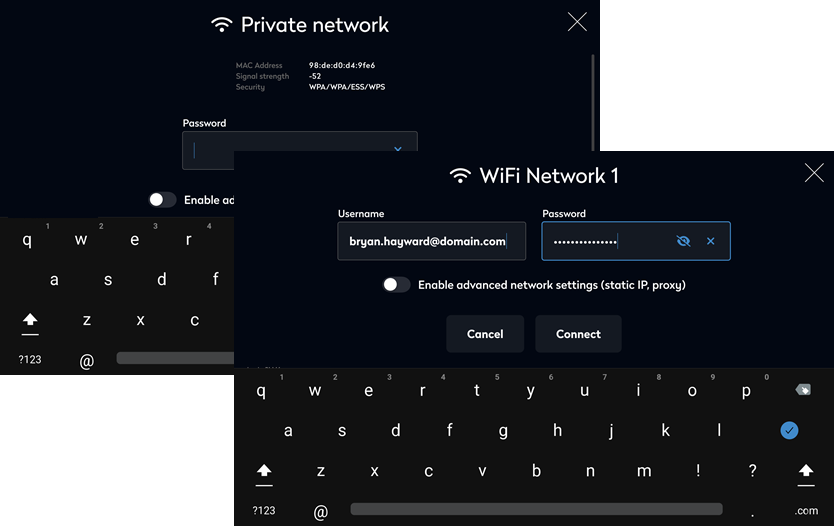
If connecting to a PEAP secured network, enter the username and password, for all other Wi-Fi networks, just enter the password.
To enable a static IP and/or proxy, tap Enable advanced network settings. Learn more: Advanced settings
Tap Connect.
Forget network
To forget a Wi-Fi network, follow steps 1-5 above to view your Wi-Fi networks, tap and hold the network to remove, and tap Forget.
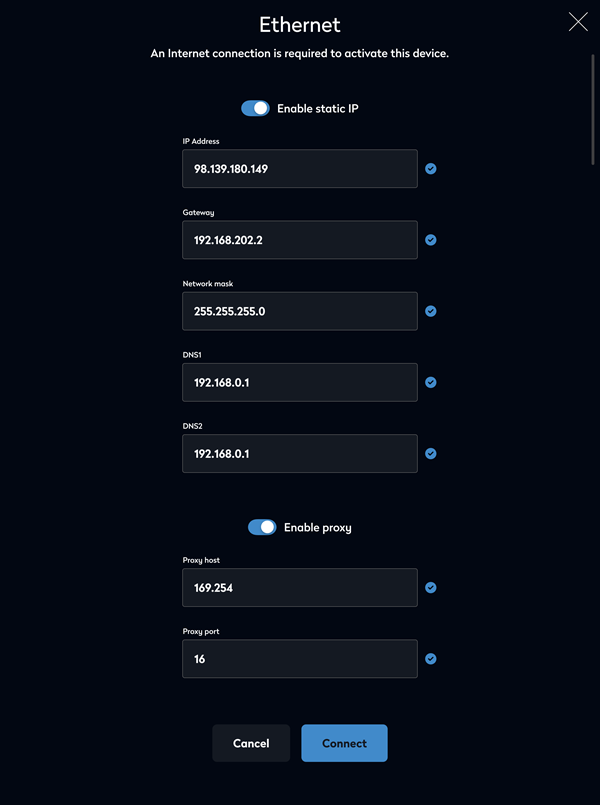
Advanced settings
Enable a static IP and/or proxy for the Wi-Fi or Ethernet network.
From the Admin menu, navigate to System Settings > Network > select the network > tap the options to enable a static IP and/or proxy.
Enter the required information for the static IP and/or proxy and tap Connect.