Configure SCIM provisioning for Azure AD
Before you start
The SCIM provisioning for Microsoft Azure AD guide is written for Azure Active Directory administrators configuring user provisioning for Eptura Engage using Eptura Engage SCIM API. It assumes familiarity with Azure AD, basic identity management concepts, and the SCIM standard.
How to configure SCIM for Eptura Engage in Azure Active Directory
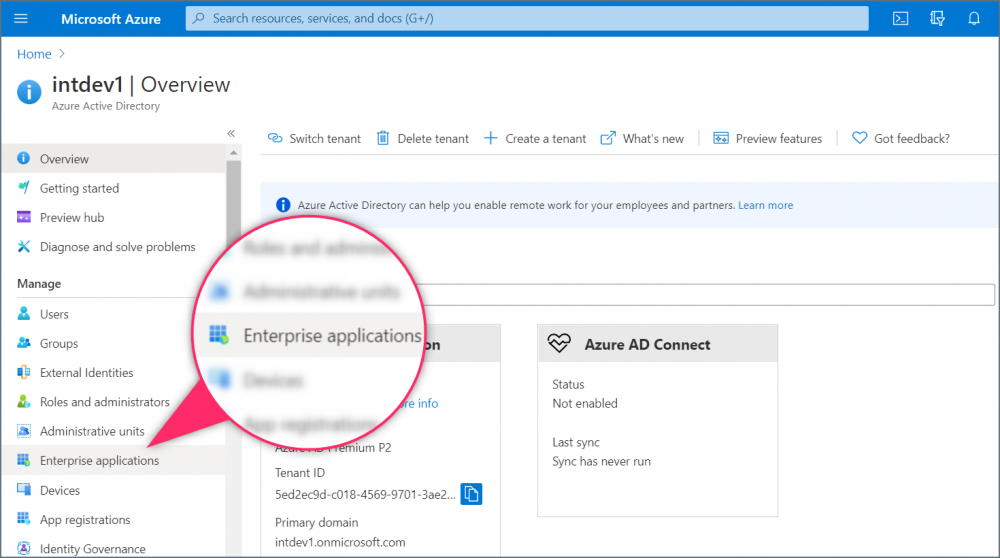
- Sign in to the Azure portal and open Azure Active Directory.
- Select Enterprise applications.
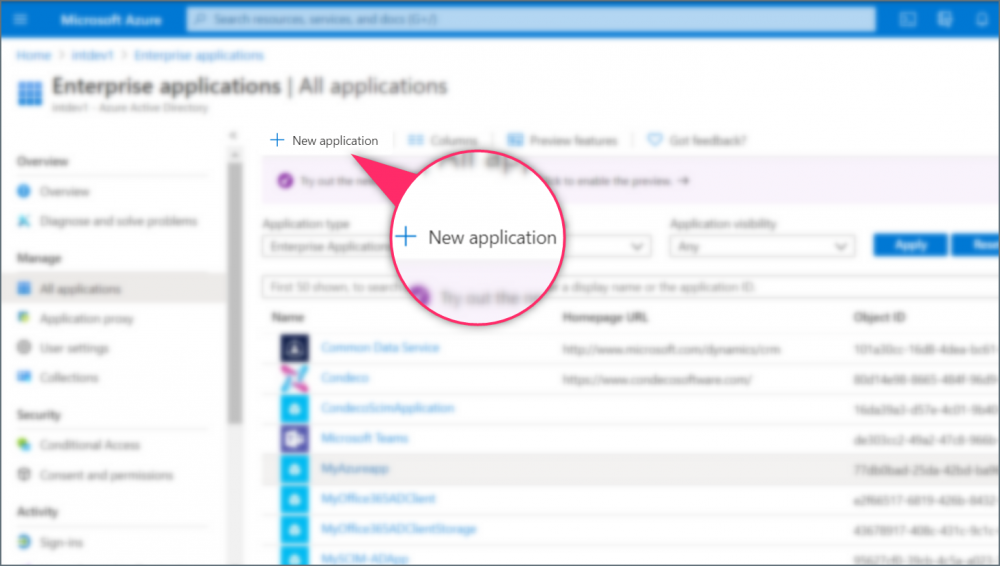
- Click New application.
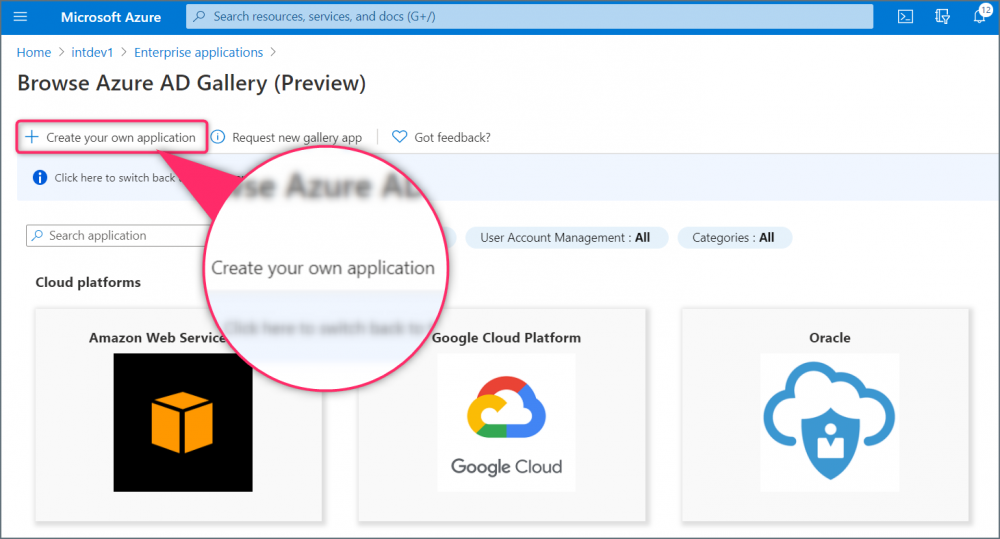
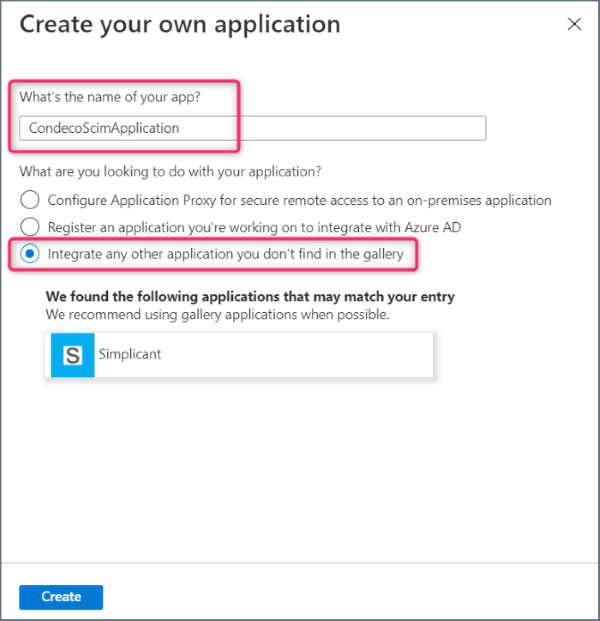
- Click Create your own application.
- Enter a name for the new application i.e. ‘CondecoScimApplication’ and select Integrate any other application you don’t find in the gallery. Click Create.
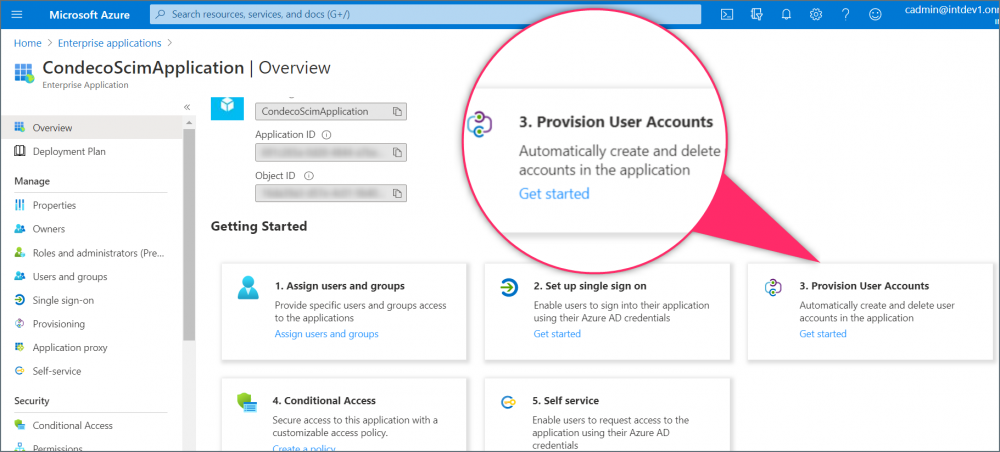
- From the Overview page for your new application, click Provision User Accounts.
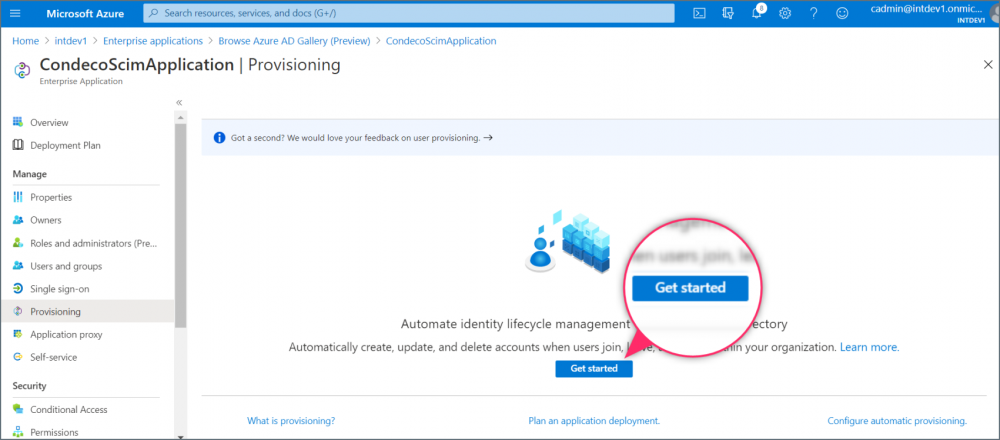
- Click Get started.
- On the Provisioning page, click the Provisioning Mode drop-down and select Automatic.
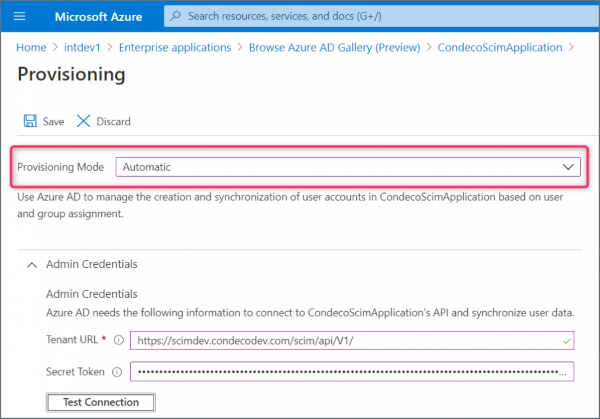
- Add the Admin Credentials:
- Tenant URL: enter the Eptura Engage SCIM URL i.e. https:///scim/api/V1/
- Secret Token: enter the token from your token provider. Learn how to generation a token
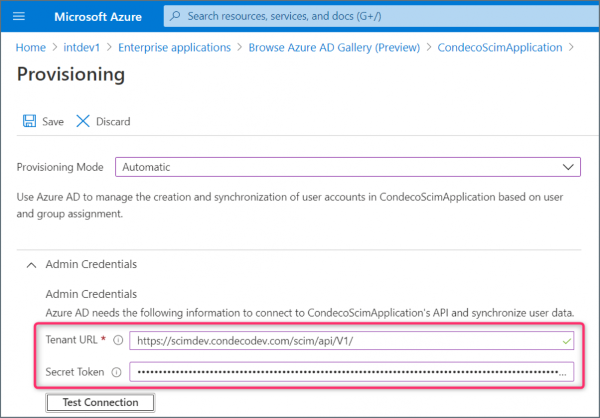
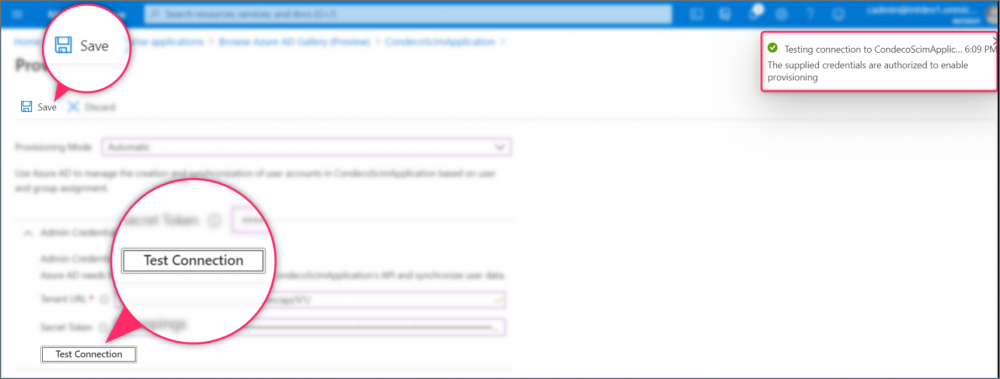
- Click Test connection and if successful, click Save to save your new application.
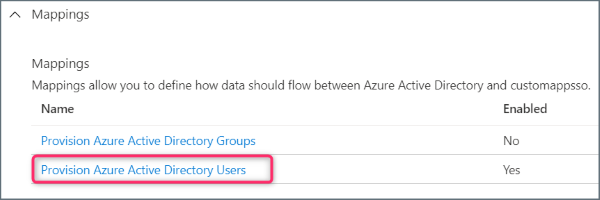
- Still on the Provisioning page, expand the Mappings section and click Provision Azure Active Directory Users.
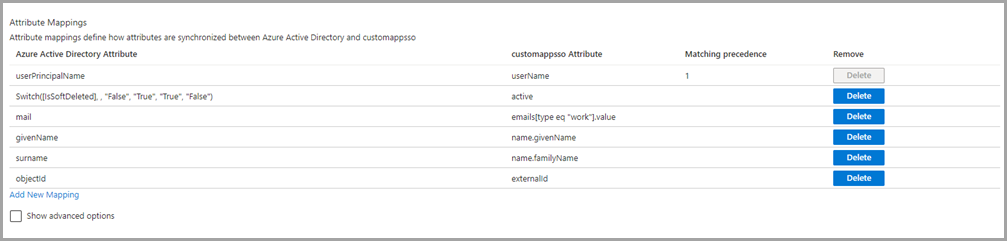
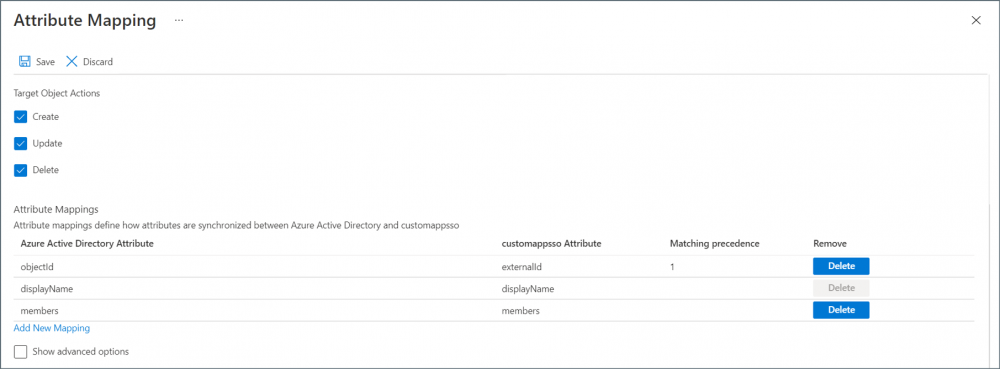
- The Attribute Mapping table must only contain the following customappsso attributes:
Mandatory attributes:
- userName
- active
- emails[type eq “work”].value
- name.givenName
- name.familyName
- externalId
Optional attributes:
- phoneNumbers[type eq “work”].value
- phoneNumbers[type eq “mobile”].value
Phone number values: Phone number values must follow the RFC 3966 standard. More information about phone number values is available in the SCIM API Developers Guide > Schemas or visit the Internet Engineering Task Force (IETF) RFC Editor for full details of RFC 3966: https://www.rfc-editor.org/
Click Delete to delete mappings not listed above. The image shows only the required mappings.
Learn more about SCIM User attributes and the associated Condeco User attributes
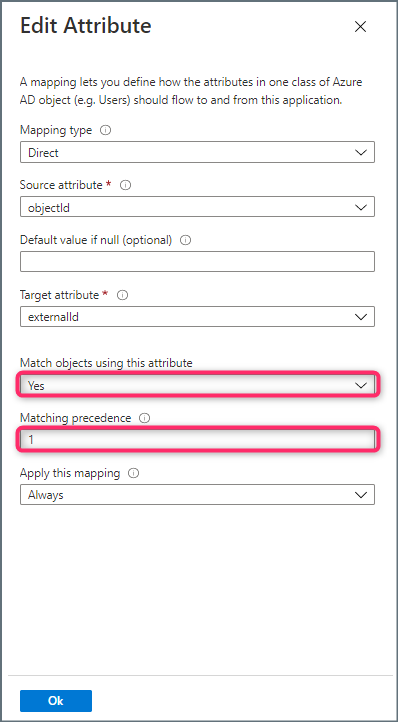
- Still on the Attribute Mapping page, click “externalId” mapping from the customappsso Attribute column and change the values as follows:
Mapping type: Direct
Source attribute: objectId
Default value if null (optional): leave blank
Target attribute: externalId
Match objects using this attribute: No
Apply this mapping: Always
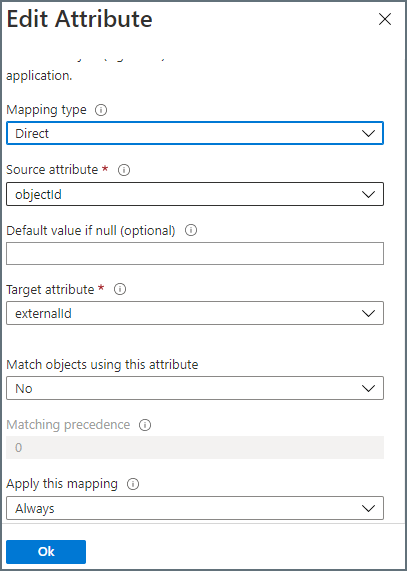
- Click OK to save the values.
- Click Save to save the Attribute Mappings and click Yes to confirm.
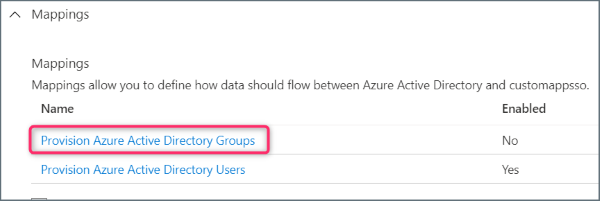
- Expand the Mappings section and click Provision Azure Active Directory Groups.
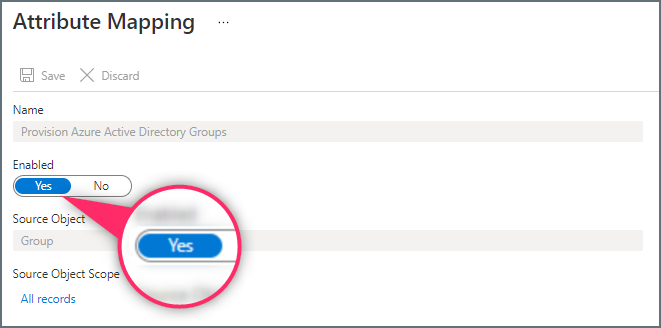
- Click Yes to enable Provision Azure Active Directory Groups, then click Save.
- The Attribute Mapping page is displayed. Edit the group attributes as follows:
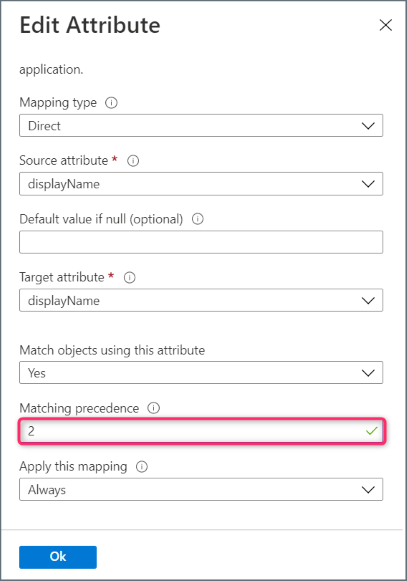
- Click the group attribute “displayname” to open the Edit Attribute page. Change Matching precendence to 2.
- Click OK to save and return to the Attribute Mapping page.
- Click the group attribute “objectId” to open the Edit Attribute page. Click Match object using this attribute and select Yes. Check the Matching precedence value is 1.
- Click OK to save and return to the Attribute Mapping page.
- Click the group attribute “displayname” again to open the Edit Attribute page. Click Match object using this attribute and select No. Check the Matching precedence value is now 0.
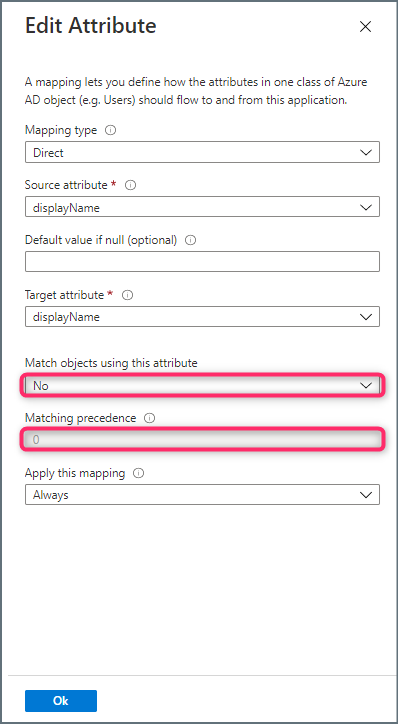
- Click the group attribute “displayname” to open the Edit Attribute page. Change Matching precendence to 2.
- Click OK to save and return to the Attribute Mapping page.
- Click Save to save the Attribute Mappings and click Yes to confirm.
- Click X to close Attribute Mapping and return to the Provisioning Page.
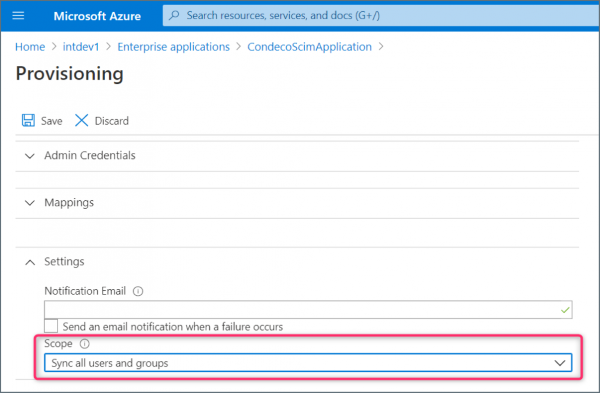
- Expand Settings, click the Scope drop-down list and select Sync all users and groups.
Note: If the Scope drop-down list is not visible, close the Provisioning page and click Edit Provisioning to reopen.
- Set the Provisioning Status button to On.
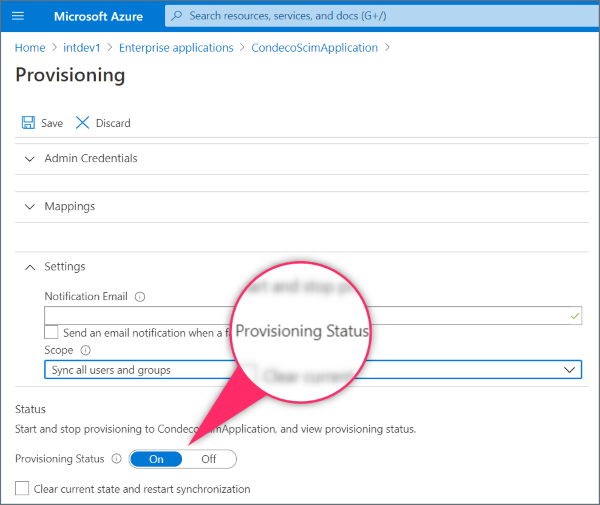
- Click Save to complete the SCIM application provisioning.
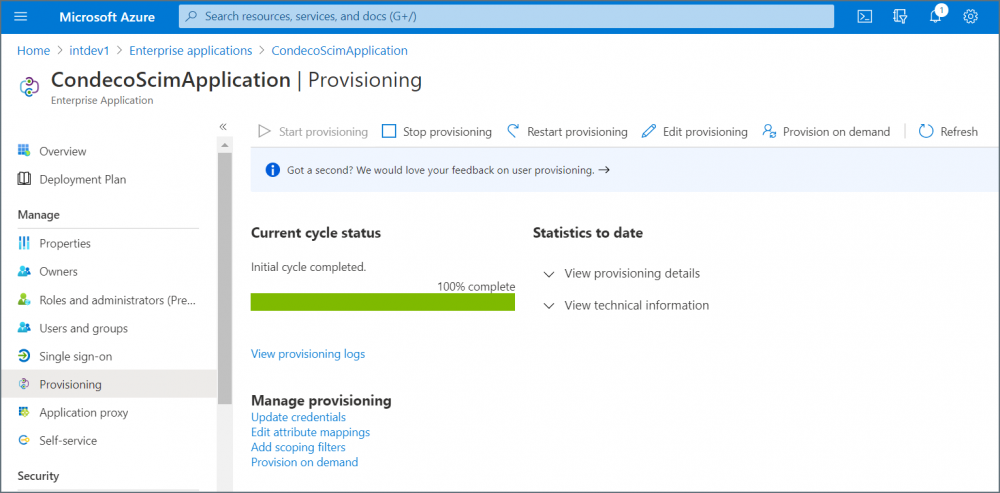
Current cycle status
In the Manage navigation menu select Provisioning to view the status of the current or initial incremental cycle. Use the buttons at the top to manually start or stop provisioning, and click View Provision details to check the schedule for the next run.