Quick searches
Quick search tools for booking meeting spaces
A Quick Search tool is available on the Meeting space home page to quickly find a meeting space at a preferred location on a single date. You can also quickly create a booking from the booking grid.
Contents
Quick search from the Meeting Spaces home page
Perform a quick search for a meeting space
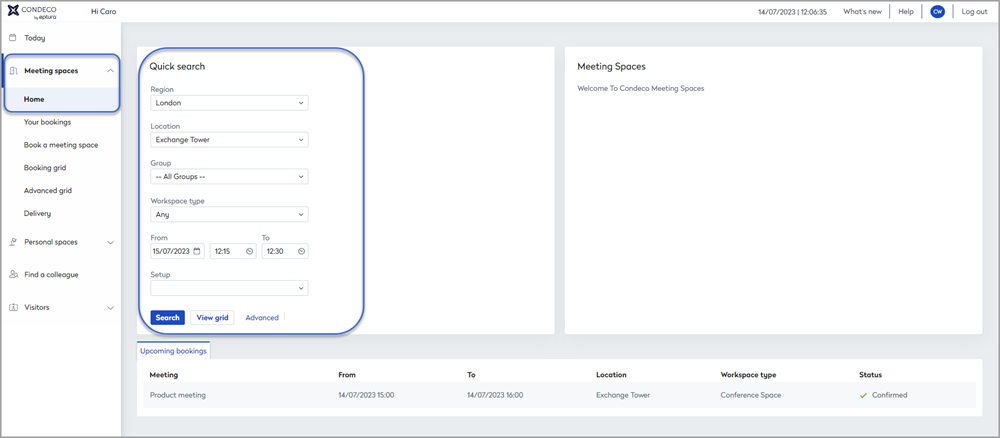
- Navigate to Meeting spaces from the module menu on the left-hand side to open the home page.
- Select the Location, Group, and Workspace type for the meeting from the drop-down lists in the Quick search tool.
- Select the date for the booking and the start and end times. You can click the calendar icon to select the date from the pop-up calendar.
- To choose a specific layout for the meeting space, click the Setup drop-down and make your selection.
- In the Number Attending box, enter the number of people the meeting space must accommodate.
- Depending on your requirements, there are three ways to search for an available space; Search, View grid, and Advanced:
- Click Search to display the list of available meeting spaces below the Quick search tool. The following options are available for each meeting space in the search results:
- Information about the meeting spaces is displayed, including the attributes offered with the space. Hover your cursor over the acronyms to see the attribute names. Learn more: Attributes
- Click the name of the meeting space to show more details about the space in a pop up window.
- Click Book to book your chosen meeting space. If the meeting space is a managed space that requires approval, a Request button appears instead of the Book button. Click Request to submit the booking request for approval.
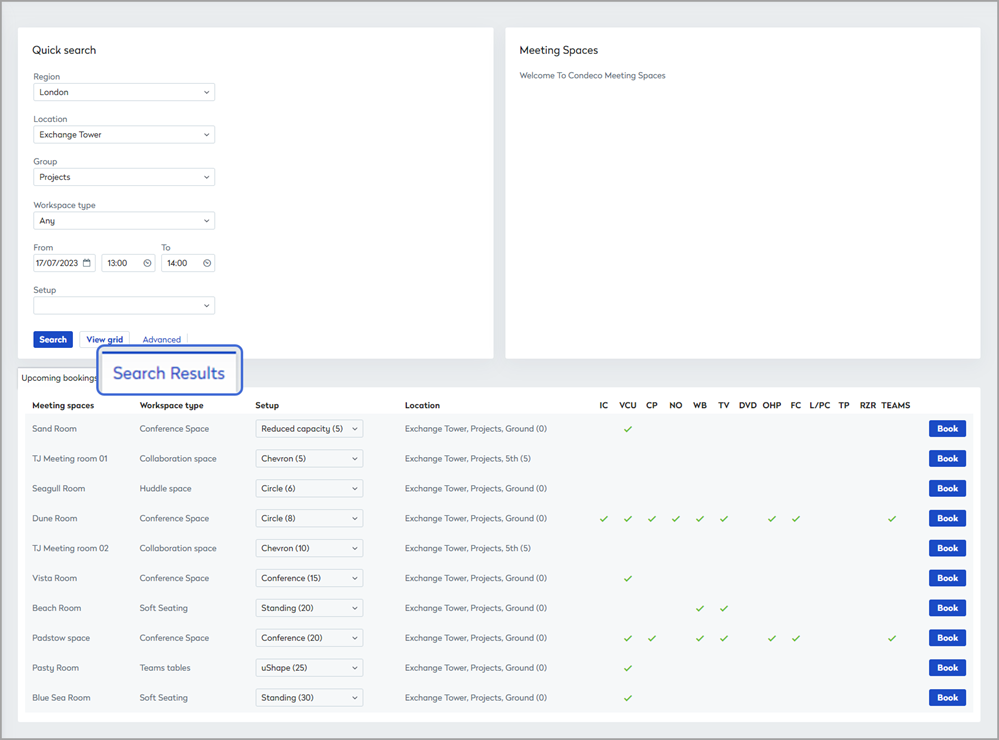
Search results following a Quick search are displayed on the Meeting spaces home page
- Click View Grid to view available meeting spaces on the booking grid. Learn more: Booking grids.
- Click Advanced to select more options, such as services, from the Book a meeting space page. Learn more: Book a meeting space page
- Click Search to display the list of available meeting spaces below the Quick search tool. The following options are available for each meeting space in the search results:
See Eptura Engage in action
Book a meeting space and request services using Quick search tool from the Meeting spaces home page
Create booking tool on the booking grid
Make simple bookings directly from the meeting spaces booking grid using the Create booking tool.
Making a booking using the 'Create booking' pop up on the booking grid
- Click a time slot on the booking grid and drag your mouse to extend the duration.
- If 'Create booking on grid' is enabled for the group, the Create booking pop up opens, as shown in the visual above.
- If 'Create booking on grid' is not enabled for the group, the booking form opens Learn more: Meeting space booking form
- In the Create booking pop up, enter a title for the booking, then select the number of attendees and the booking type from the drop-down lists.
- Optional: Edit the name of the Requestor and Host if required. The host's working status is automatically set to be in the workplace (unless they have manually set it to working remotely or not working).
- Microsoft 365 integrations only: Tick or untick Add to your Outlook calendar as required (your selection cannot be changed for this booking later). Learn more: Synchronizing bookings with Microsoft Outlook. Only available with our Microsoft 365 integration. Learn more: Eptura Engage for Microsoft Outlook
- Click Book to book the meeting space.
✨Intelligent booking
If Intelligent booking is enabled, Eptura Engage automatically books a personal space for the host when their status is set to be in the workplace. Learn more: Intelligent booking for personal spaces
Good to know
- When setting a time slot on the grid, the time bar displays the default setup and clean-down times for the meeting space, as well as the start and end times of the booking.
- When creating a booking in the current time slot via Create booking on the Booking grid, the booking status is automatically set to 'In Progress'.
- Booking details are pre-populated based on the application configuration and your profile.
- If a cost code exists for the host (or requestor) it is added to the booking. However, if entering a cost code is mandatory and one doesn't exist for the host or requestor, the booking form will open instead, allowing a cost code to be entered.
- Tab between fields using your keyboard.
- Pressing the Enter key creates the booking.
FAQ
- When is it useful to use the Create booking option?
The Create booking option is designed for simple bookings or when you want to reserve a meeting space and add extra information later using the booking form. - Why is the Create booking pop up not appearing for some Groups?
Your administrator can disable the Create booking option individually for each Group. For example, 'Create booking' might be disabled if mandatory details are required that cannot be entered through the Create booking pop up. - Why does the booking form sometimes open instead of the Create booking popup?
When a meeting space has a default setup or clean-down time configured that causes an overlap with another booking, or a setup time that has already passed, the booking form opens instead, to provide flexibility to adjust the booking.
Limitations of the Create bookings tool
- The Create bookings tool is available only on the standard booking grid (not the Advanced booking grid).
- Mandatory custom fields are ignored.
- Default service items are not added to a booking.
- Requestors and hosts must exist and be selected from the lookup.
- Meeting space messages are not shown.
- Meeting space costs are ignored.
We recommend the Create bookings tool on the booking grid is disabled if any of the above limitations cause a breach of your organization's business rules. The Create bookings tool is enabled/disabled individually for each group from the group's application settings. Learn more: How to configure a group for meeting spaces