Requesters Guide
Once you put in a request, it must be approved or rejected by a User in Hippo. Requests can be made for a specific Location, Equipment, or Vehicle within your facility. Requesters can receive email notifications when approved or rejected and when completed.
Steps:
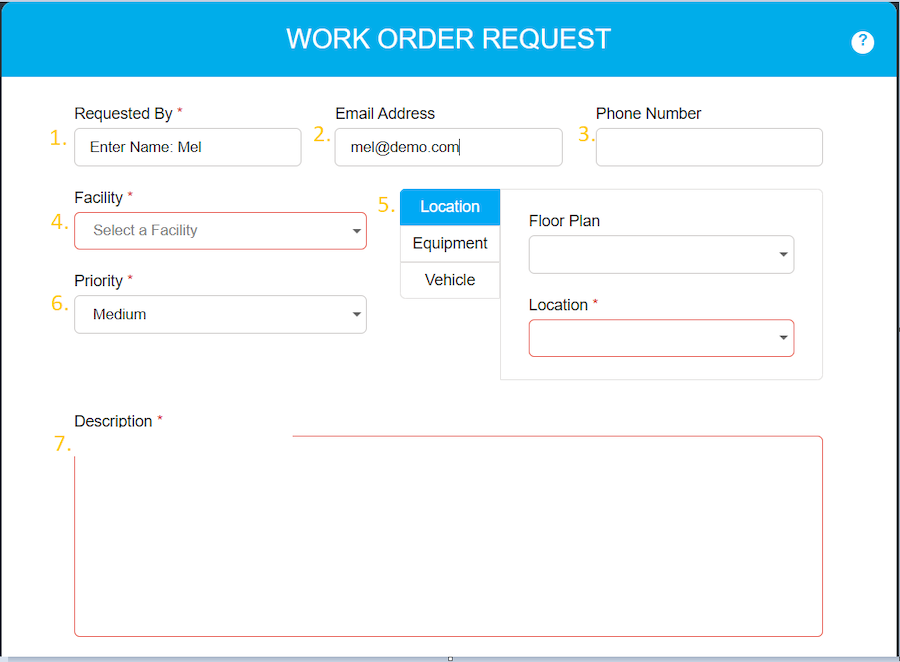
Once you log into Hippo, you arrive at a Work Order Request form. Any field outlined in red is mandatory.
- The Requested By field is filled in automatically with the first name and the last name of the User, or you can click in the field to add your name.
- The Email Address field is filled in automatically if it has been previously stored in Hippo. If the Email Address field is empty, click on the field to add your email address.
- Adding your phone number is an option unless outlined in red.
- Click in the Facility field and select the facility your request is associated with.
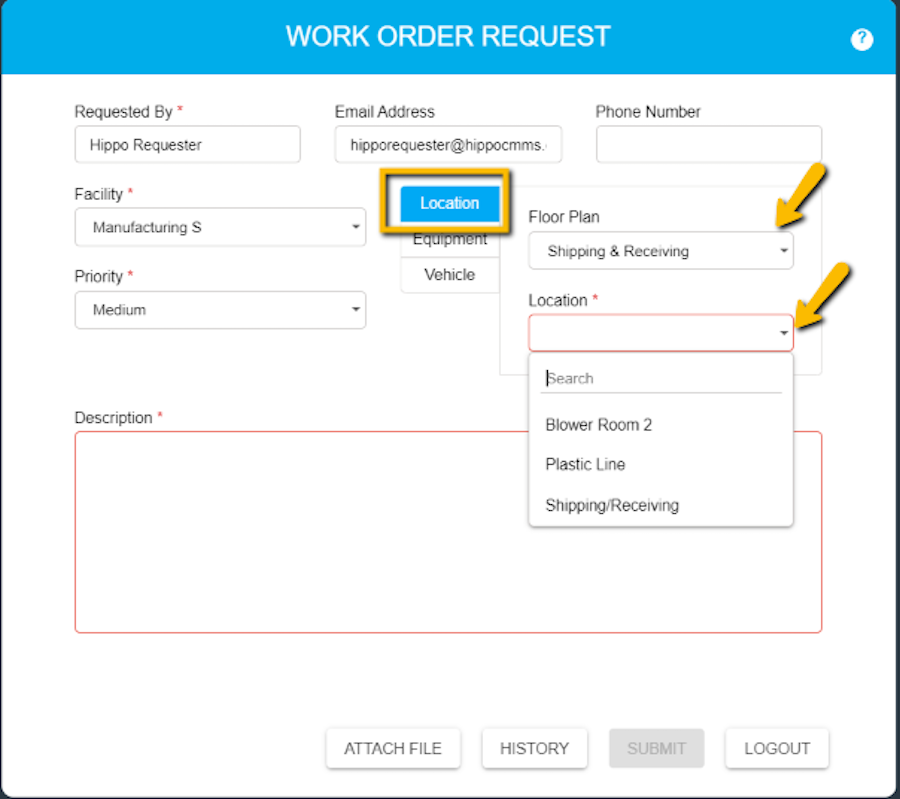
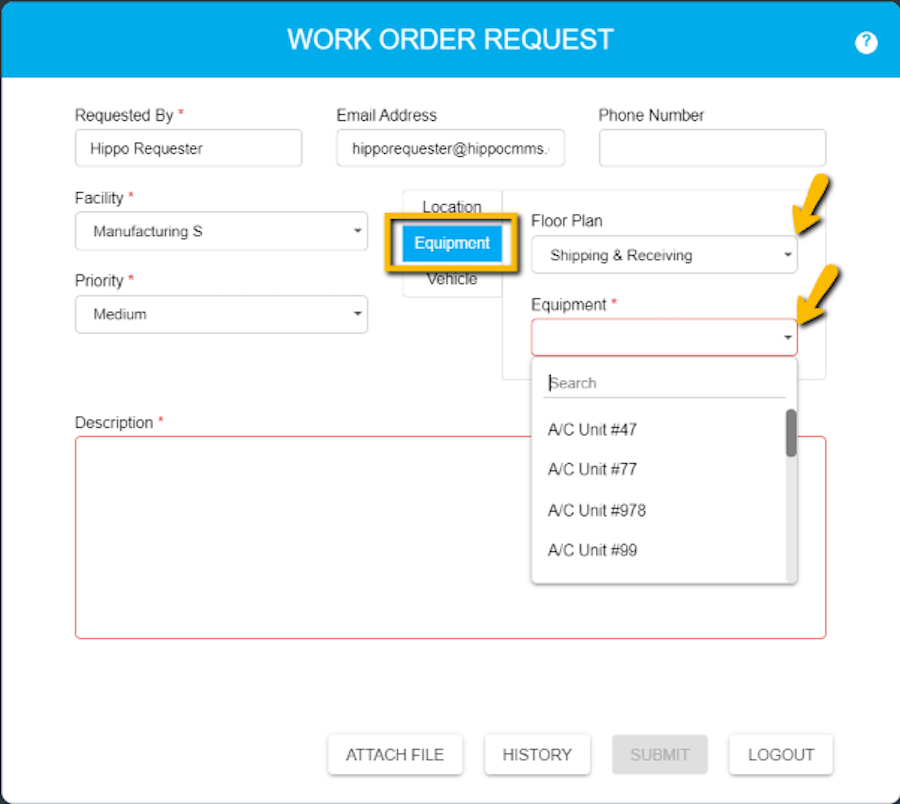
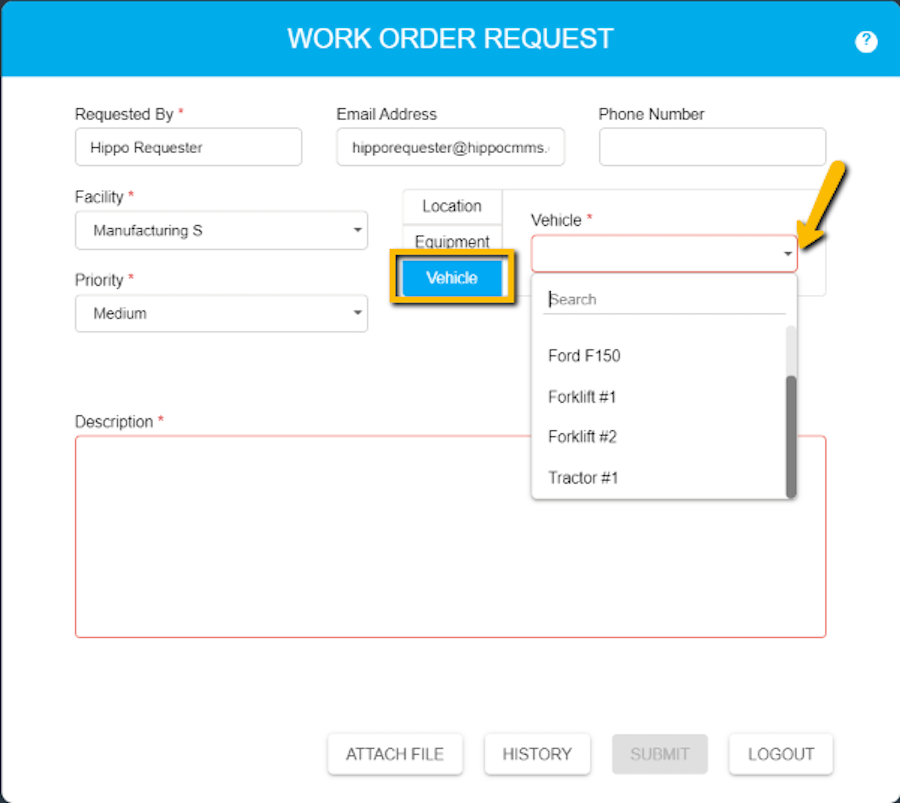
- Next, click on Location, Equipment, or Vehicle to select the type of request you are submitting.
Location type: Click in the Floor Plan field and select the floor plan or area to the facility. Then, click in the Location field outlined in red and select the exact location for the request. You can also type the location name in the Search field.
Equipment type: Click in the Floor Plan field and select where the equipment is located from the dropdown list. Next, click in the Equipment field outlined in red to select the exact equipment the request is for. You can also type the equipment name in the Search field.
Vehicle type: Click in the Vehicle field and select the vehicle name from the drop-down. You can also type the vehicle name in the Search field.
- You may see a Priority field on this form. Select a Priority from the dropdown list to determine the level of your request. Medium priority is the default.
- Click in the Description field to add all the details to your maintenance request. The more details the better!
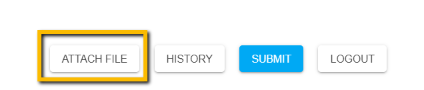
Note: Requester can click on the Attach File button at the bottom of the form to attach a file to the request. A picture is worth a thousand words.
If you click on the Attach File button, then the Upload icon appears.

Click on the Upload button and select the file from your computer. If your file has a name, it appears in the name field, or you can click in the field and type in a new name. Hit the icon to view the file.

Note: You also see the Delete icon. Click on the Delete icon to remove the file.

Note: A User may see a “History” button. This is a permission setting determined by your System Admin to Hippo. The history displays all the requests submitted in the past.

- Once all the mandatory fields have been filled out, click the “Submit” button at the bottom of the form.

A pop-up window appears confirming your request.

It is now pending review. That means the request has been sent to be approved or rejected. If you added an email to your form, you will receive a notification to the follow-up of your request.