Companies
This article shows a User how to add a company to Hippo. A User can add Companies at the Enterprise Level as well as the Facility Level. If a User creates a company at the Enterprise Level, he/she can associate it with multiple facilities. Typically, a company is a vendor that is associated with a work order for reporting purposes. However, any company on the Companies grid can also be associated with a piece of equipment such as a Manufacturer, Installer, or Distributor.
Definitions
Company: Company is used to represent a vendor associated with a work order.
Company Category: Company categories make it possible to group similar companies types together. This makes it easier to find when selecting them from a work order form.
Instructions
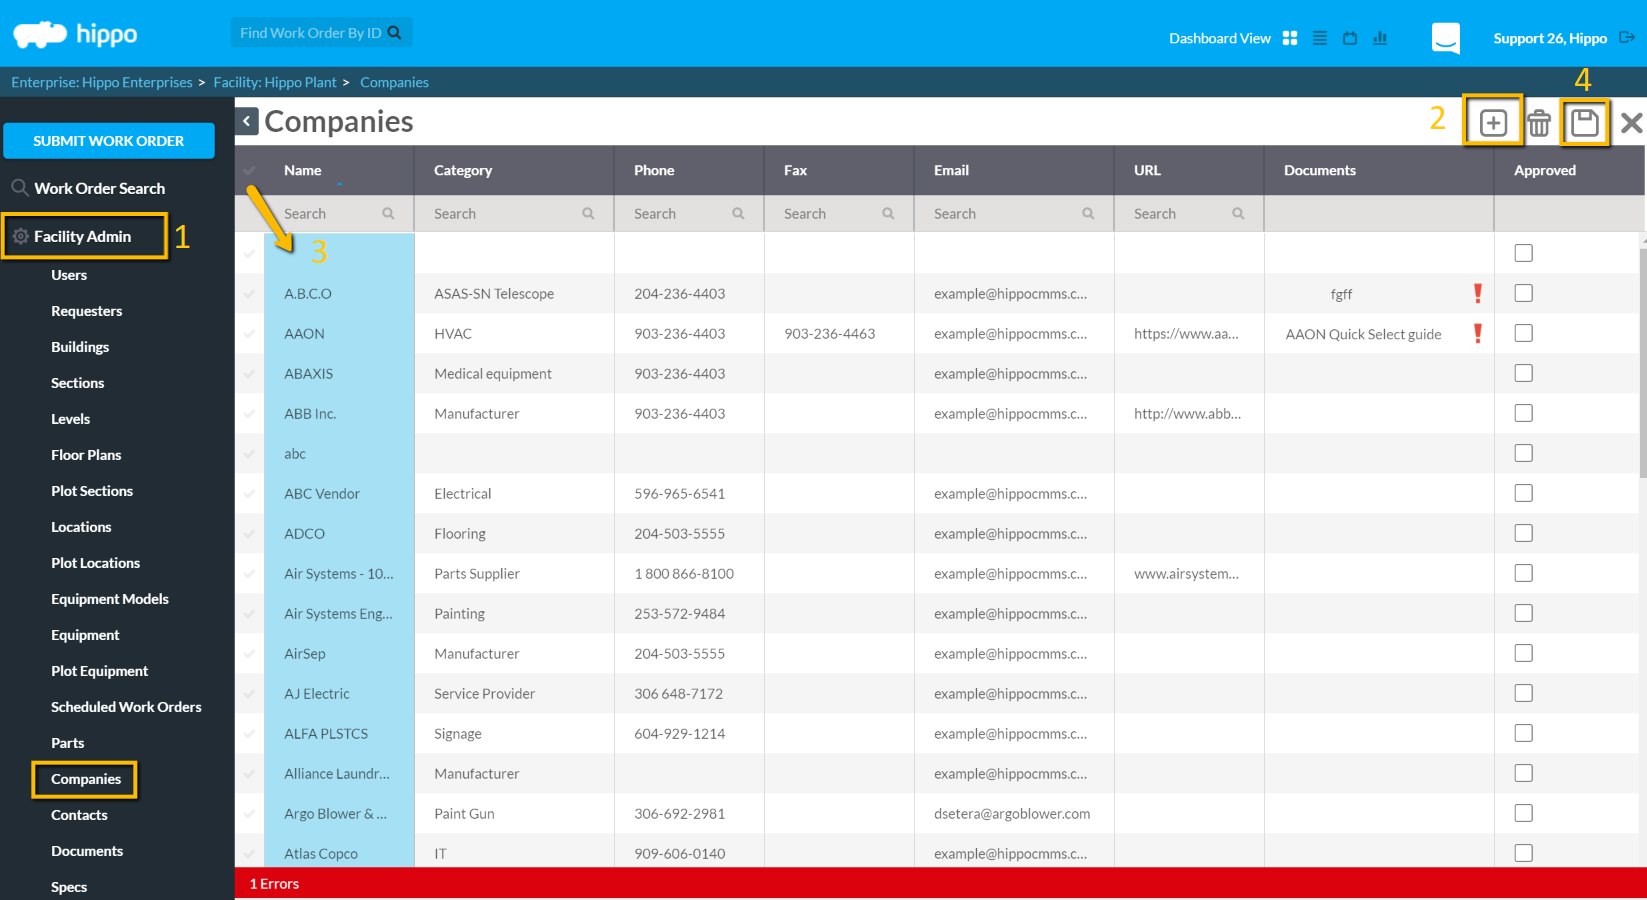
- To create a new Company, access the Companies grid under the Facility Admin panel or the Enterprise Admin panel.
- Click on the New (+) icon located in the top right corner and an empty row will appear at the top of the Companies grid.
- Click in the “Name” field to enter the name of the Company.
- Use the Save icon located in the top right corner to save the entered information.

- The rest of the fields on this grid are optional. A User can use the Hippo software successfully without entering in any additional information. However, it is best practice to enter as much information as possible regarding Companies, as the Hippo system should be used as a database to store all company information for future reference. For example, we suggest you add the Company phone number so that it is visible on the work order.
- Category – Click in the dropdown menu in the Category field to associate a category with a company. If a User wishes to create a new category, click into the category filed and then click on the +. Type in the name of the Category and click save.
- Phone – Click in the “Phone” field to enter the phone number for a company. This number will be visible on the work order once the company is selected.
- Fax – Click in the “Fax” field and enter the fax number for a company.
- URL – Click in the “URL” field to save the URL for the company’s website.
- Documents - Under the Documents column, click on the drop-down menu and choose “Add”. Name the document, enter a description and expiration date, and then choose if needed, associate a Web Page or Online Document.
If a User wishes to upload a file that is stored on your hard drive, select Online Document and click on “Upload a file”. This will prompt the User to choose a file that is saved on a hard drive. Select the file to be uploaded and then click on “Submit”.
Remember: A User can only upload file types that are set as accepted file types. A User can add and edit accepted file types in the Global Settings panel under Enterprise Admin.
