How to Float your PMs
In this article, you’ll learn about a simple Hippo hack that prevents PMs from piling up in your Hippo database.
Topics covered:
- What’s floating?
- How do I set it up?
- How does it benefit me?
What is Floating?
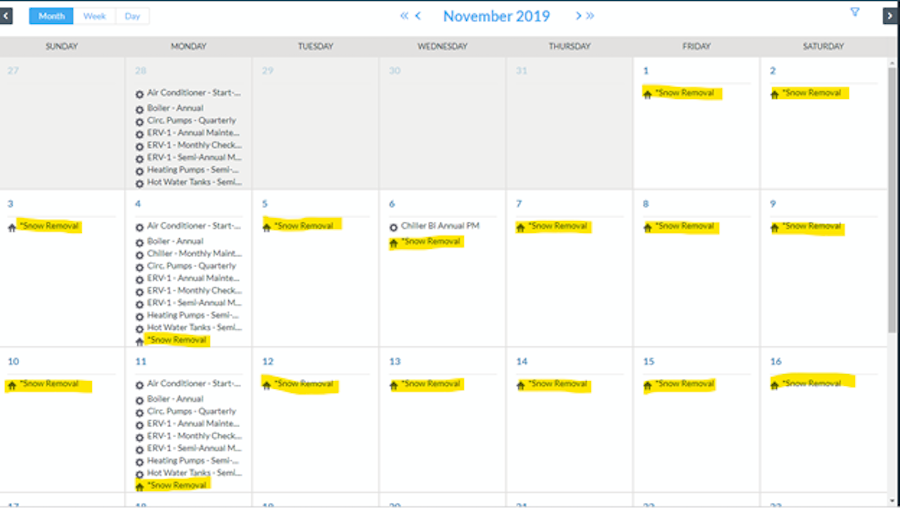
Floating a PM prevents it from generating if the one before has not been completed yet. Here is an example of a PM that generates often:

If you have a PM that generates daily, or every few days, the floating option keeps the next work order from generating until you’ve closed out the one before.
How do I set it up?
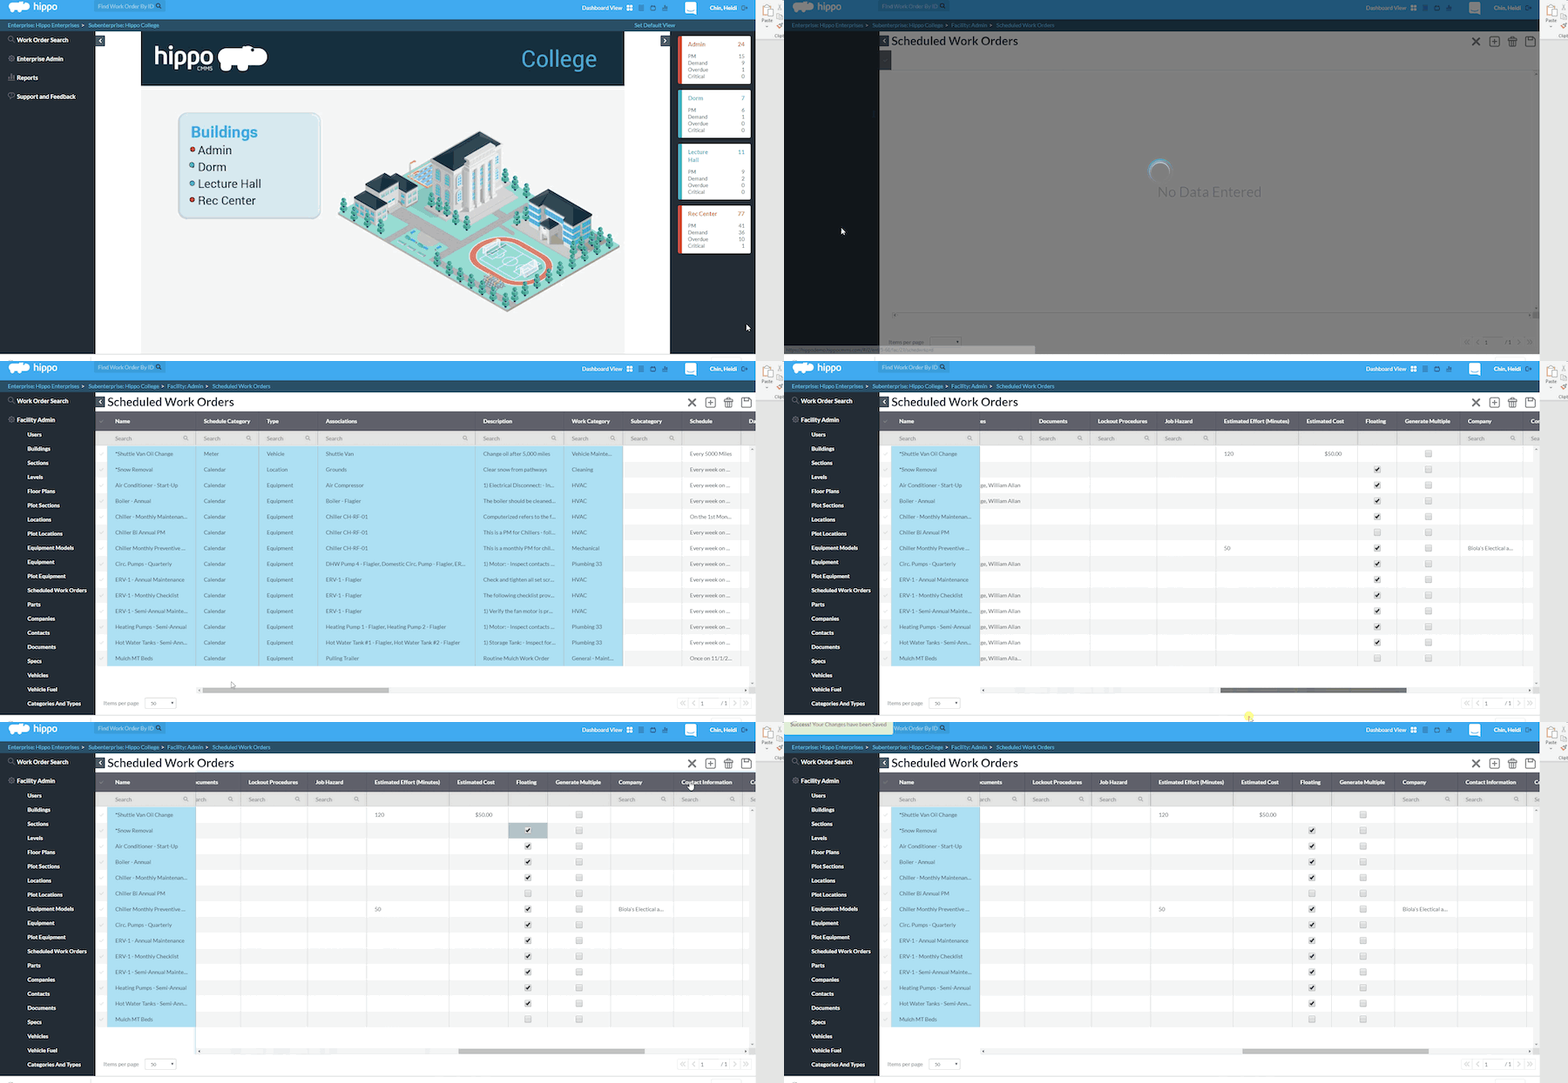
For those of you still using the old Schedule Work Order grid, under the “Facility” level, click on the “Scheduled Work Orders” panel and scroll all the way to the right until you see the column “Floating.” Add a checkmark in the box by clicking in it. Hit the "Save" icon in the top right. You have now enabled the Floating feature for this particular PM.

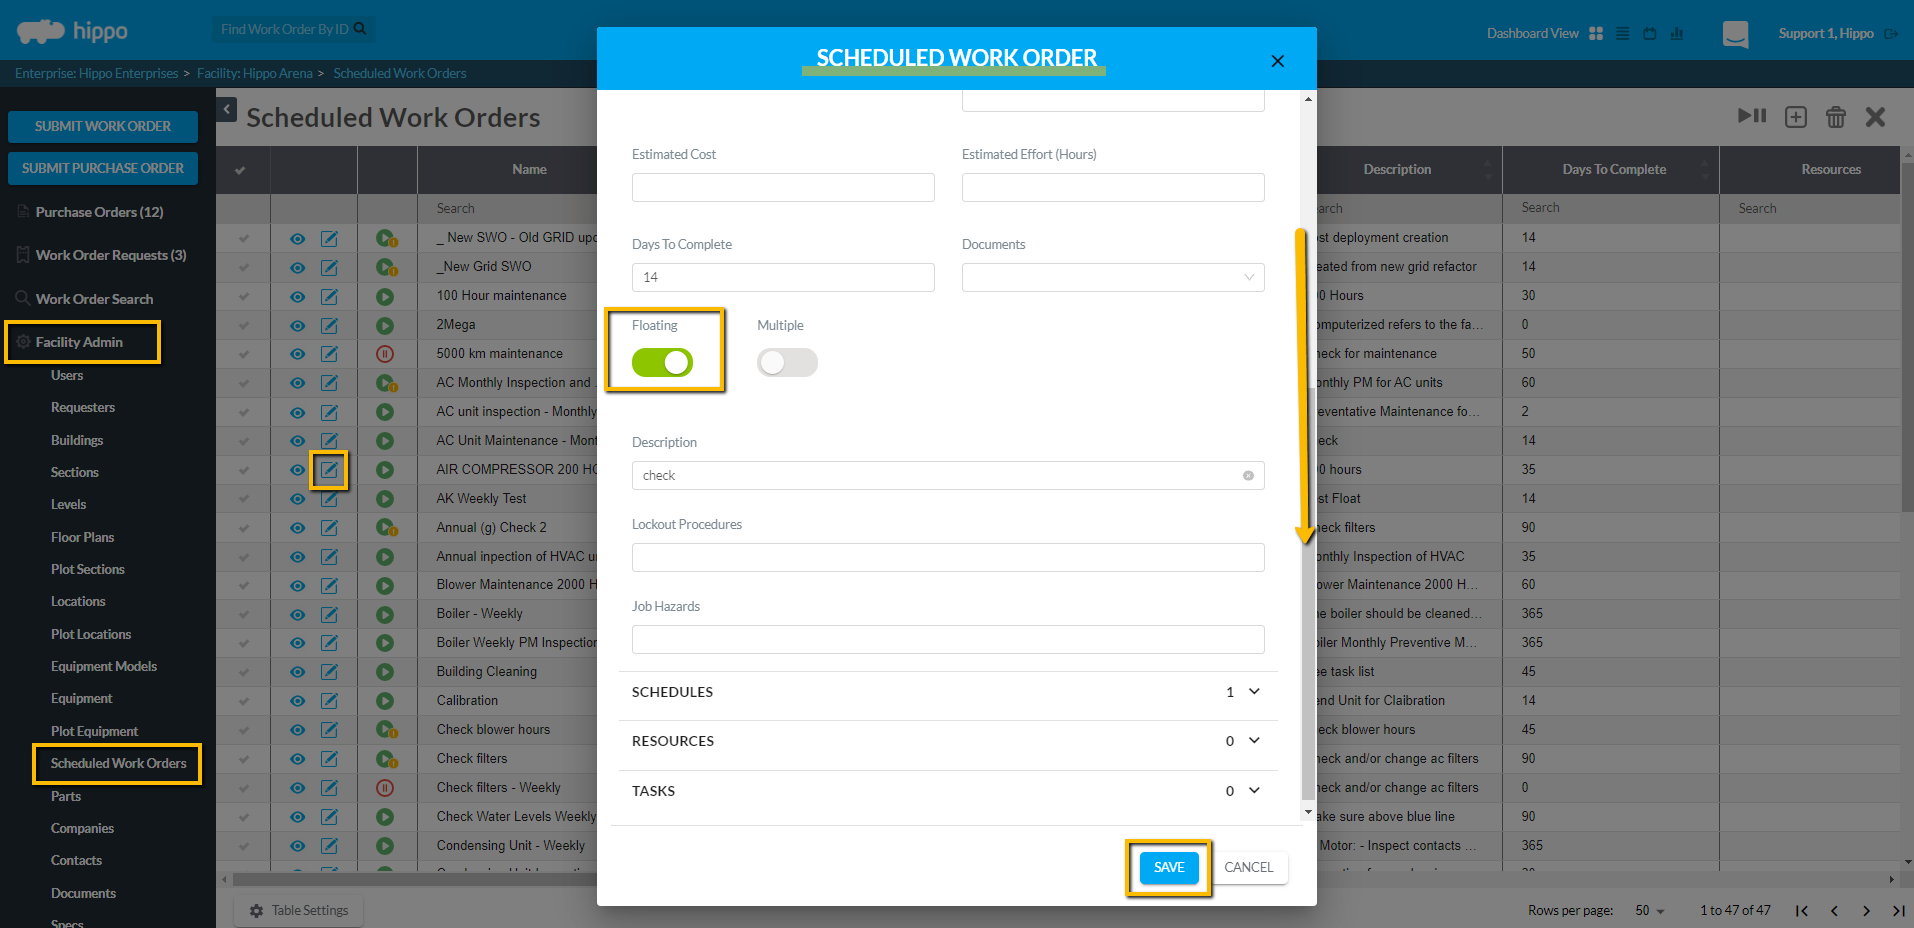
For those clients using the refactored Scheduled Work Order grid, under the "Facility" level, click on the "Schedule Work Orders" panel and hit the edit button next to the PM name you want to enable Floating. Once the "Scheduled Work Order" form opens, scroll down and toggle on the Floating" button. Hit Save at the bottom of the form.

3. How does it benefit me?
Floating PMs help to keep your dashboard clean and tidy because the PMs are not piling up one after the other. This is especially useful when you have work orders that happen every few days, if not every day.
