Equipment Transfer Module
Introduction
Enabling the Equipment Transfer module, allows Users to transfer equipment from one facility to another. You also have the option to move work orders along with the asset.
Definitions
Equipment Transfer: to transfer an asset or equipment from one facility to another
Instructions
Note: There are a few steps needed to enabled this feature. Jump to step 12 if this feature and the User permissions have already been applied.
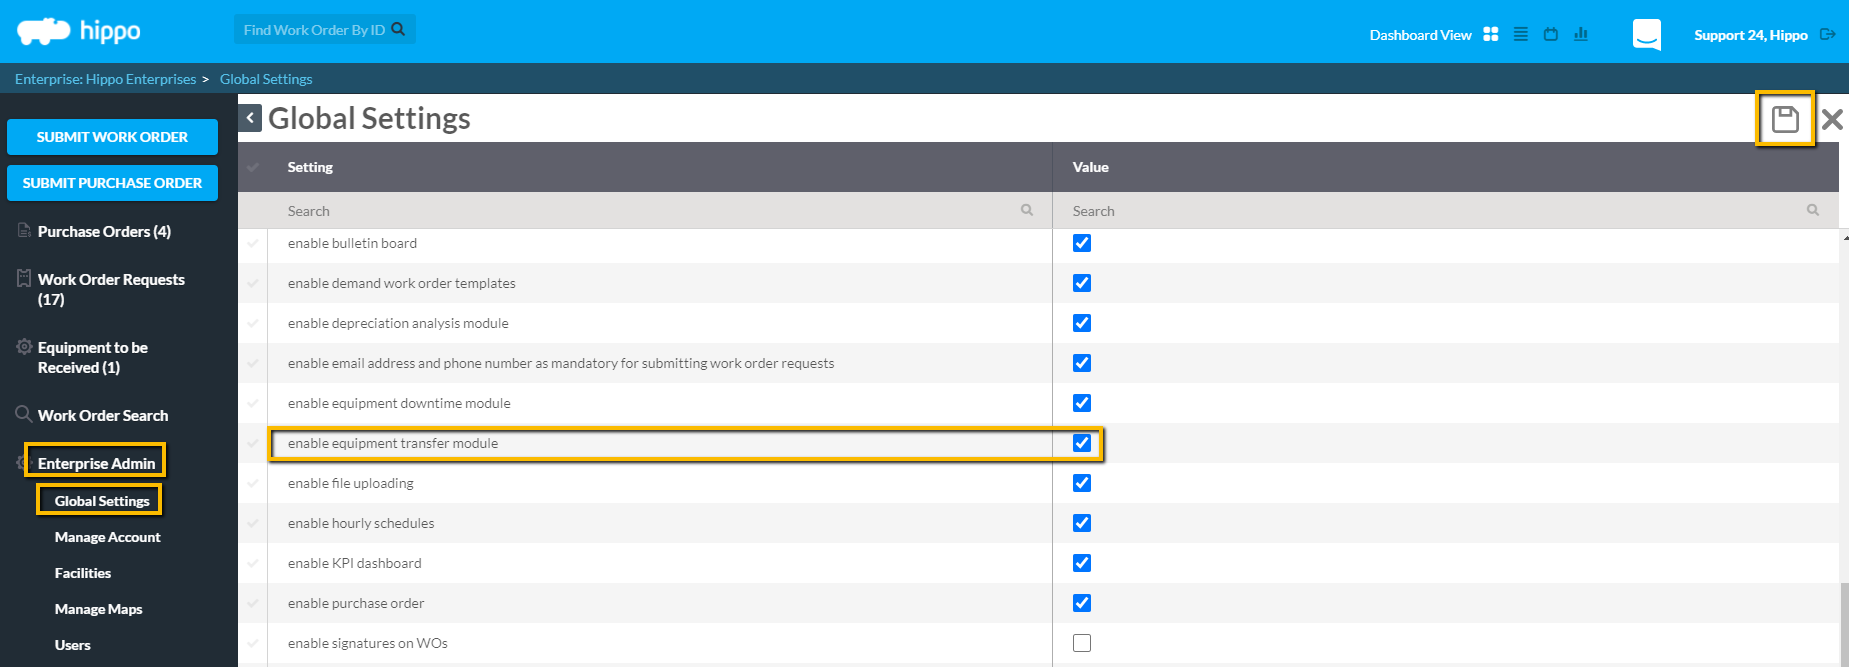
- On the Global Settings grid, in the “Setting” column, look for “enable equipment transfer module” and click on the box next to it. This box is found under the “Value” column.
- Make sure there is a checkmark in the box.
- Click on the “Save” button found in the top right corner.
- Log out of the Hippo system, then log back into it, or click on the “Refresh” icon. This will add the new module.
Note: now that this feature has been enabled, there are a few other steps needed to use this module.
Note: Users must have permission to transfer equipment.
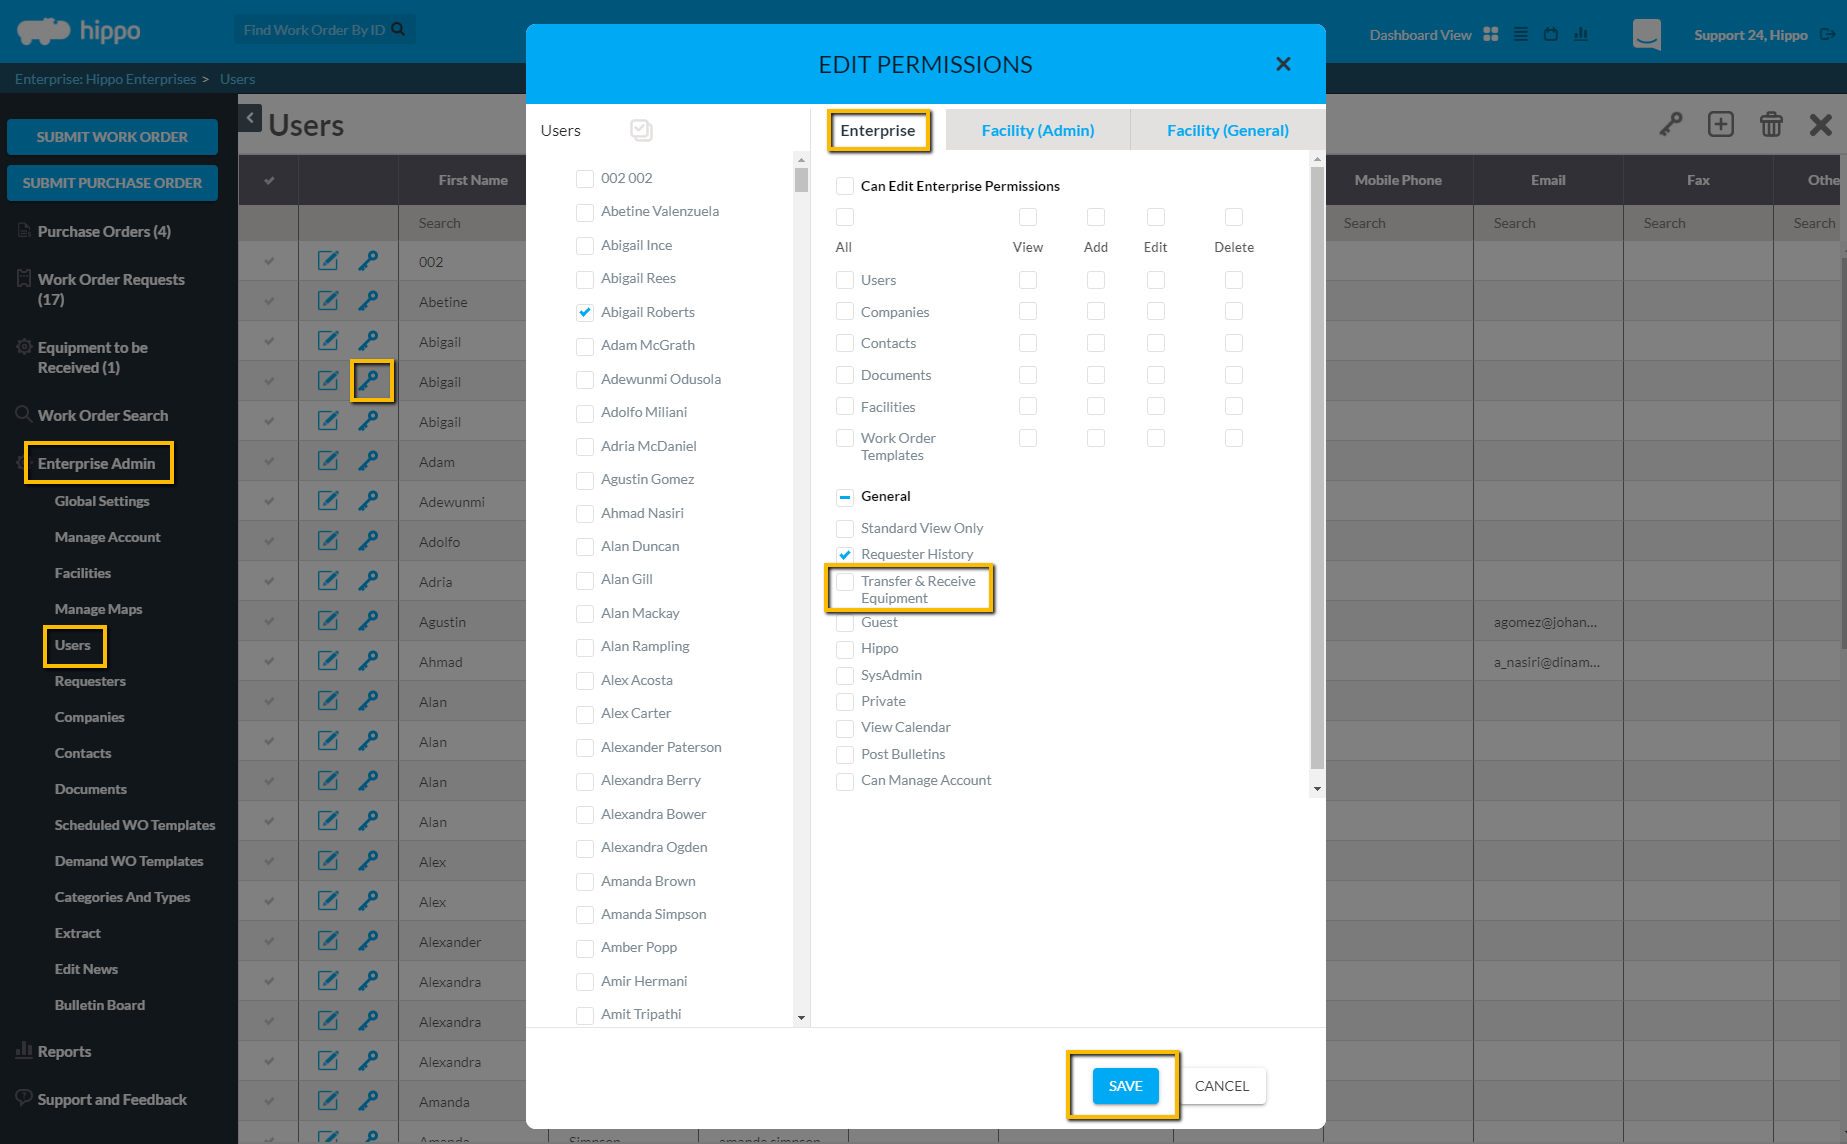
- Click on the “User” panel, under Enterprise Admin.
- Click on the key icon next to the User's name to open the permissions form.
- On the Enterprise page of the Edit Permission form, click in the box next to the permission “Transfer & Receive Equipment” under the “General” subcategory. A checkmark should be in this box.
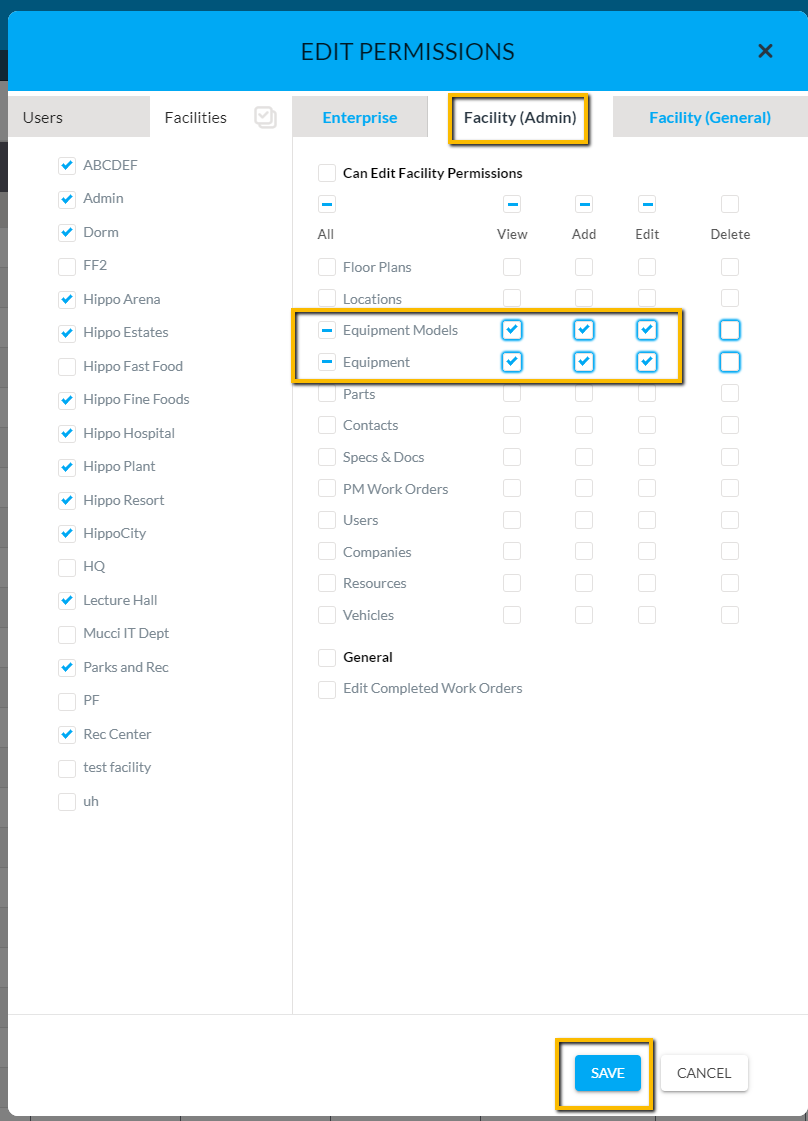
- Click on the “Facility Admin” page of the Edit Permission form.
- Make sure that the User has permission to “View”, “Add”, and “Edit” both Equipment Models and Equipment. The Admin User can give these permissions by clicking in the correct boxes and making sure there is a checkmark.
- Click on the “Save” button located at the top right corner of the grid.
- A User will need to log out of the Hippo system and log then back in again or click on “Refresh” to apply the changes.
Note: any User with these permissions can see and click on the “Equipment To Be Received” panel on the left side of the screen.

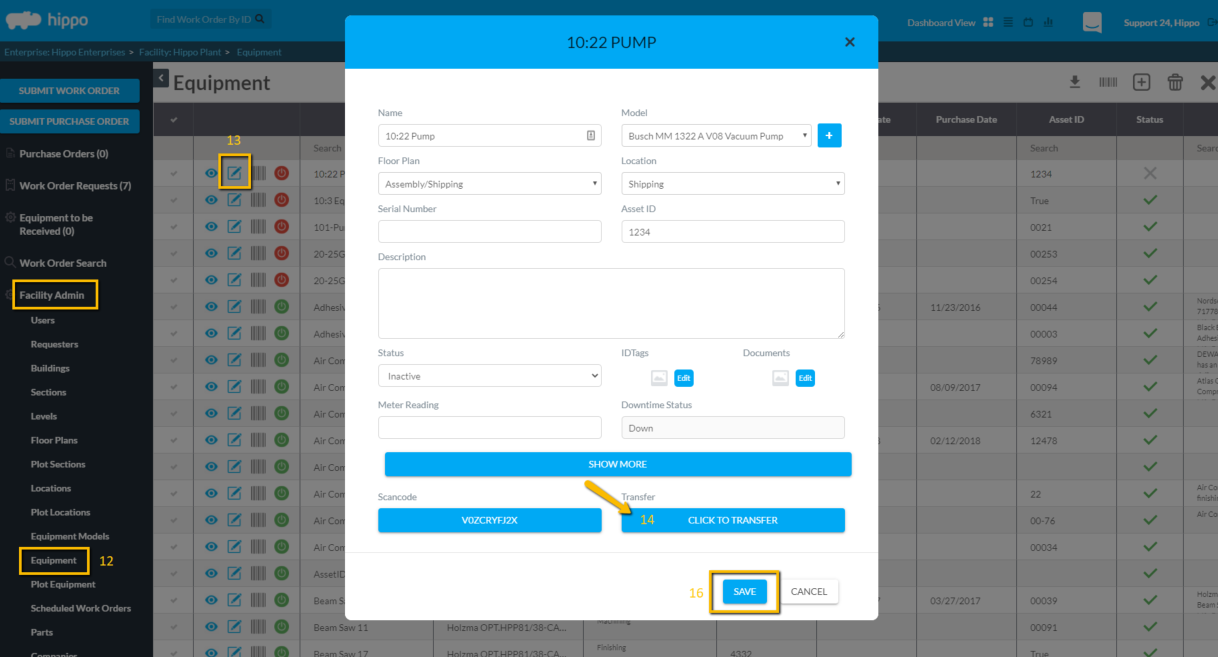
- To transfer equipment, click on the Equipment panel, from Facility Admin.
- Click on the edit icon next to the name of the equipment.
- Click on the "Click to Transfer" button.
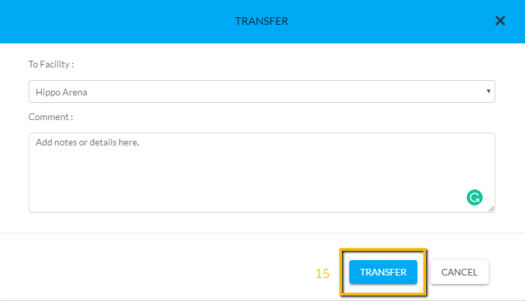
- In the "Transfer" window, select from the dropdown the Facility you wish to move this asset to, add any comments, then hit the Transfer button at the bottom of the window.
- Hit the Save button on the Equipment window. This asset is now ready to be received or canceled and has moved to the "Equipment to be Received" Panel, Enterprise Admin.

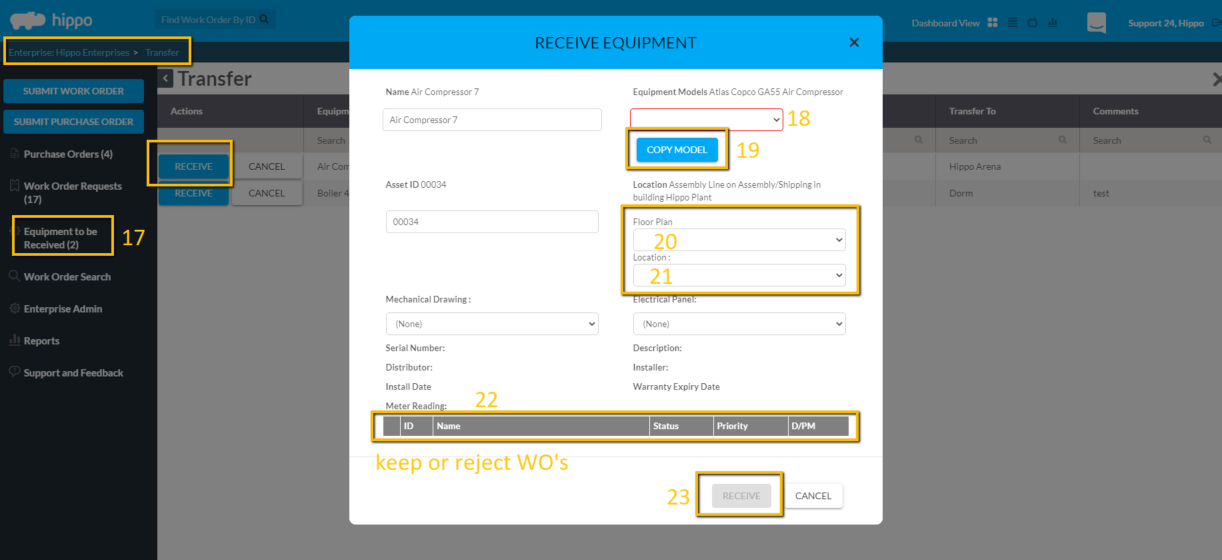
- Click on the "Equipment to be Received" panel. Click "Cancel" to reject the equipment transfer request. Click on “Receive” to transfer the equipment and add or edit the asset details. A new pop-up window called “Receive Equipment” opens. Equipment info can be edited on this form.
- The Equipment Models field is mandatory and is outlined in red. Click on the arrow in this field to view and select the Equipment Model info associated with this piece of equipment
- Click on the “Create Copy” button.
- Next, click on the arrow in the “Floor Plan” field, and select which Floor Plan this equipment is associated with.
- Click on the arrow in the “Locations” field to select the specific location within the Floor Plan that this equipment is found.
Note: Any other field in this form is optional to edit, but the existing information is based on the original data entry.
Note: you can select any work orders you want to transfer along with the equipment.
- Click on the green check icon to transfer the existing work order to the new facility or click on the red x icon to cancel the work order.
- Once all information has been reviewed, click on the “Receive” button at the very bottom of the form.
The equipment and work orders are now in the new facility and are visible in the new Facility Admin, Equipment grid.
