Plot Locations
Learn about the Plot Sections grid.
This article shows a User how to plot Locations to Hippo. This can only be done with the Advanced View version of the software.
Definitions
Plotting Location: To add a location icon to a floor plan so a User can quickly submit and find a work order by location.
Instructions
- Enter a Facility, access the Facility Admin Panel
- Open the Plot Locations grid.
- Choose the Floor Plan of a location as indicated below.
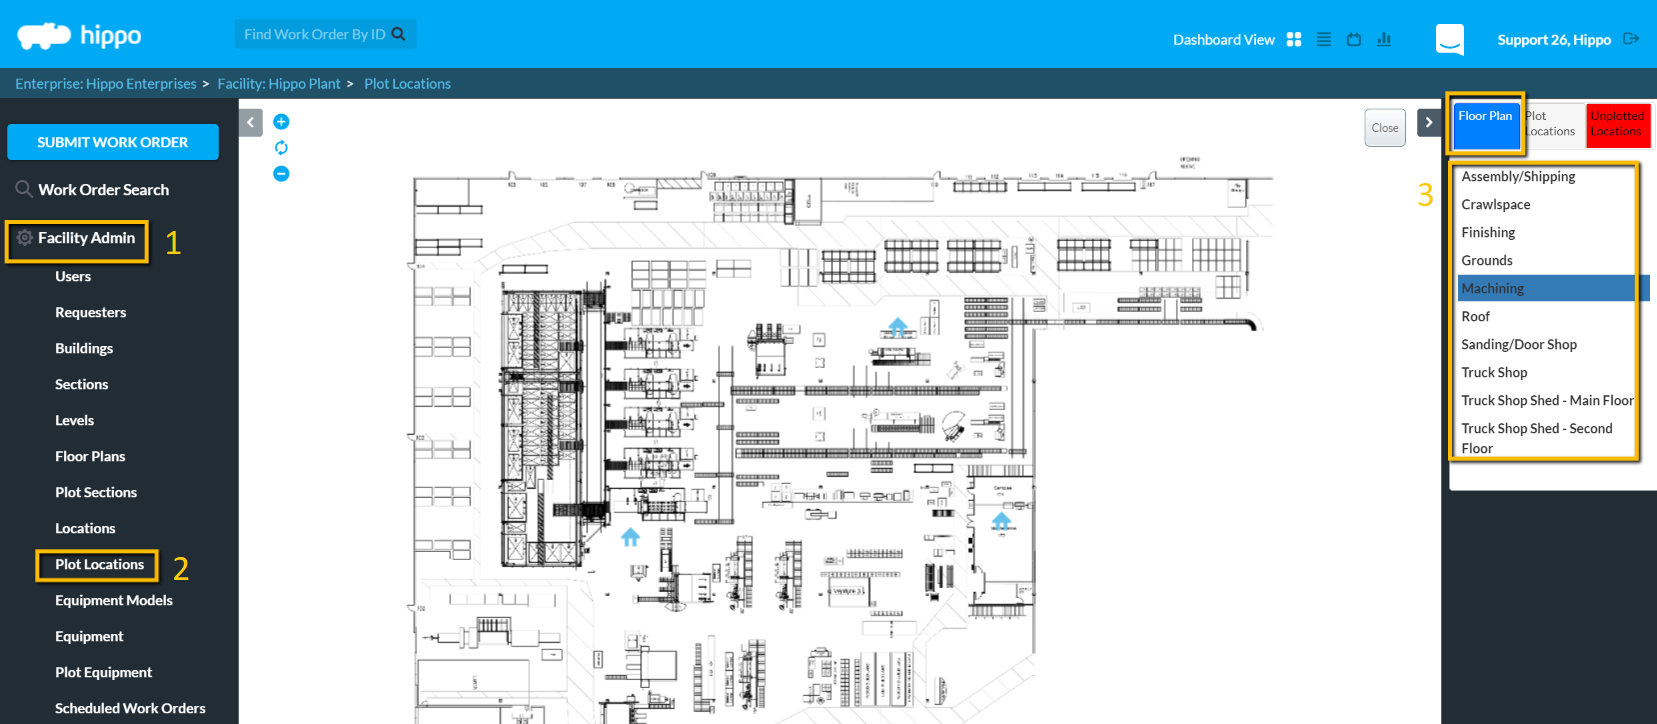
- The designated Floor Plan will show, then click on the “Unplotted Locations” tab.
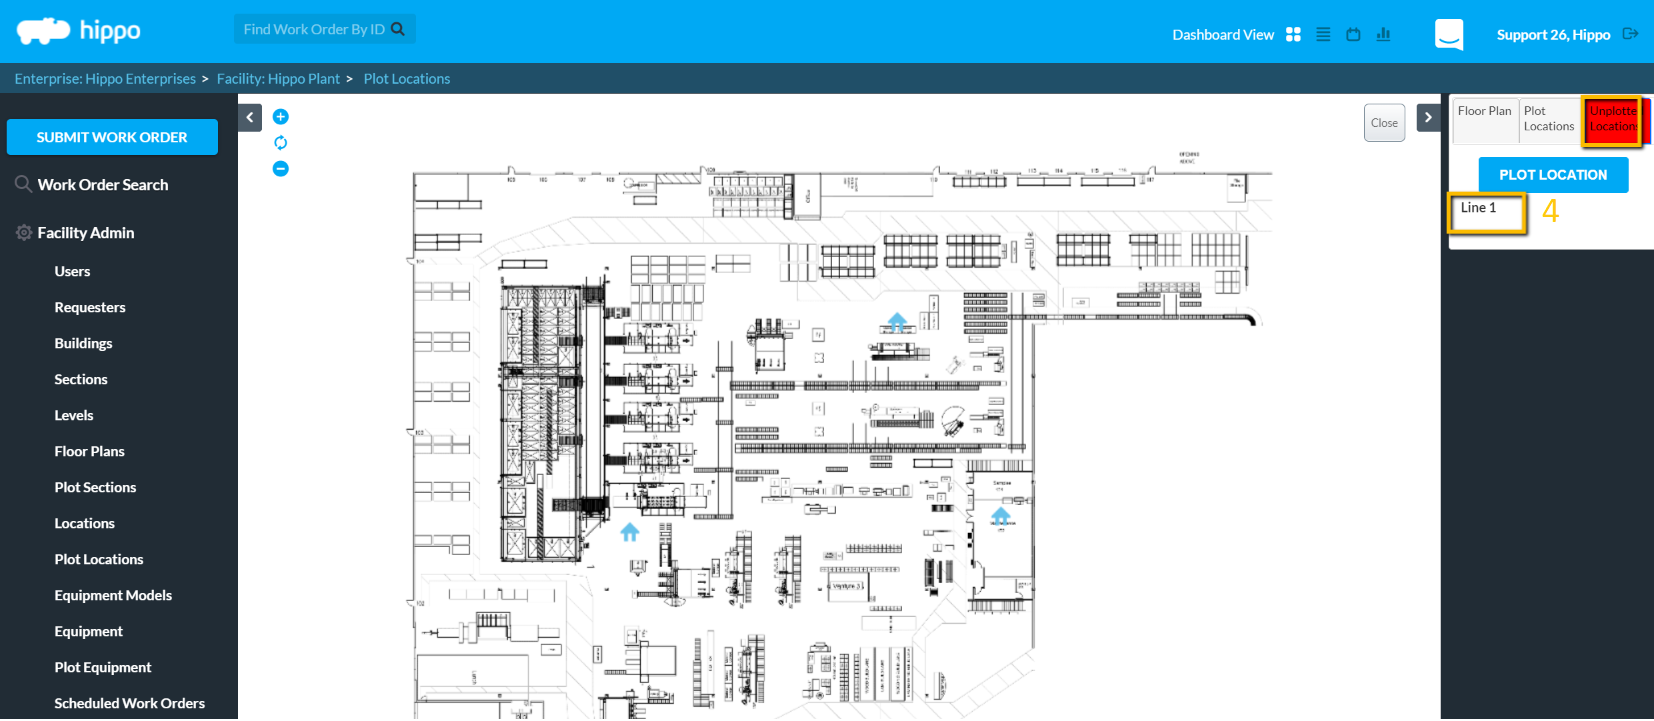
- To plot the “unplotted locations”, click on one of the locations.
- Click on the “Plot Location” button.
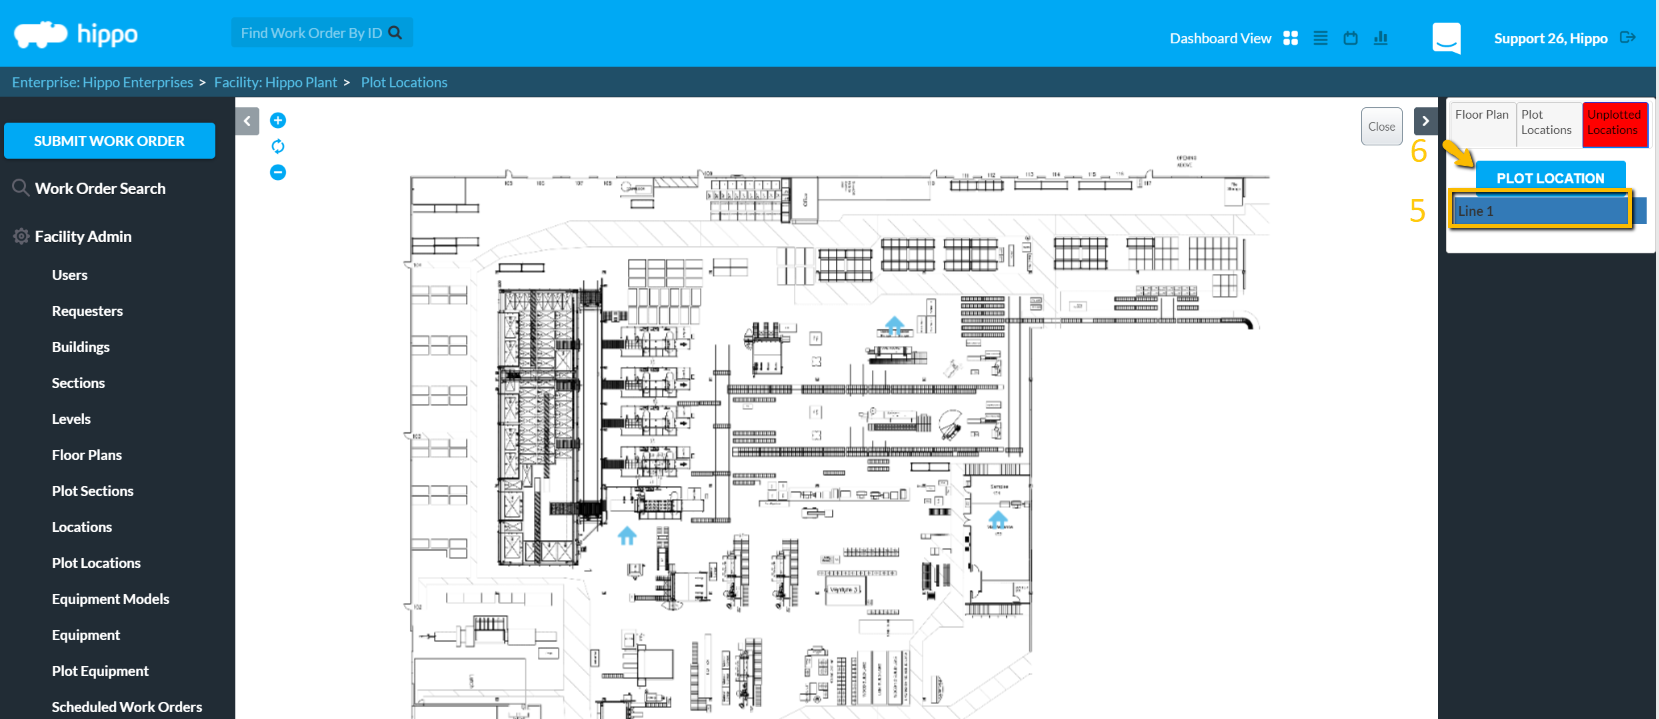
Note: By default, the plotted location will appear in the top left corner of the screen as a House.

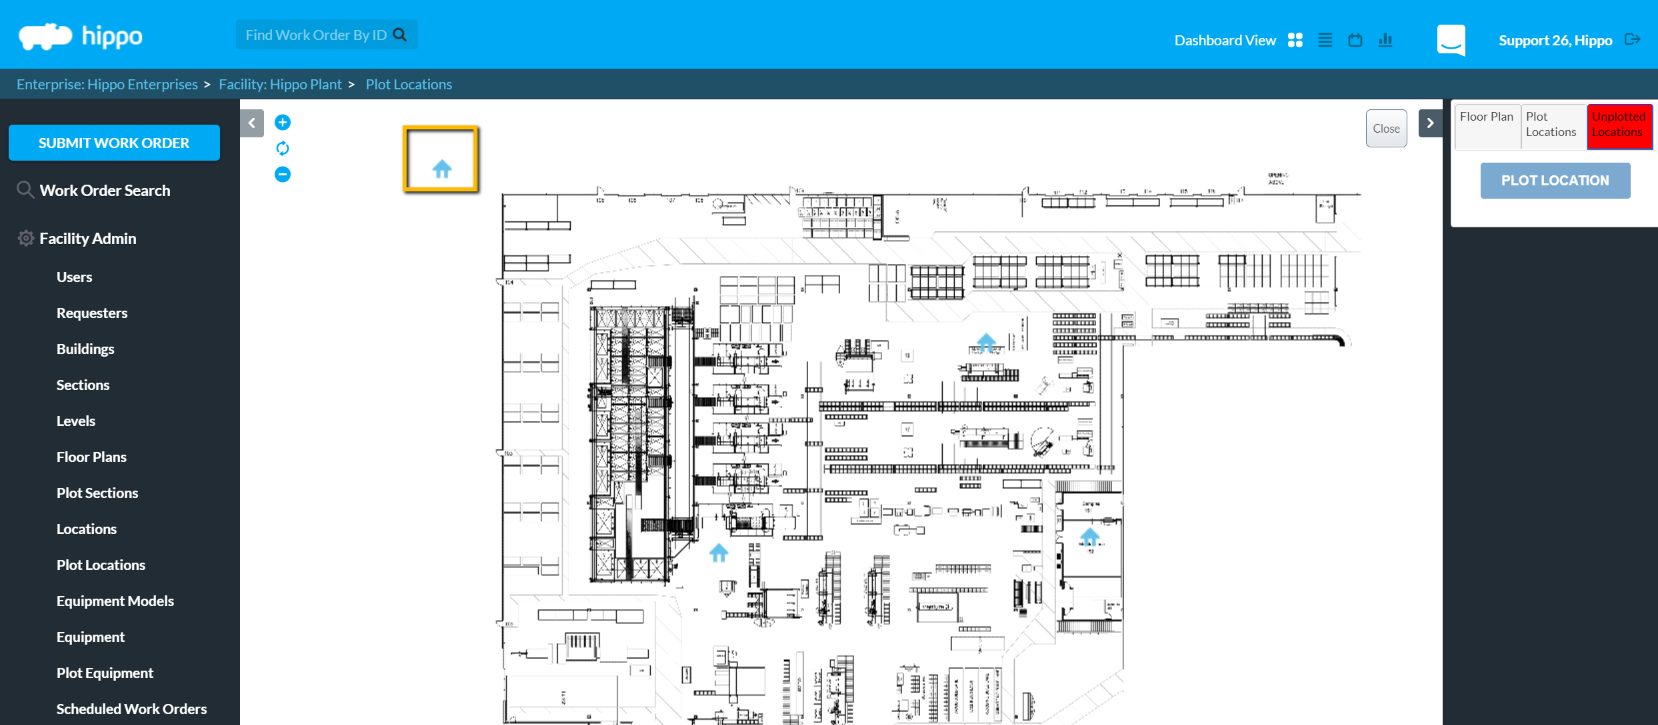
Drag the House icon from the corner and on to an appropriate place on the Floor Plan.
- A User can view a list of all plotted locations under the ‘Plotted Locations’ tab.
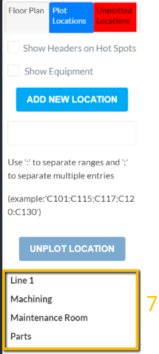
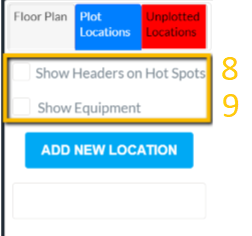
- A User can also choose to Show Headers on Hot spots, which will make the name of the location appear next to the house icon, so he/she can tell one location from another.
- A User can also choose to show all Equipment on the floor plan by checking off the “Show Equipment” box.
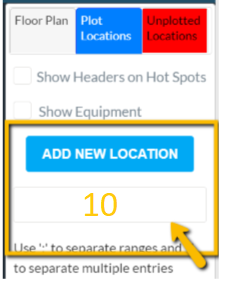
- A User can add new locations from the Plotted Locations tab as well. First, select the floor plan a User wishes to add locations to from the Floor Plan tab, then click on the “Plotted Locations” tab. Enter the name of the location desired to be added, and then click on “Add New Location”(s). The location will be found under the Unplotted Locations tab for a plot.
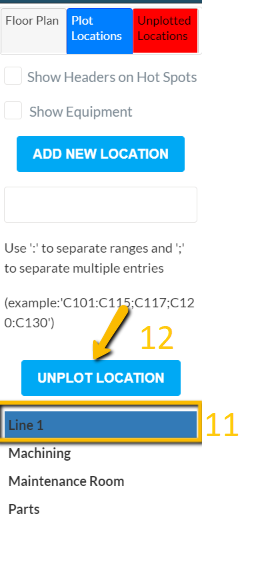
- To unplot a location, click on the name of the location to be unplotted under the Plotted Location tab.
- Click on “Unplot Location”.
- When finished, click on the “Close” button in the upper right corner.