How to Copy User Permissions
Step 1: Create a New User
Go to the Users grid under Enterprise Admin. To create a a new User, click the add icon in the top-right corner of the Users grid. Fill in the details for the new User. At a minimum, you need to include their First Name, Last Name, and User ID. You don't want to give this User any permissions yet, so uncheck "Open permissions popup after saving". Then click "Save". The new User jumps into alphabetical order on the grid.
Step 2: Find Your Template User
You need to find a template User or an existing User in Hippo that has the same role as the new User you just created. Click the key icon to the left of the template User's name to open their permission form. Notice that on the "Edit Permissions" form the permissions assigned to this template User are marked by a checkmark.

Step 3: Select Your New User's Name
With your template User permissions displayed, add a check in the box next to the new User's name, under the User tab to the right.
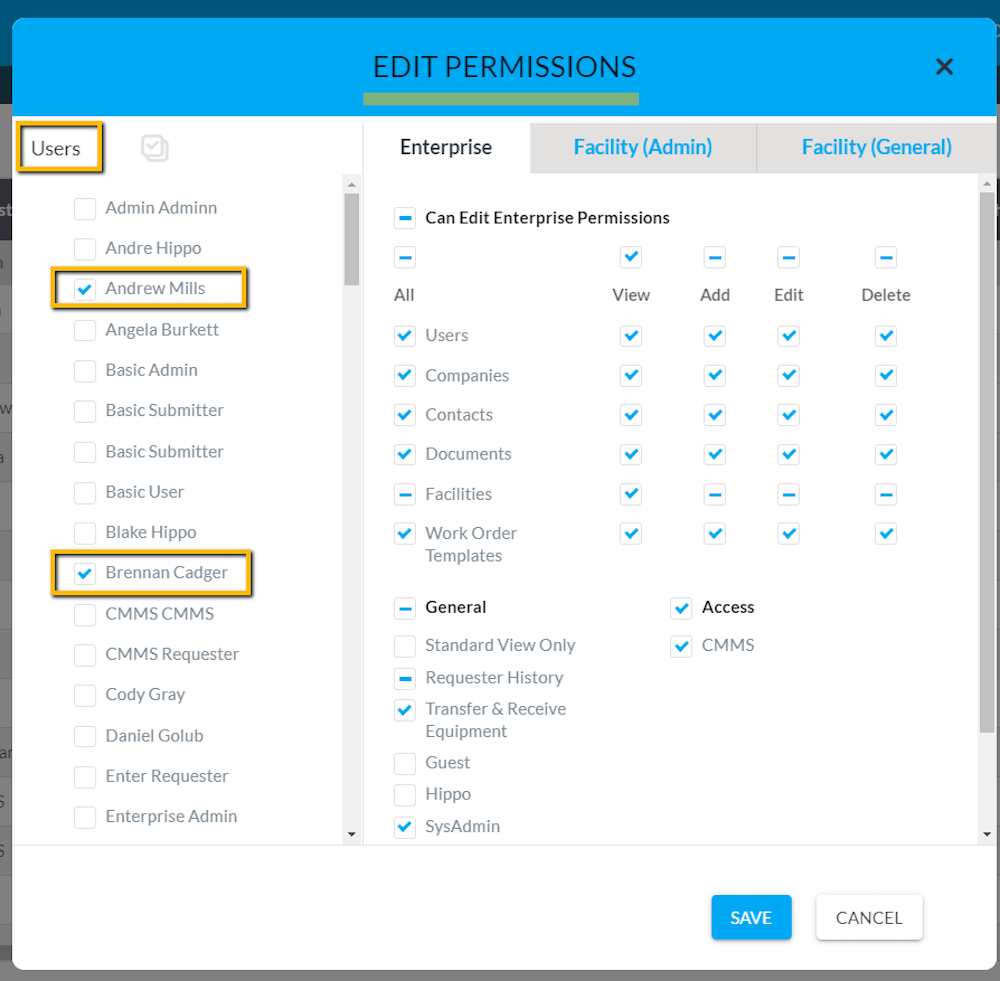
Note: All permissions may now have a dash instead of a checkmark. There are two rules of thumb for permissions:
- A checkmark means that permission is enabled for all selected Users and in all selected facilities
- A dash means that permission is enabled for only some Users in the selected facilities
Keeping that in mind, to copy the permissions from the template User to your newly created User, you need to turn the dashes to checkmarks.
Step 4: Copy Permissions to the New User
All you need to do now is to click any dash that appears next to a permission. Then hit Save at the bottom of the form.
Important: Make sure to avoid the section titles and the All checkbox representing a full row of permissions. This turns the dash into a checkmark, and now these permission are enabled for both Users on all the currently selected facilities.
Important: If by mistake, you click the section titles or the All checkbox or click an empty permission's checkbox, you can always back out by clicking the Cancel button and restarting from Step 2.
Step 5: Verify Your New User's Permissions
To verify your User's new permissions, reopen their permissions and check which permissions have a checkmark next to them. If you want to verify against your template User, find that user in the Users list and select their name. This should maintain all individual permissions with a checkmark next to them. Don't worry about the titles of subsections. For example, the Work Orders subsection is still a dash because there are a couple of individual permissions under it that are unchecked.