Set up G Suite SSO with Hippo
Introduction
This tech note discusses how to set up G Suite Single Sign On (SSO) with Hippo V6.
What is Single Sign On (SSO)
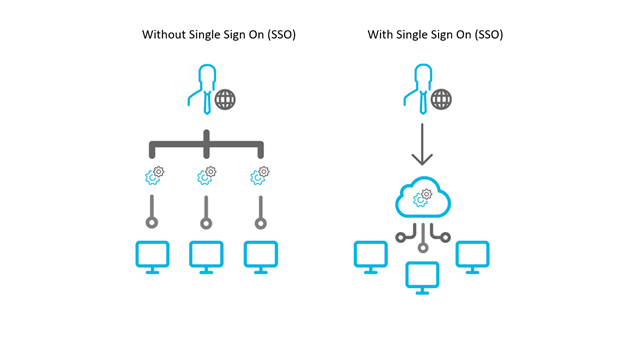
Single Sign On (SSO) is a new feature utilized by Hippo that simplifies the login procedure.
Single Sign On (SSO) is an authentication process that allows the user to access multiple applications with a single set of login credentials (username and password). One of these applications can be Hippo CMMS.
How does It work?
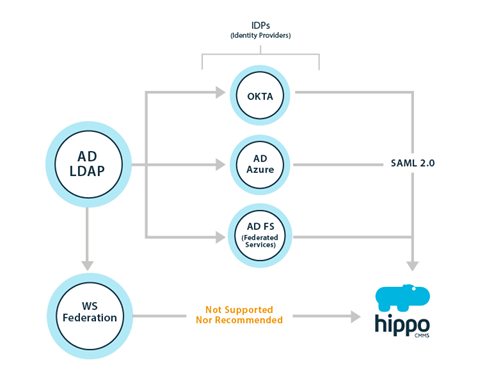
In Hippo, SSO is managed by an identity provider. The role of an identity provider is to allow for reliable integration for SSO to all your applications, including Hippo. Examples of identity providers include Active Directory Federated Services (AD FS), Active Directory Azure, and Okta.
I have G Suite. How do I set it up to work with Hippo?
The following steps are intended to walk you through the process of connecting your G Suite instance with Hippo CMMS.
- Sign in to your Google Admin console (https://admin.google.com) using an administrator account.
- From the Admin console Home page, go to Apps and then SAML Apps. To see Apps on the Home page, you might have to click More controls at the bottom.
- Click the plus (+) icon in the bottom corner
- Click Set up my own custom app.
The Google IDP Information window opens and the Single Sign-On URL and the Entity ID URL fields automatically populate.
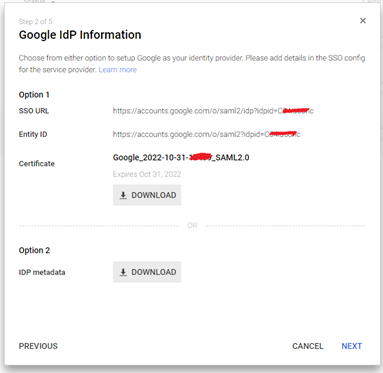
- Copy the Single Sign-On URL and the Entity ID URL as you will need to send this to Hippo CMMS at the end of this technote. We recommend pasting this information into notepad.
- Next, click the download button in the certificate row. This will download the certificate in a .pem file. This file can be opened in notepad.
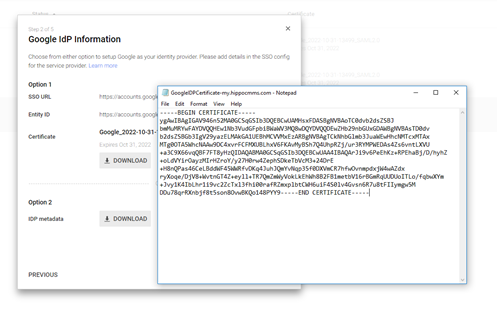
- Copy the certificate and combine with the Single Sign-On URL and the Entity ID URL information.
- Click next in the Google IdP information window. You should now see the Basic Application Information Window:
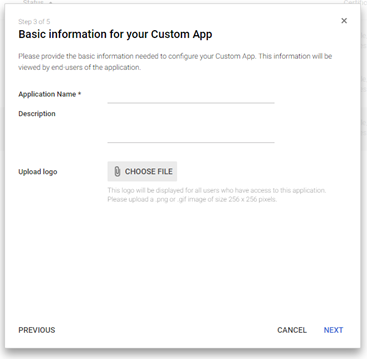
- In the Basic Application Information window, type in Hippo CMMS as the application name. (Optional: you can also add a description)
- Click Choose file next to the Upload Logo field to upload a PNG or GIF file to serve as an icon. The file size should be 256 pixels square. You can use this image as an example. In the attachments section at the bottom of this technote, you can download this file.

- In the Service Provider Details window, enter https://auth.hippocmms.com/sso/provi...nt_id=clientID replacing ClientID with your Hippo’s client ID, into the ACS URL. (Note that there's no trailing slash at the end of the URL)
- Enter https://auth.hippocmms.com into the Entity ID. (Note that there's no trailing slash at the end of the URL)
- Leave start URL empty.
- Leave signed response unchecked.
- Select EMAIL as Name ID format.
- Click next to proceed to Attribute Mapping. Add 3 attributes as per the image below. Click finish.
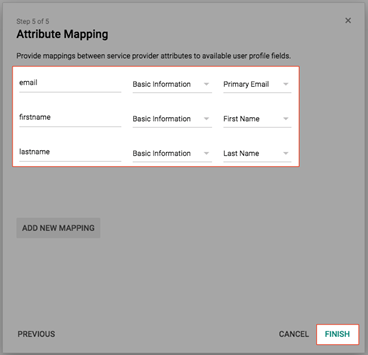
- You will now see Hippo CMMS added in your SAML apps.

- Next, click on the three vertical dots on the right side of the screen.
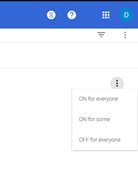
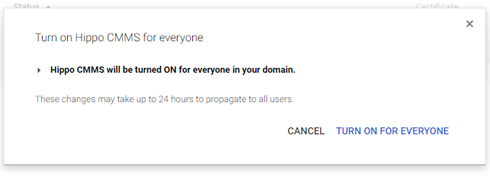
- Click “ON for everyone” to enable Hippo CMMS SSO for all users in your organization. Please note that it may take up to 24 hours to propagate to all users.
- Please send the information collected in Step 7 to support@hippocmms.com along with your ClientID:
- Single Sign-On Service URL
- Entity ID
- The signing certificate file (downloaded in step 6)
