Set up Azure Active Directory SSO with Hippo
What is Single Sign On (SSO)
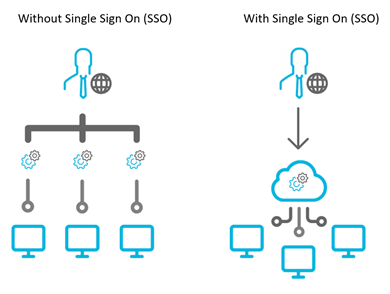
Single Sign On (SSO) is a new feature utilized by Hippo that simplifies the login procedure.
Single Sign On (SSO) is an authentication process that allows the user to access multiple applications with a single set of login credentials (username and password). One of these applications can be Hippo CMMS.
How does It work?
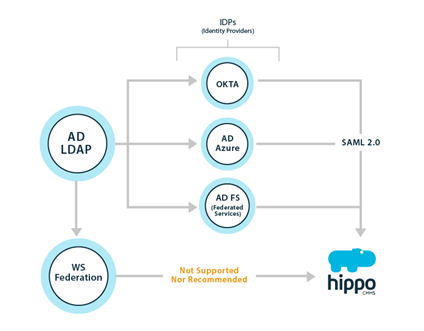
In Hippo, SSO is managed by an identity provider. The role of an identity provider is to allow for reliable integration for SSO to all your applications, including Hippo. Examples of identity providers include Active Directory Federated Services (AD FS), Active Directory Azure, and Okta.
I have Azure Active Directory. How do I set it up to work with Hippo?
The following steps are intended to walk you through the process of connecting your Azure Active Directory instance with Hippo CMMS. This information comes from Azure and is subject to change. You can view Microsoft documentation here.
- Login to Azure Active Directory.
Note: If you do not have an Azure subscription yet, you must create an Azure subscription by clicking Try it now link here: http://azure.microsoft.com/en-us/pricing/free-trial/
This will need to be a Microsoft Account, but because this account will have access to your Active Directory, it is recommended that this be an institutional account like your school email address.
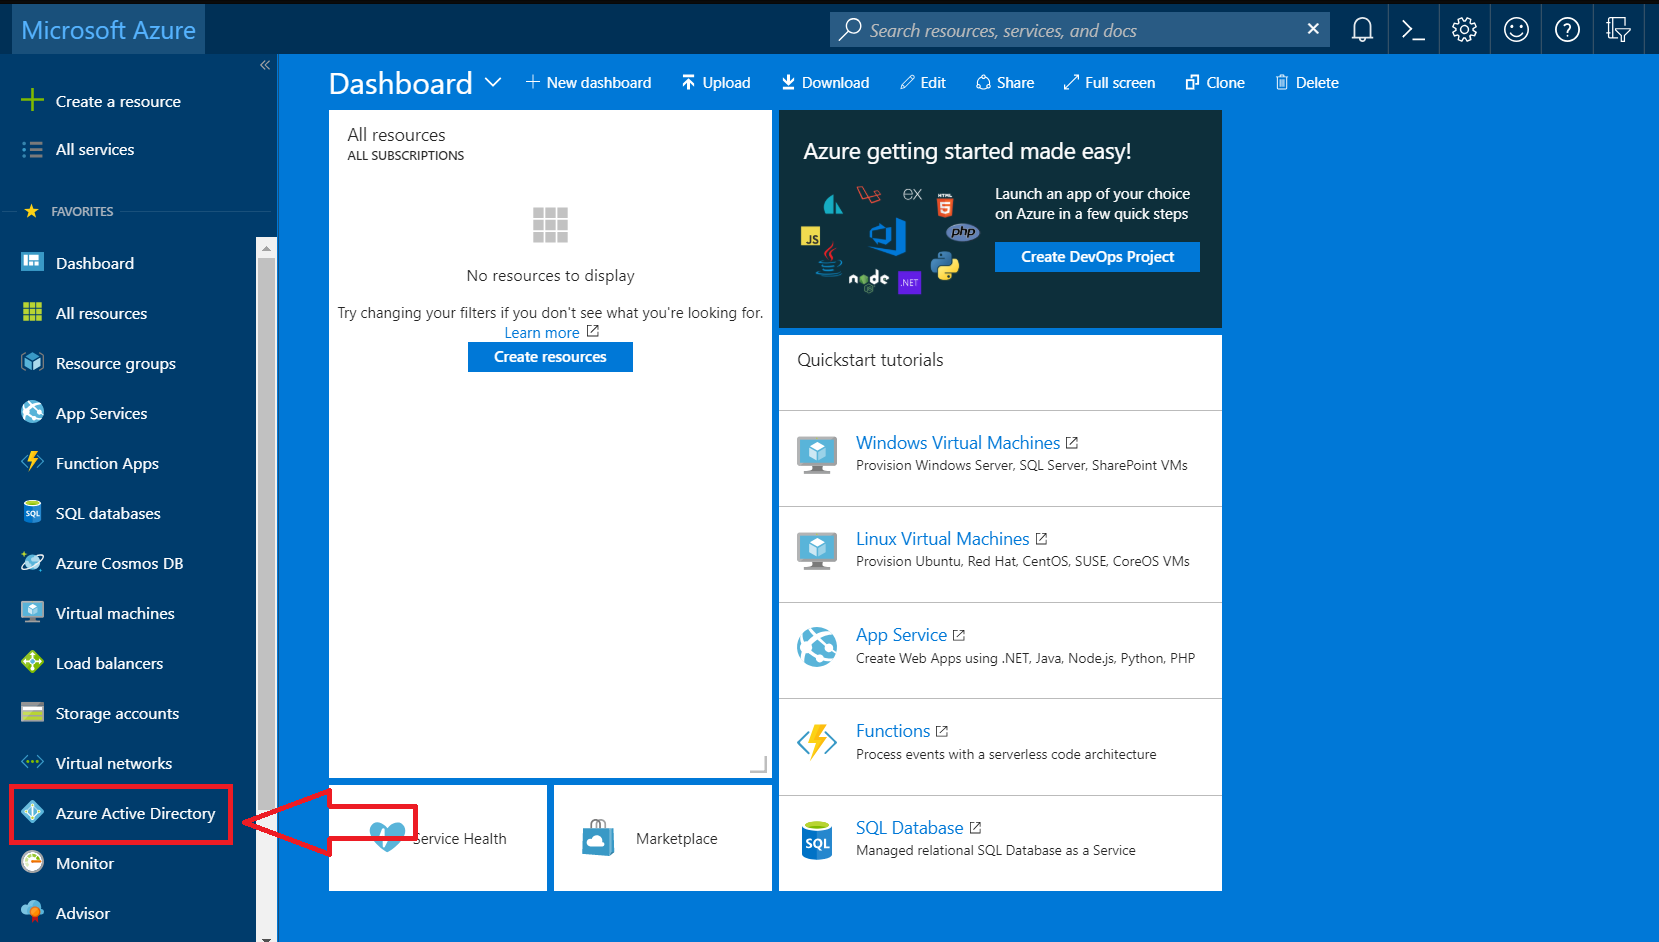
- Select the Azure Active Directory in the menu on the left
Scroll down until you see the Active Directory option. Click Active Directory to select it.
- Add an Active Directory if necessary
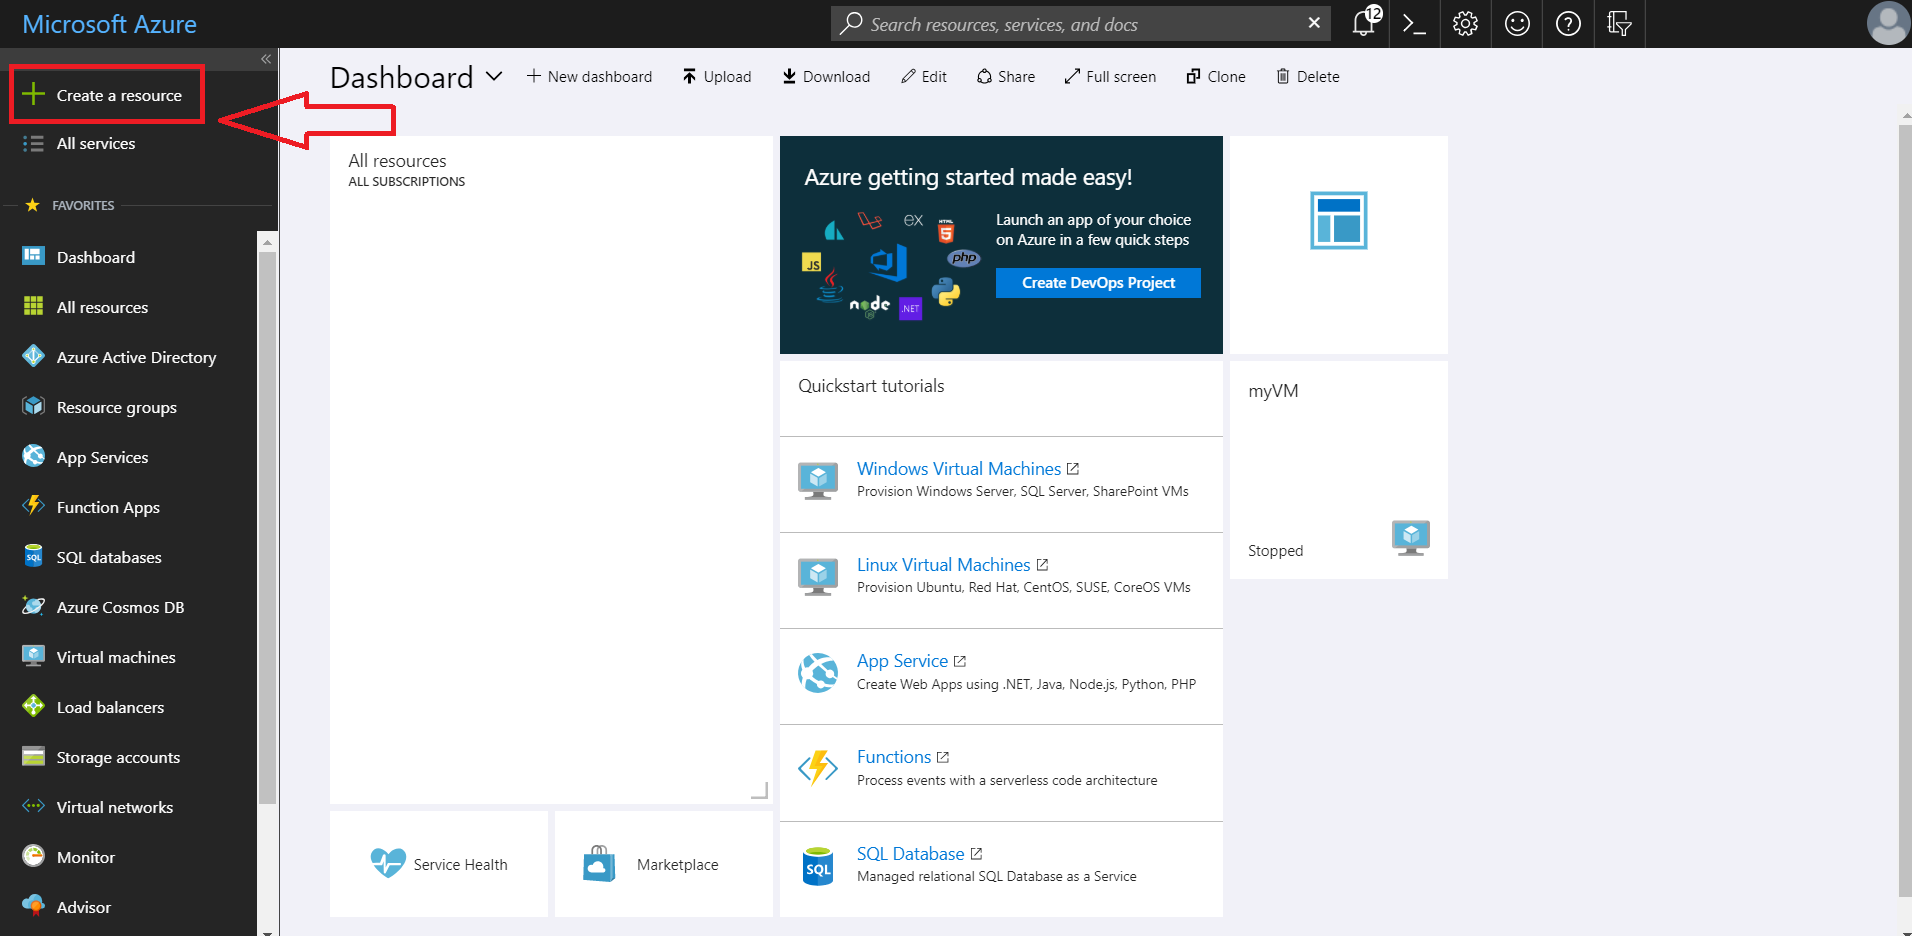
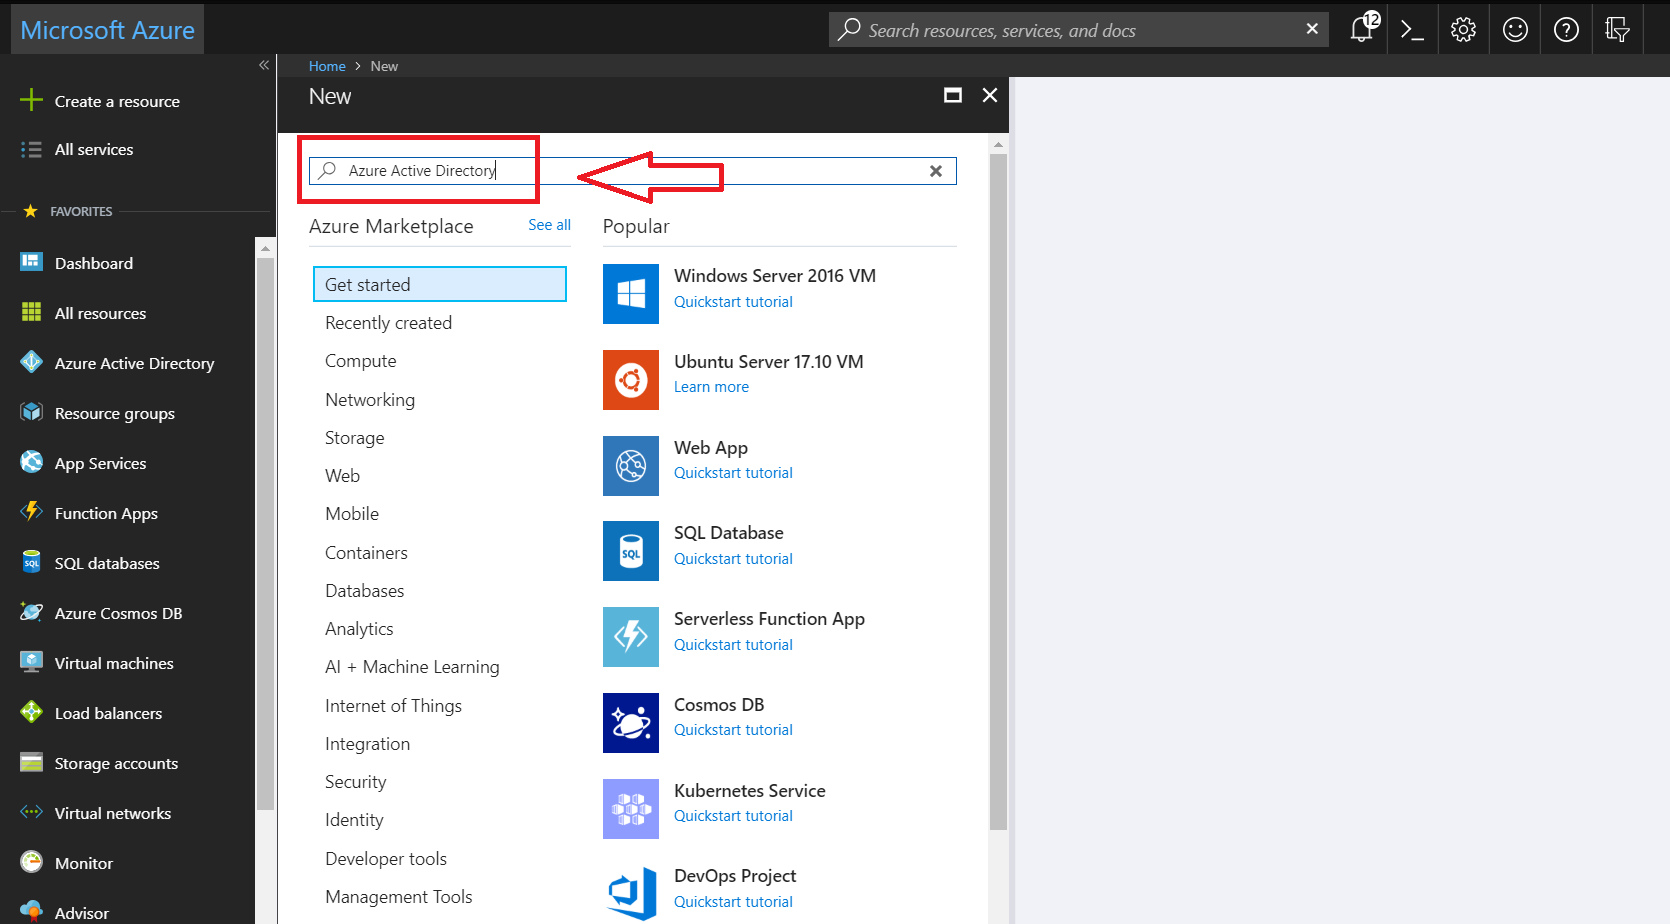
If you don't see the directory you want to use here, you're going to have to add the directory. Please perform the following steps. If you already have an Azure Active Directory, jump to Step 4 of this technote.- Click create a resource
- In the search field, type in Azure Active Directory
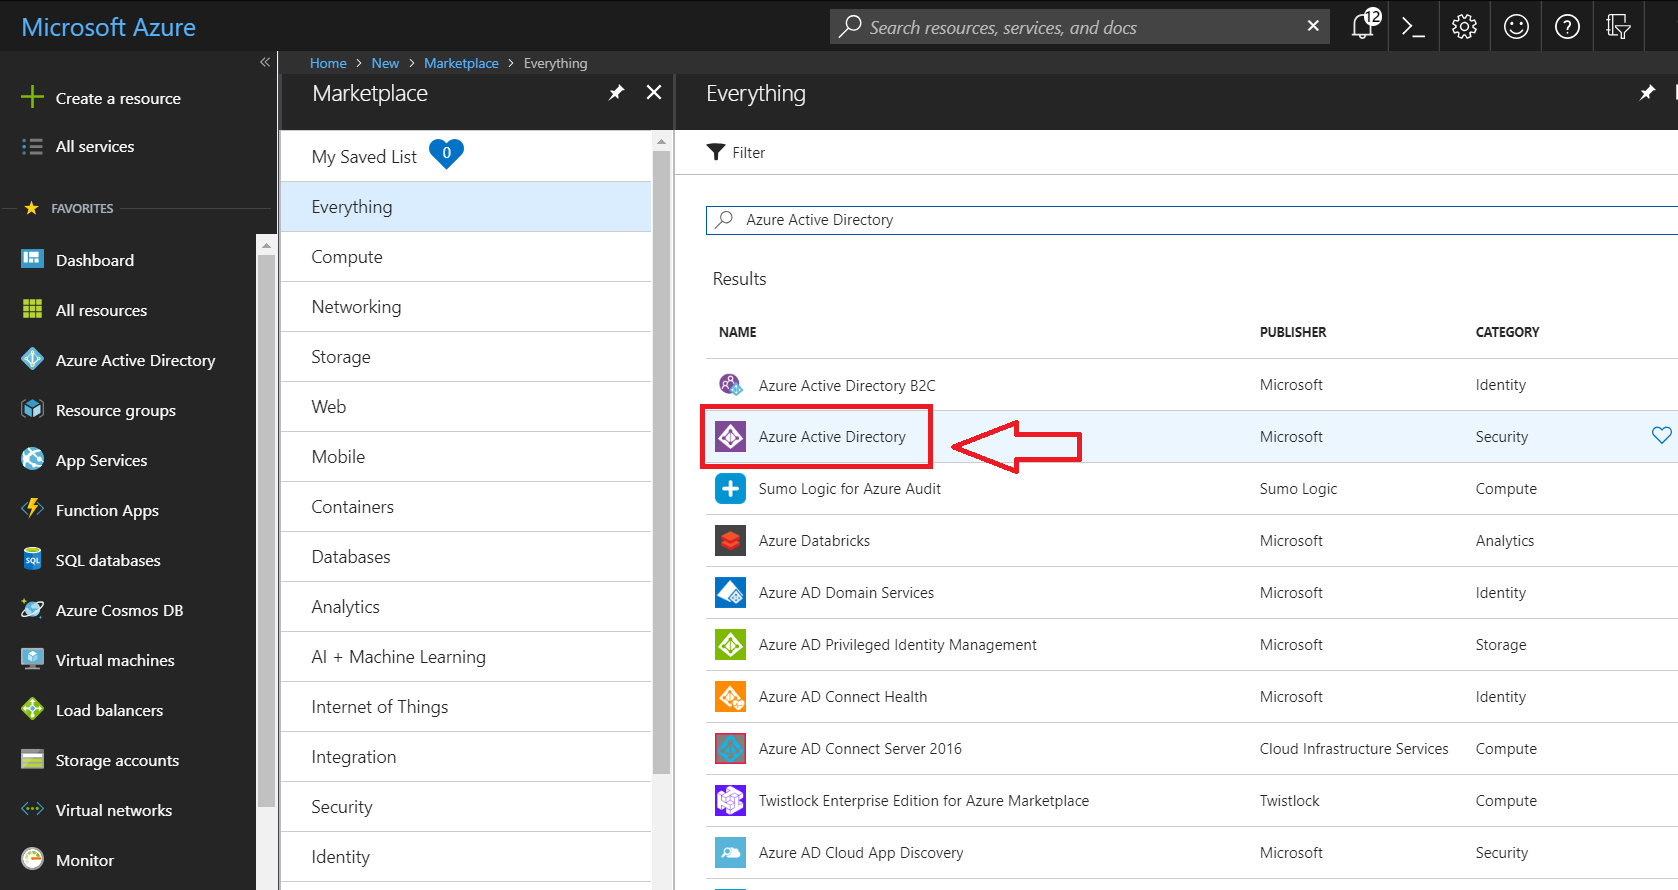
- Click on Azure Active Directory
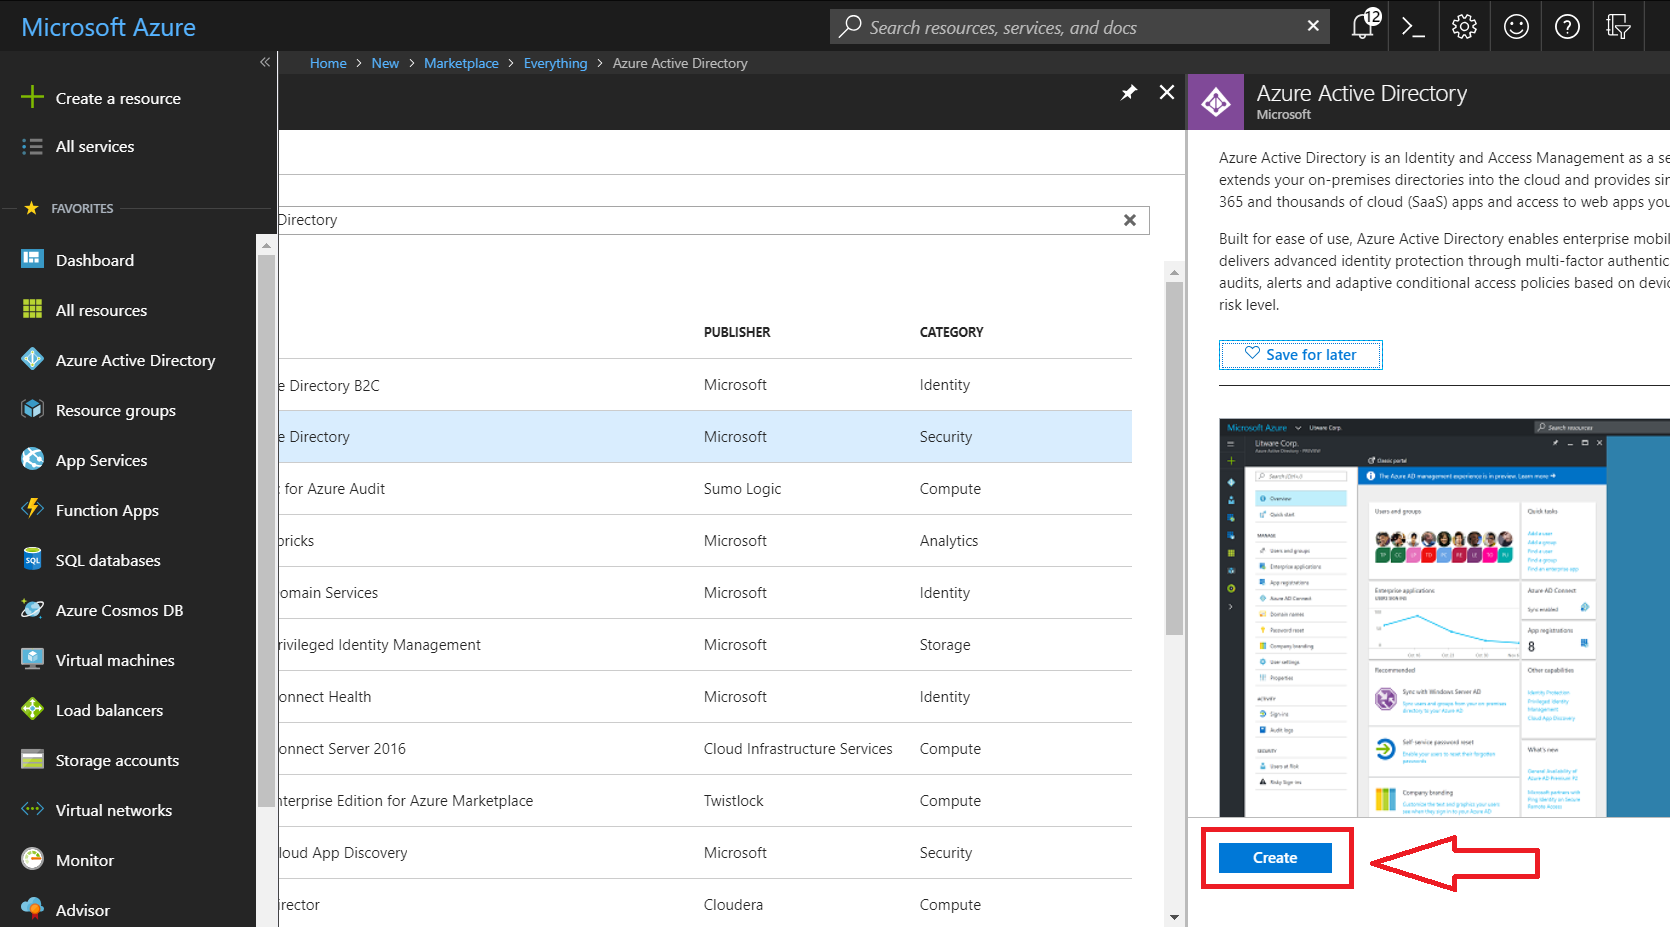
- Click create
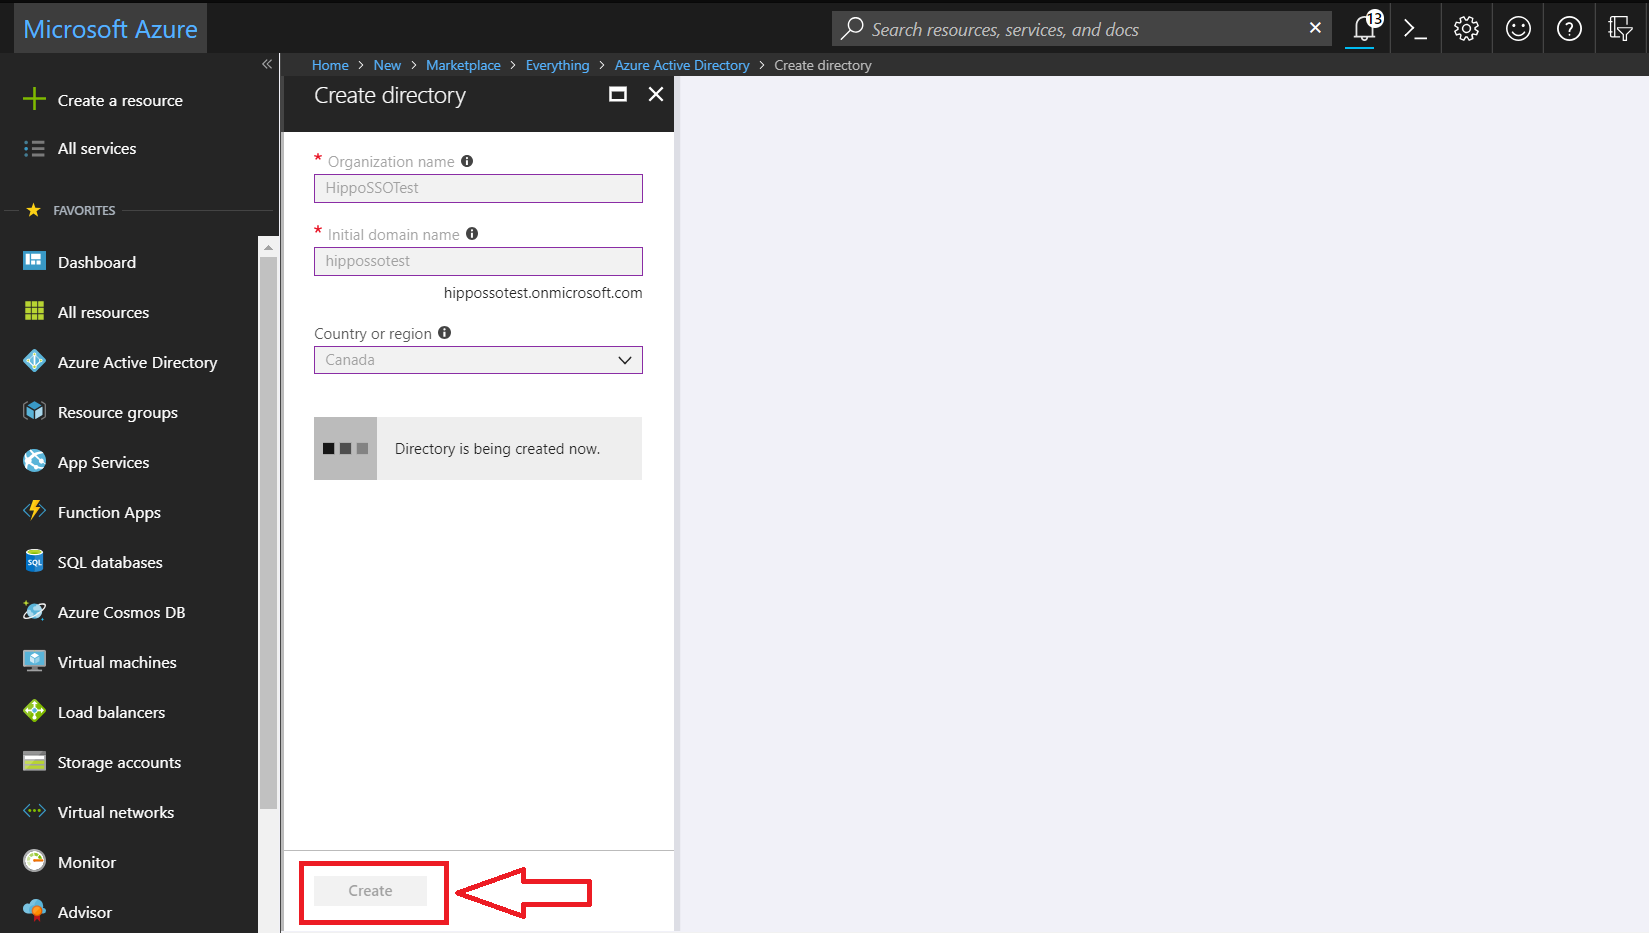
- Enter your Organization name and Initial domain name. By default, a basic domain name at onmicrosoft.com is included with your directory. Later, you can add a domain name that your organization already uses, such as contoso.com
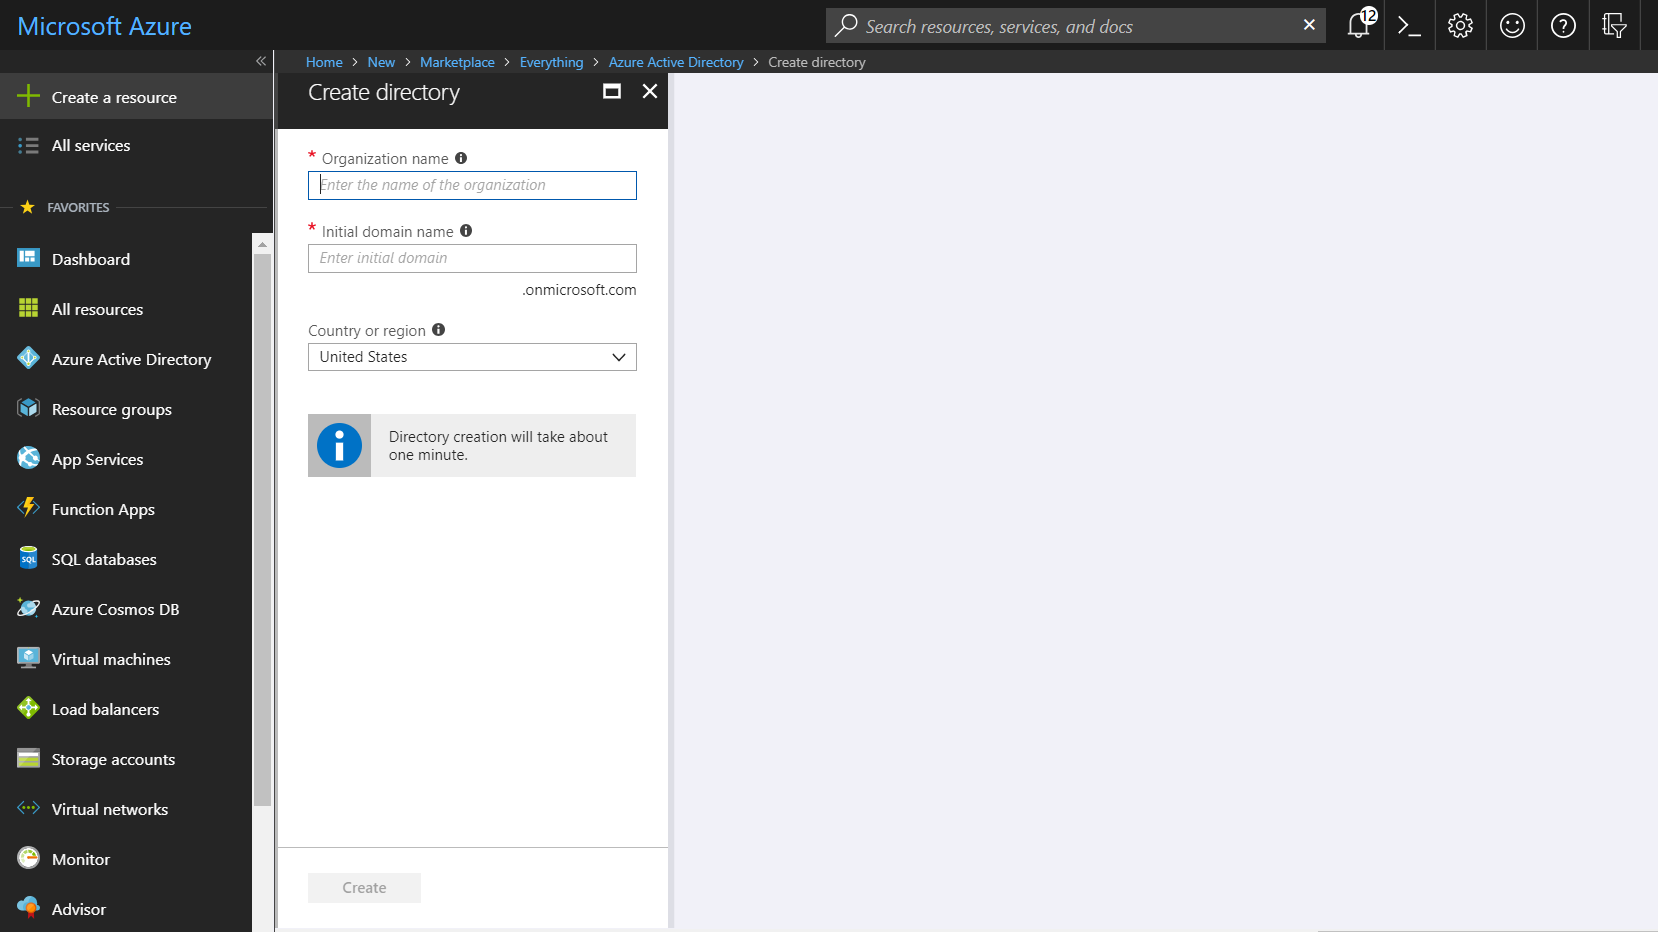
- Click create, and the directory will begin to create.
- Once directory has been created, click on the blue “here” text access the directory.
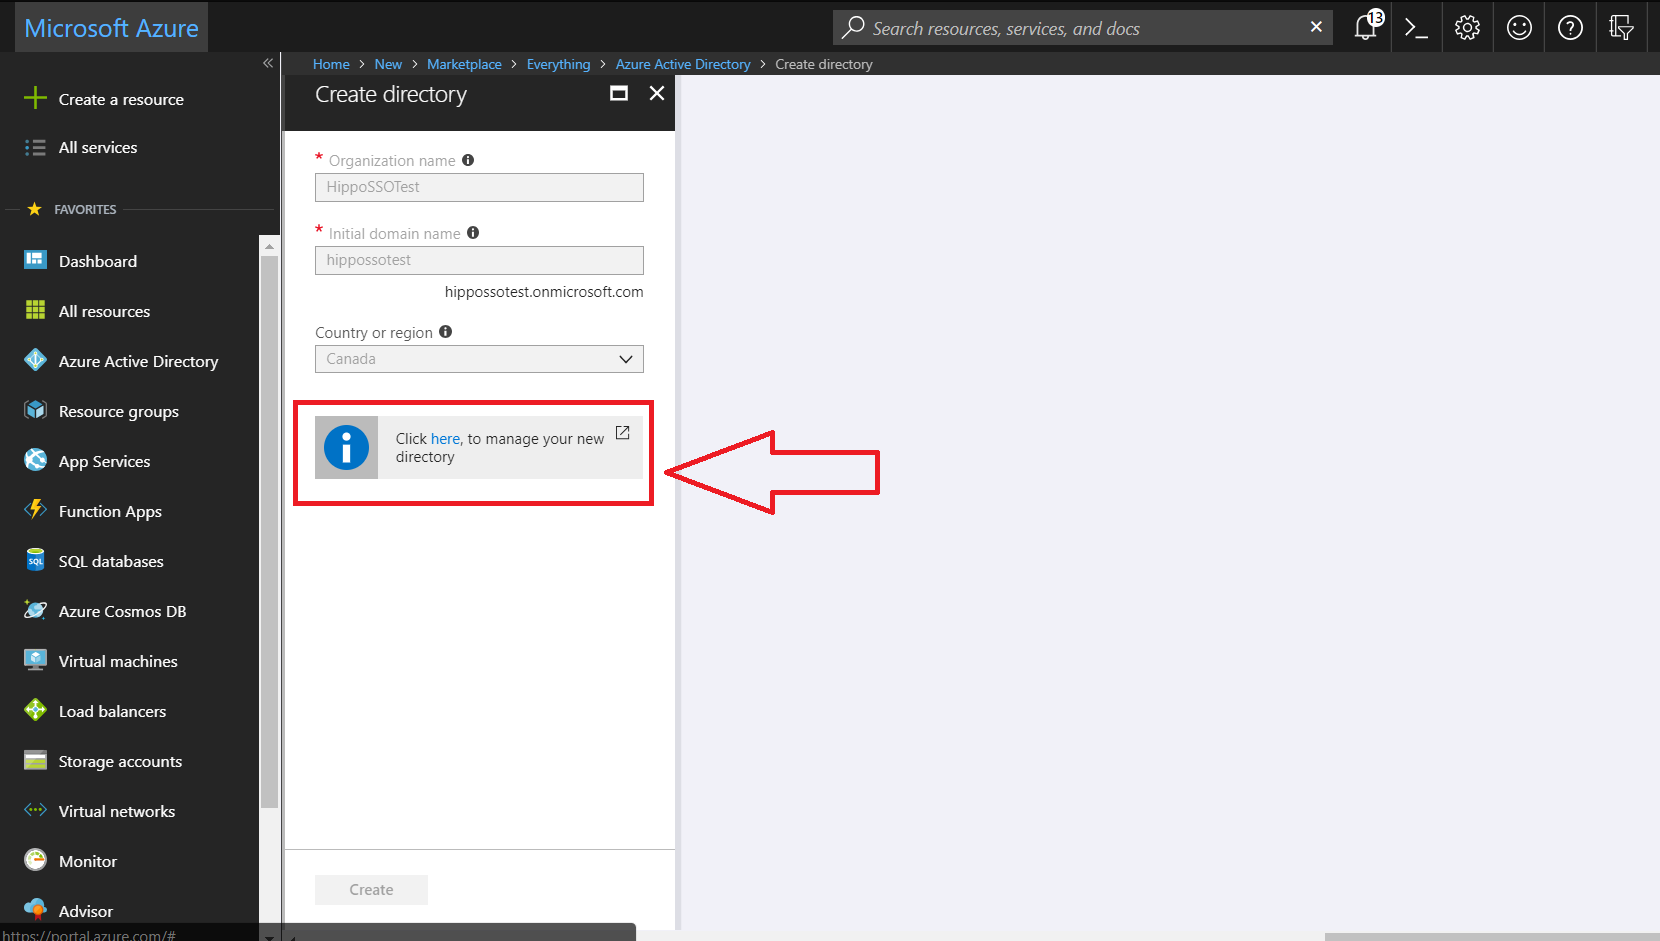
Please refer to https://docs.microsoft.com/en-us/azu...arted-azure-ad for more information on how to manage your Azure Active Directory.
- Click create a resource
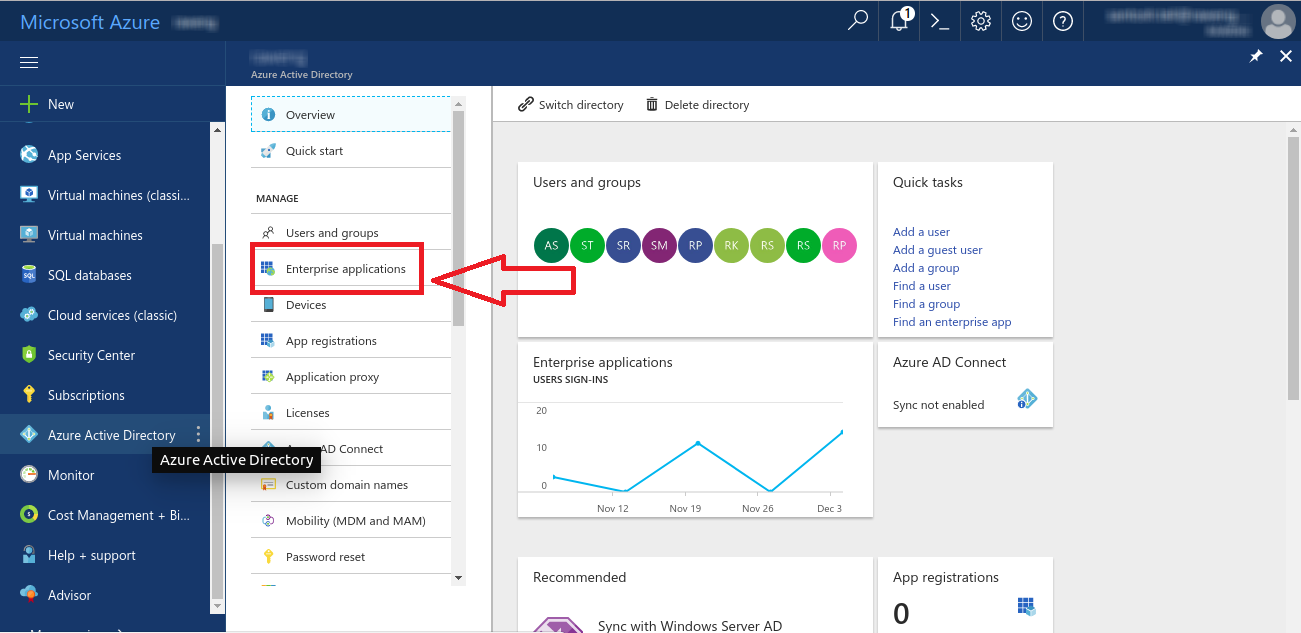
- From the overview, Select Enterprise Applications.
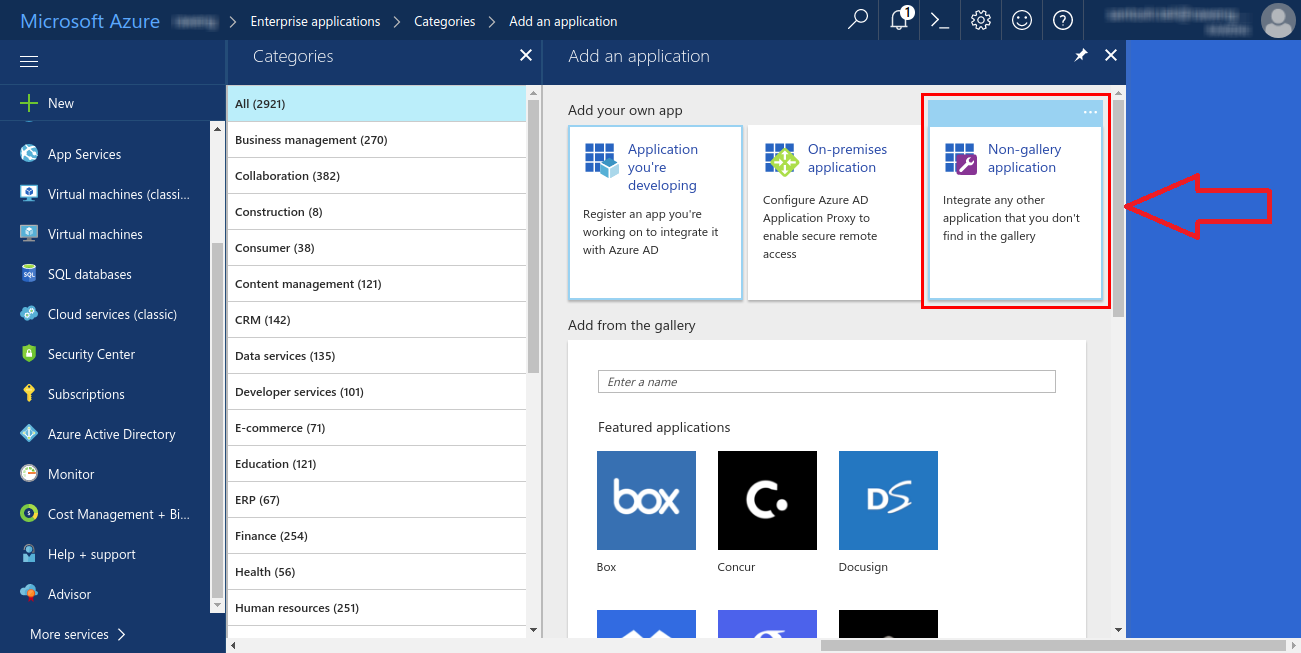
- From the top, Click new application
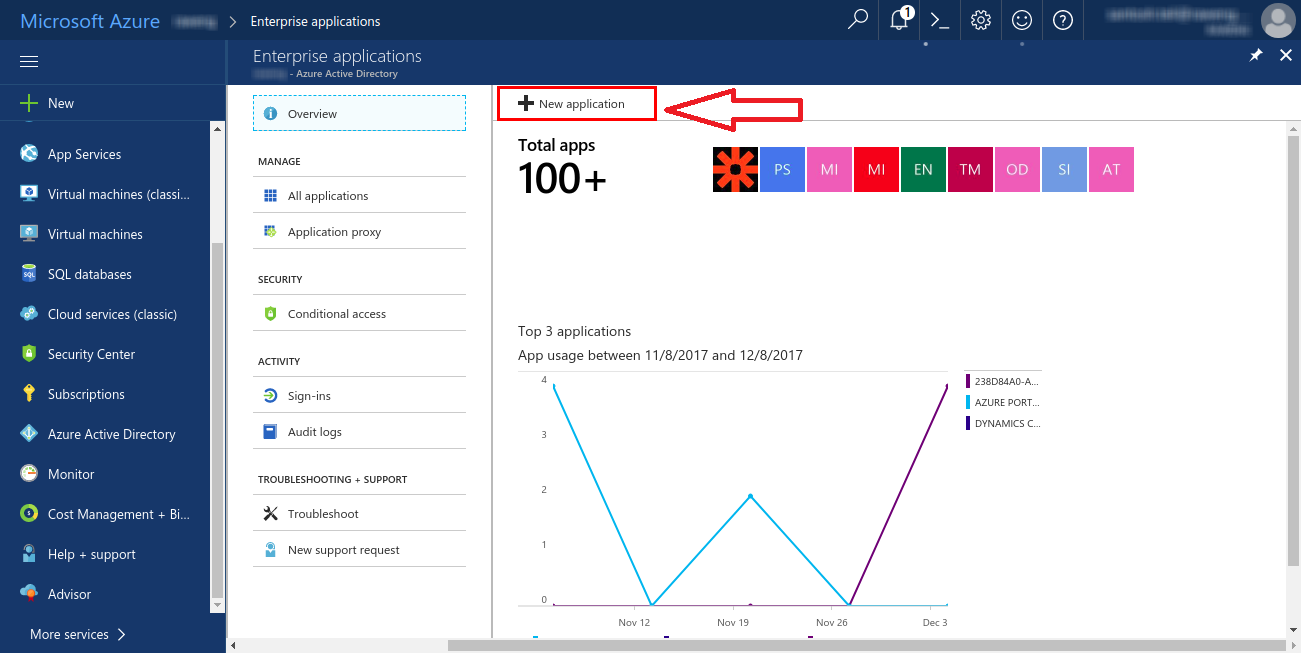
- Select Non-gallery application. This will allow you to create a new application that is not already present in the gallery.
- Provide a name, e.g. ‘Hippo CMMS’. Click on ‘Add’.
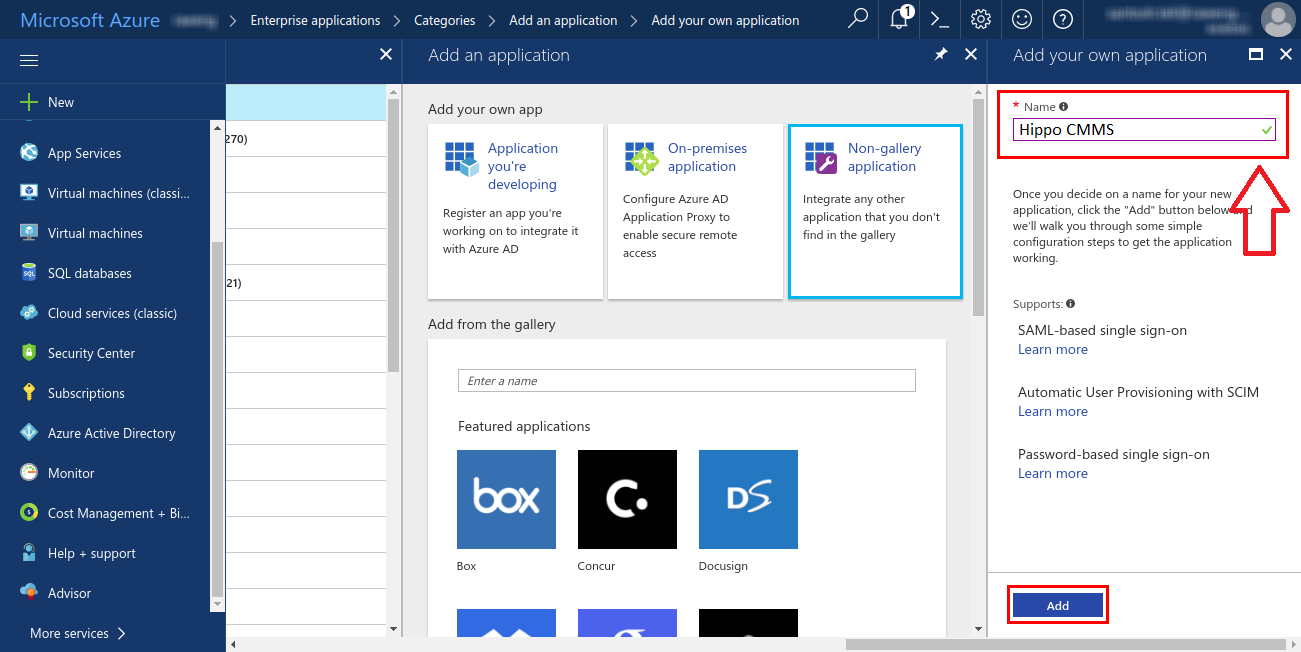
- This will lead you to the ‘Quick start’ page that will lead you to the further steps that you can perform after creating your app. The steps include assigning users to your app, creating a test user for testing your app, configuring our app to use Azure AD as identity provider, and so on.
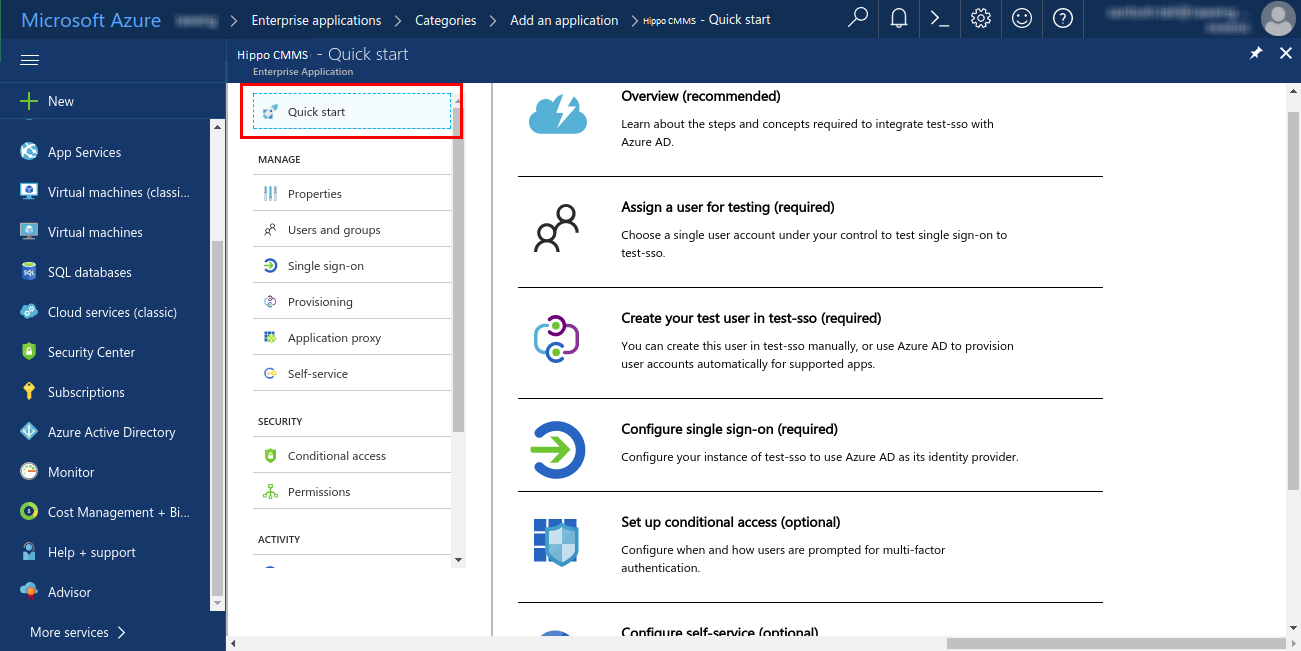
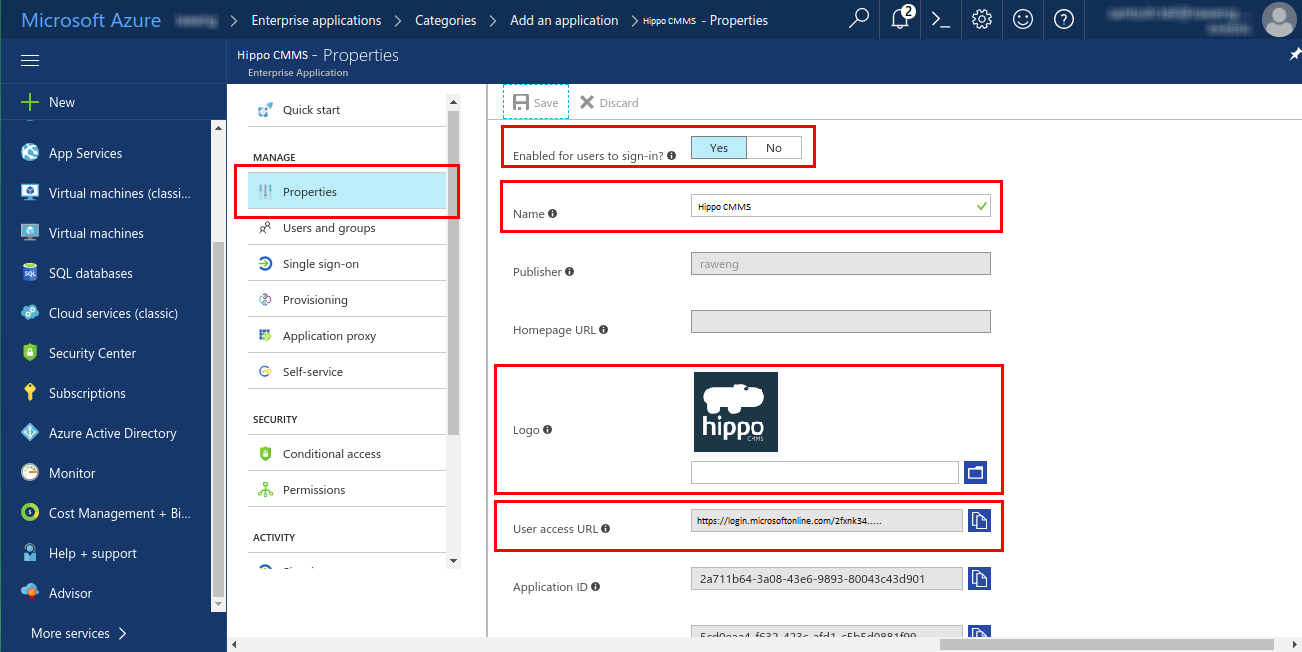
- Now, click on ‘Properties’ on the left navigation panel. Here, you can enable the application for users to sign in, and provide your application a name and a logo. In the attachments section at the bottom of this technote, you can download the Hippo logo.
- Next, you need to enable Azure AD single sign-on in the Azure portal and configure single sign-on in your Hippo CMMS application. Click on ‘Single sign-on’ in the left navigation panel.
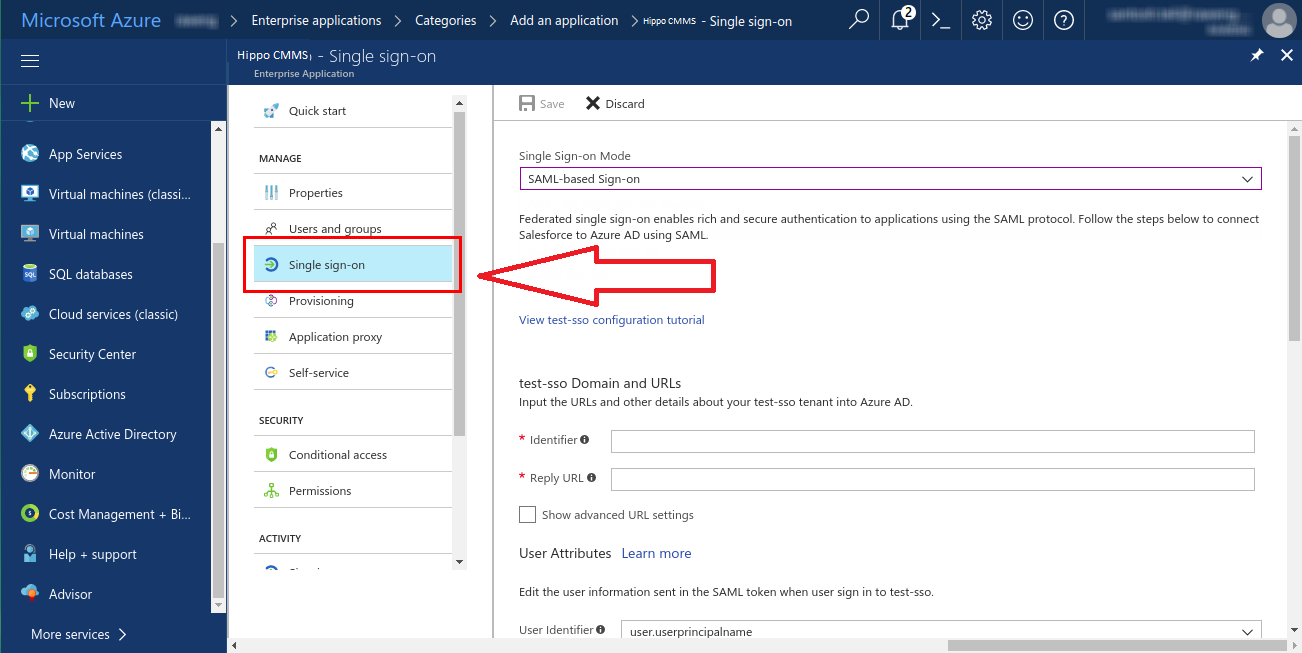
- Select ‘Single Sign-on Mode’ as ‘SAML-based Sign-on. This will enable single sign-on.
On the ‘Hippo CMMS Domain and URLs’ section, add the details given below:- In the ‘Identifier’ textbox, enter the ‘Entity ID’ of Hippo: https://auth.hippocmms.com
or
https://auth.hippocmms.ca (If your login URL ends with .CA)
(Note that there's no trailing slash at the end of the URL). - In the ‘Reply URL’ textbox, enter:
US- https://auth.hippocmms.com/sso/provi...nt_id=clientID
or
CAD- https://auth.hippocmms.ca/sso/provid...nt_id=clientID - into Reply URL replacing clientID with your Hippo’s clientID (Note that there's no trailing slash at the end of the URL).
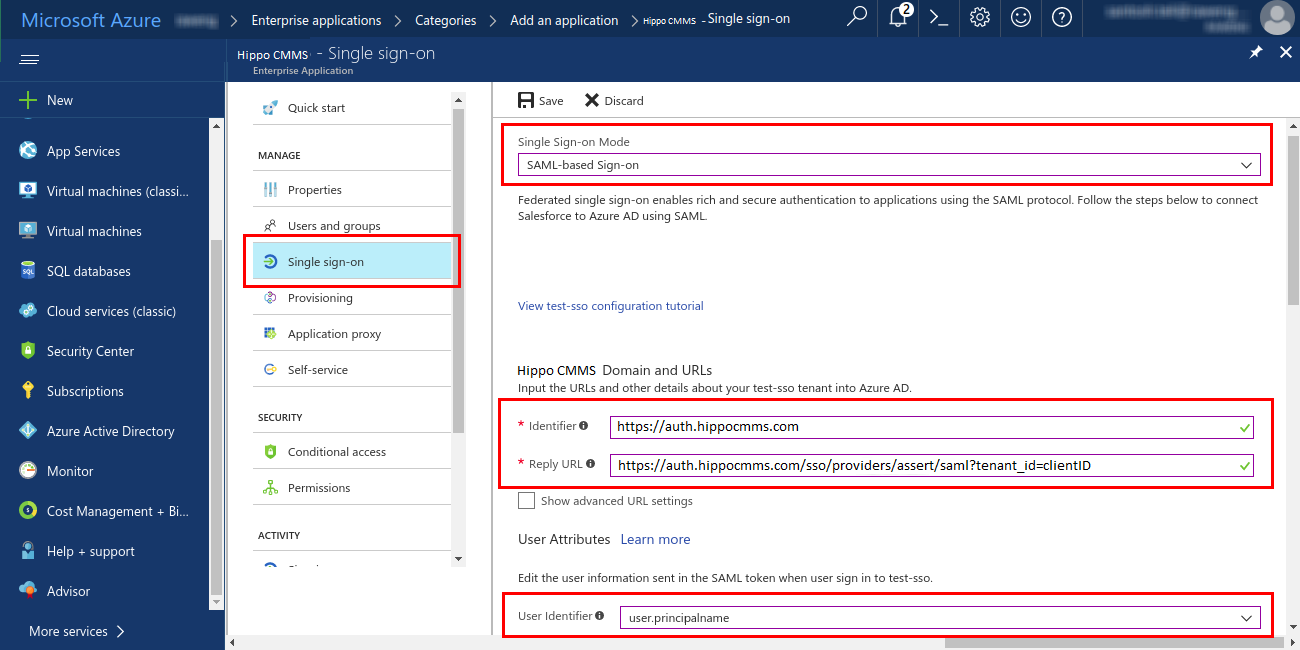
- In the ‘Identifier’ textbox, enter the ‘Entity ID’ of Hippo: https://auth.hippocmms.com
- Click save. An attribute should appear by default the next section “User Attributes”.
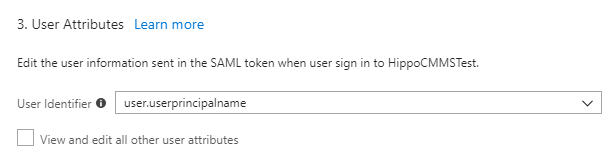
To view the attributes, check mark the “view and edit all other user attributes”
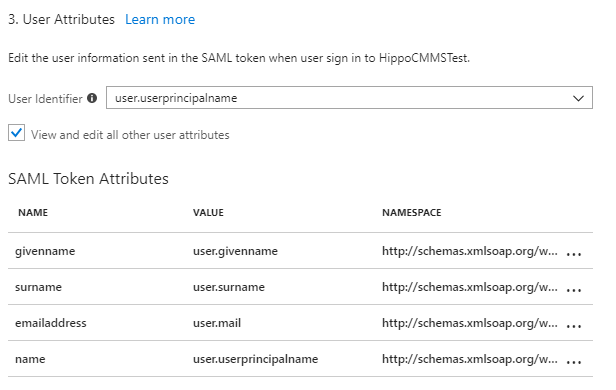
Please ensure the name and the value match to this configuration.
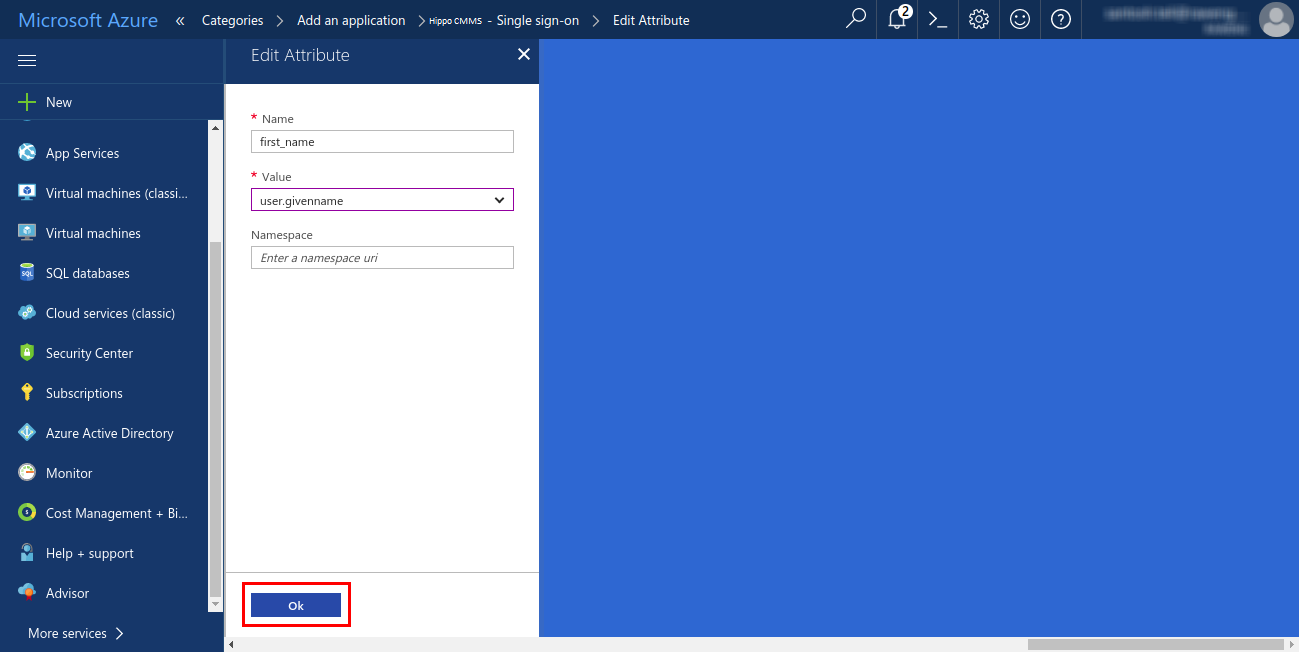
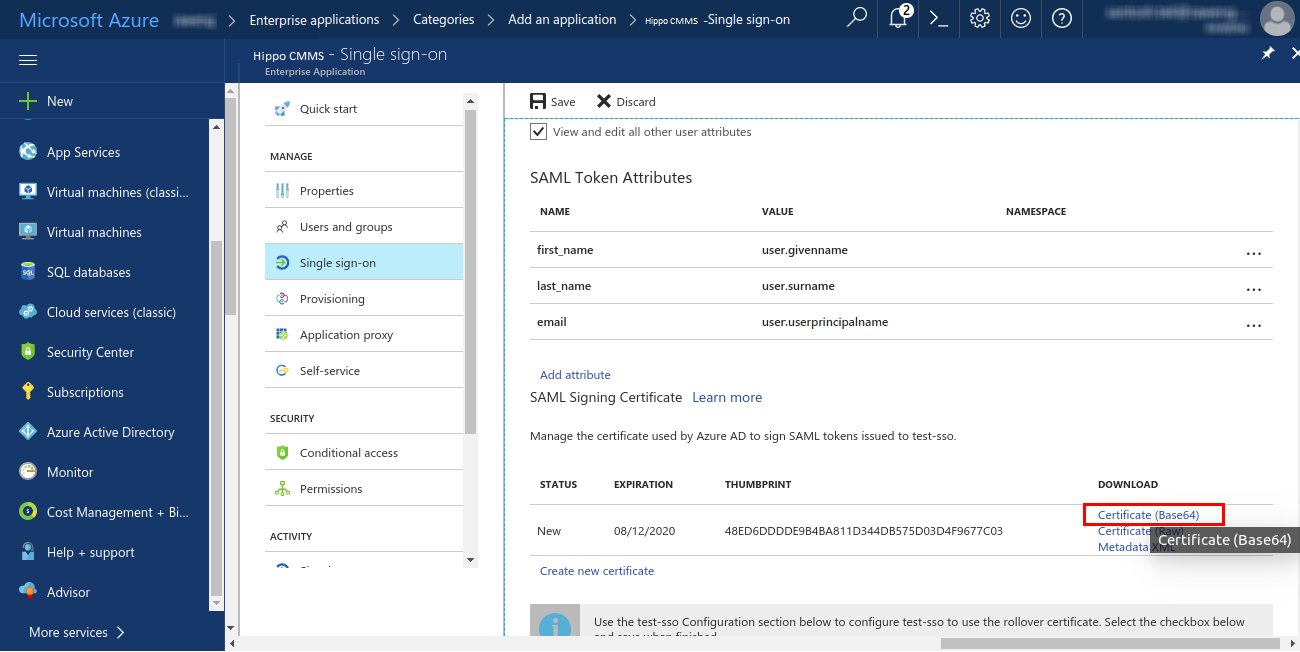
If you need to add attributes. Click ‘Add attribute’. Enter ‘first_name’ as the ‘Name’ and the select the ‘Value’ as ‘user.givenname’ from the dropdown. Click ‘Ok’. You will see the new attribute in the ‘SAML Token Attributes’ table.
Similarly, add two more attributes, ‘last_name’ and ‘email’. For ‘last_name’ assign ‘Value’ as ‘user.surname’, and for ‘email’ assign the ‘Value’ as ‘user.userprincipalname’. - Under ‘SAML Signing Certificate’ section, click ‘Certificate (Base64)’ under the ‘DOWNLOAD’ column. This will download the Base64 version of the certificate for your Hippo app. Save the certificate file on your computer.
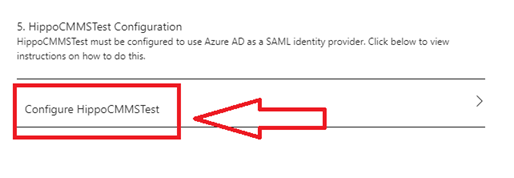
- Next, click on step 5: ‘Configure Hippo CMMS Test’ (This may appear differently if you did not use Hippo CMMS as the application name.
Please send the following to support@hippocmms.com along with your ClientID: To ensure users can sign-in to Hippo CMMS after it has been configured to use Azure Active Directory, review the following tasks and topics:
- SAML Single Sign-On Service URL
- SAML Entity ID
- The signing certificate file (downloaded in step 13)
To ensure users can sign-in to Hippo CMMS after it has been configured to use Azure Active Directory, review the following tasks and topics:
- User accounts must be pre-provisioned into Hippo CMMS. To add a user, please refer to Enterprise Admin - How to Add A User
- Users must be assigned access to Hippo CMMS in Azure AD to sign-in. To assign users, click on Users and Groups from under the Manage tab of your Quick Start Page.