Location Categories
Learn about the Location Categories.
This article shows a User how to add, modify, or remove location categories. This can only be edited by a system admin on the Hippo system.
Definitions
Locations Category: This allows a User to quickly sort through a list of locations.
Instructions
- Click on the “Categories and Types” tab, under Facility Admin or Enterprise Admin.
- Next, click on the dropdown menu “Choose Category or Type” and find “Location Categories”.
- Click on the New icon +) located in the top right corner of the screen, to add a location category. An empty row will appear at the top of the grid.
- Under the “Name” column, type the location category.
- Click in the Facility column, and select the facility name from the dropdown that this location category will be used to organize the locations.
- When finished, click the Save icon located in the top right corner of the screen to save.
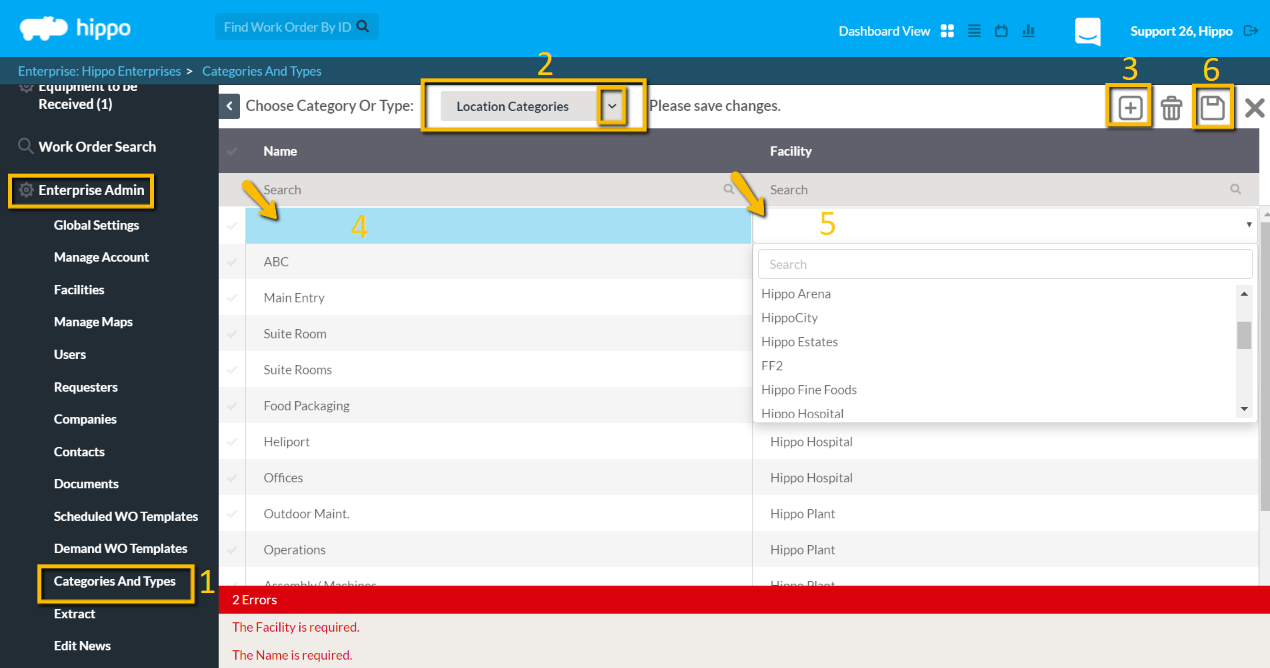
To modify, click in the field to make your changes, then you must hit the Save icon to keep modifications. To delete, put a check next to the name, and it will highlight the row. Hit the Delete Icon, located in the top right corner. Hit the Save icon to save your changes.

A User can now group together locations based on the Location Categories, on the Locations grid, facility level. - Locate the Location Grid and either select from the dropdown, or click on the + button to create a new one.
- Do not forget to click on the Save button located in the top right corner.This information will only be visible on the Locations grid and on Loc
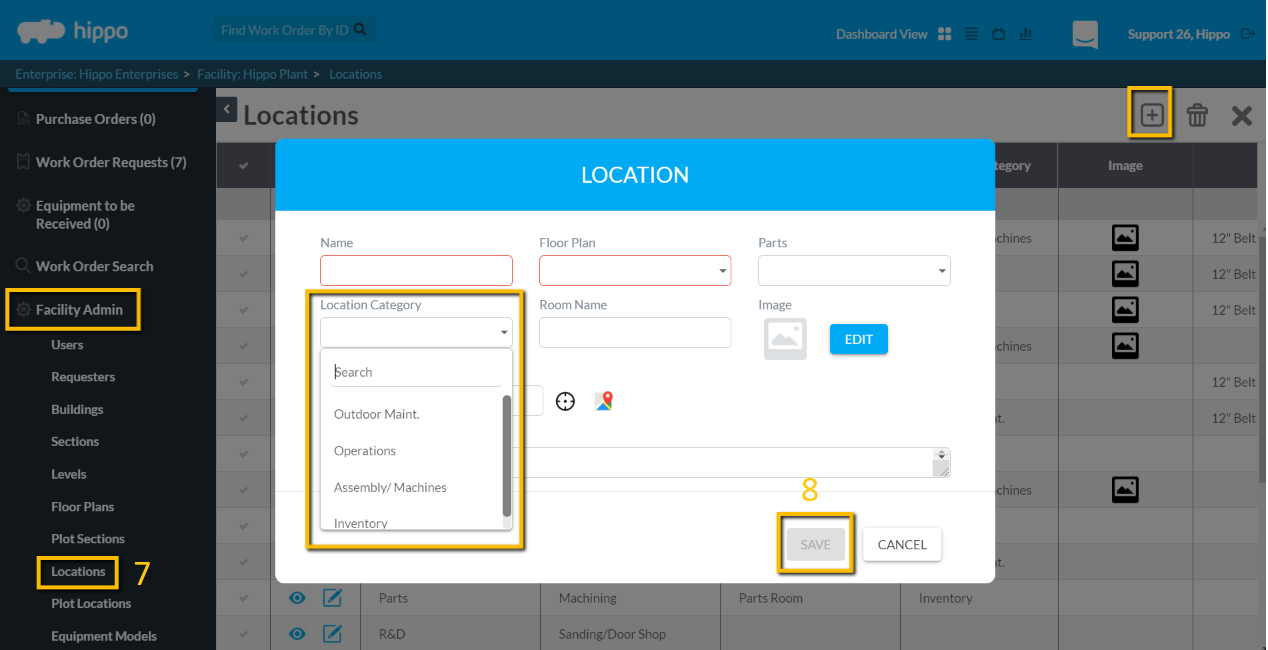 ation detail screens.