Equipment Downtime
Learn about the Equipment Downtime.
Introduction
By enabling the Equipment Downtime module, will allow Users to report equipment that is down and up again. The amount of time a piece of equipment or asset has been reported as being down can then be calculated and viewed on Maintenance History Reports.
Definitions
Equipment Downtime: Period during which an asset or equipment is not functional or cannot work
Instructions
Note: There are a few steps needed to use this feature, once it is enabled on the Global Settings grid. This module can only be added by a System Admin User.
- On the Global Settings grid, in the “Setting” column, look for “enable equipment downtime module” and click on the box next to it. This box is found under the “Value” column.
- Make sure there is a checkmark in the box.
- Click on the “Save” button found in the top right corner.

- Log out of the Hippo system, then log back into Hippo, or click on the “Refresh” icon. This will add the new module.
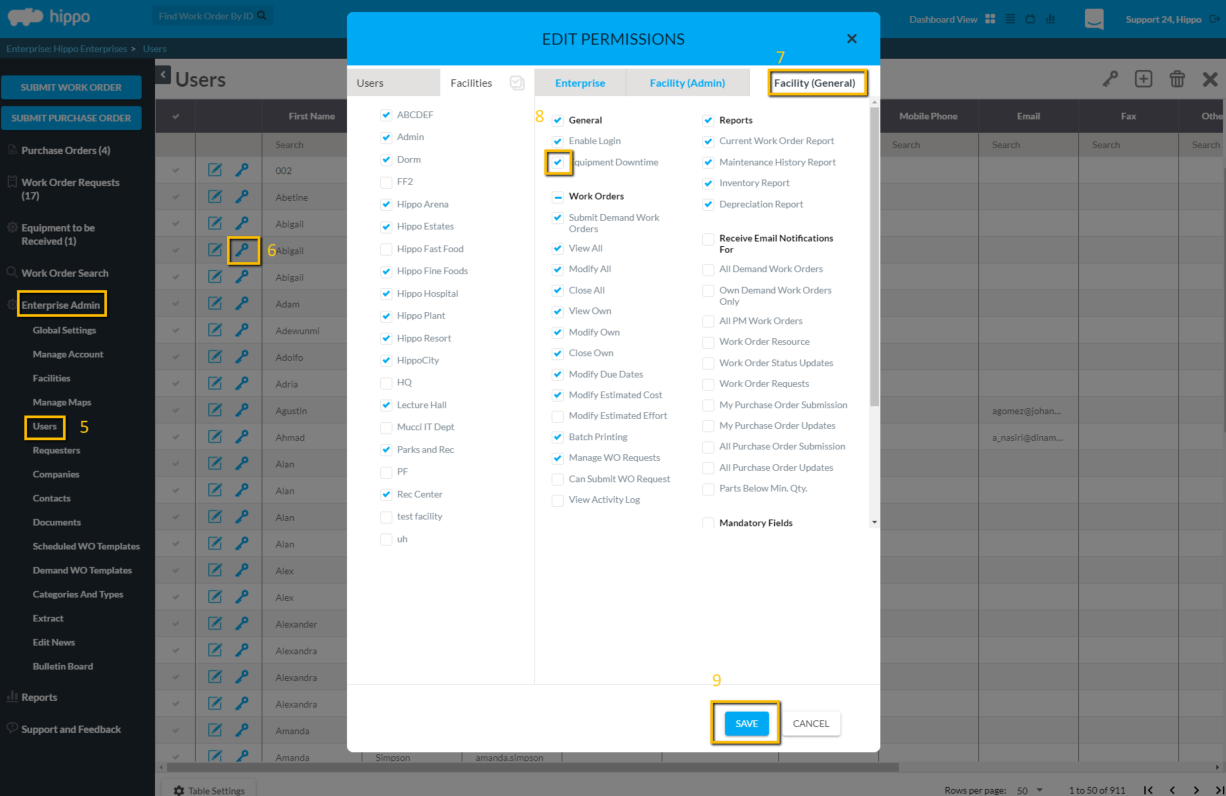
**With the feature enabled, there are a few other steps needed to use this module. Note: Users must have permission to run equipment down and up again. - Click on the “User” panel, under Enterprise Admin.
- Once on the User grid, click on the word “Edit” icon, next to the User First Name. The Edit Permissions form will open.
- Click on the Facility (General) page near the top of the Edit Permissions form.
- Find the “General” subcategory on this page and click in the box next to the “Equipment Downtime” permission. Make sure there is a checkmark in this box.
- Click on the “Save” button located at the top right corner of the grid.
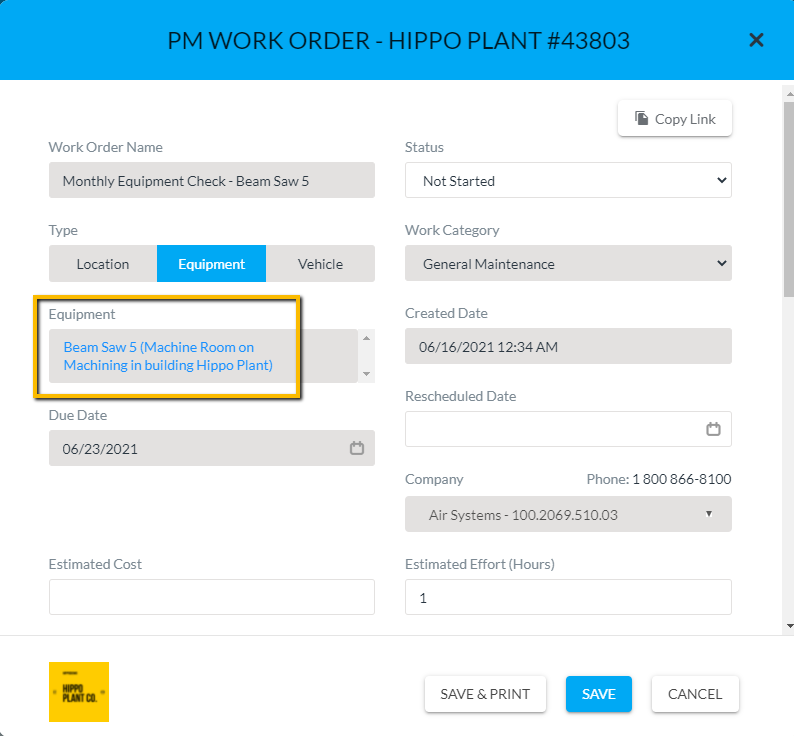
This User now has permission to report equipment down or up again from the Equipment Detail Screen. There are two ways to open an Equipment Detail Screen. - The Equipment Detail Screen can be opened from any generated work order, by clicking on the name of the equipment.
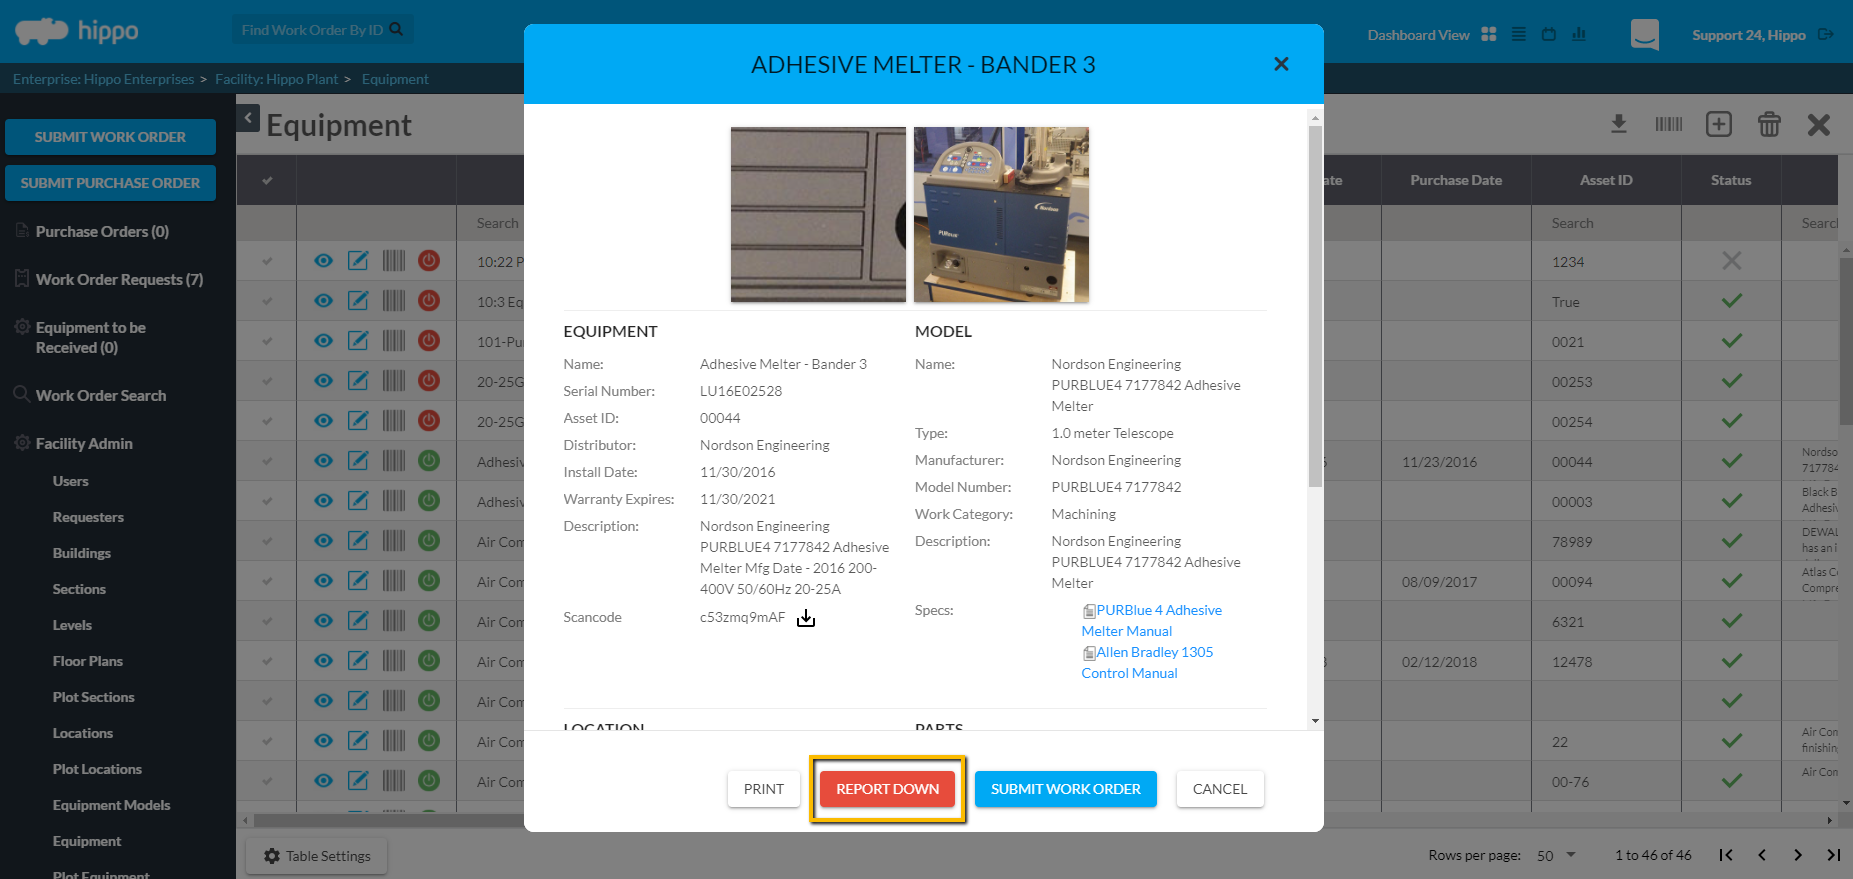
A User may also open up an Equipment Details screen from the Equipment grid, under Facility Admin. Simply click on “view” next to the Equipment name. - Once the Equipment Detail Screen is open, scroll to the very bottom and click on the “Report Down” button.
- A new pop-up window will appear titled “Equipment Downtime”. From this window, a user will select the downtime date and time for this piece of equipment.
- A User can use the arrows next to the Month's name and year to move back or forward by months. Once the correct month is located, click on the “calendar date”, so that it is highlighted.
- Use the arrows above and below the hours and minutes to select the exact time. Select if the time is AM or PM by clicking on the AM/PM box.
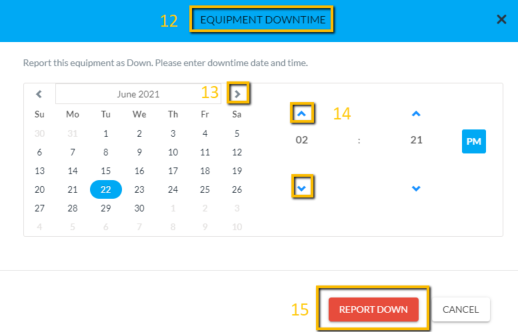
- Click on the “Report Down” button at the bottom of the window. This window will disappear and the Warning label across the top of the Equipment Detail screen will be displayed.

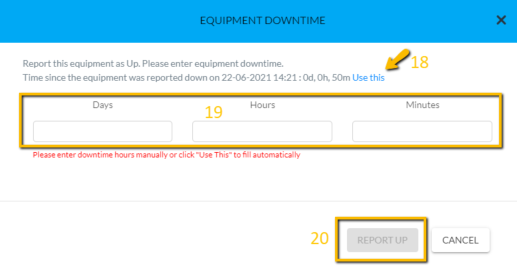
- Click on the Report Up button found at the bottom of the Equipment Detail screen, to mark equipment up again. A new pop up window will open.
- A User can click on “Use this” to keep the calculated time from since reported down, or manually enter the time frame.
- Click in the “Days”, “hours”, or “Minutes” field to type in the numbers.
- Click on the” Report Up” button at the bottom of the window.
The Equipment Detail screen will no longer indicate that this piece of Equipment is reported down.
Note: The calculated amount of time that the equipment or asset has been reported down is available in the Maintenance History Reports.
