Equipment
Learn about the Equipment grid.
This article shows a User how to add equipment to Hippo. Entering a piece of equipment is probably the single most important piece of data to be entered in the software; this is what a User will be submitting work orders for, and tracking the maintenance history.
Instructions
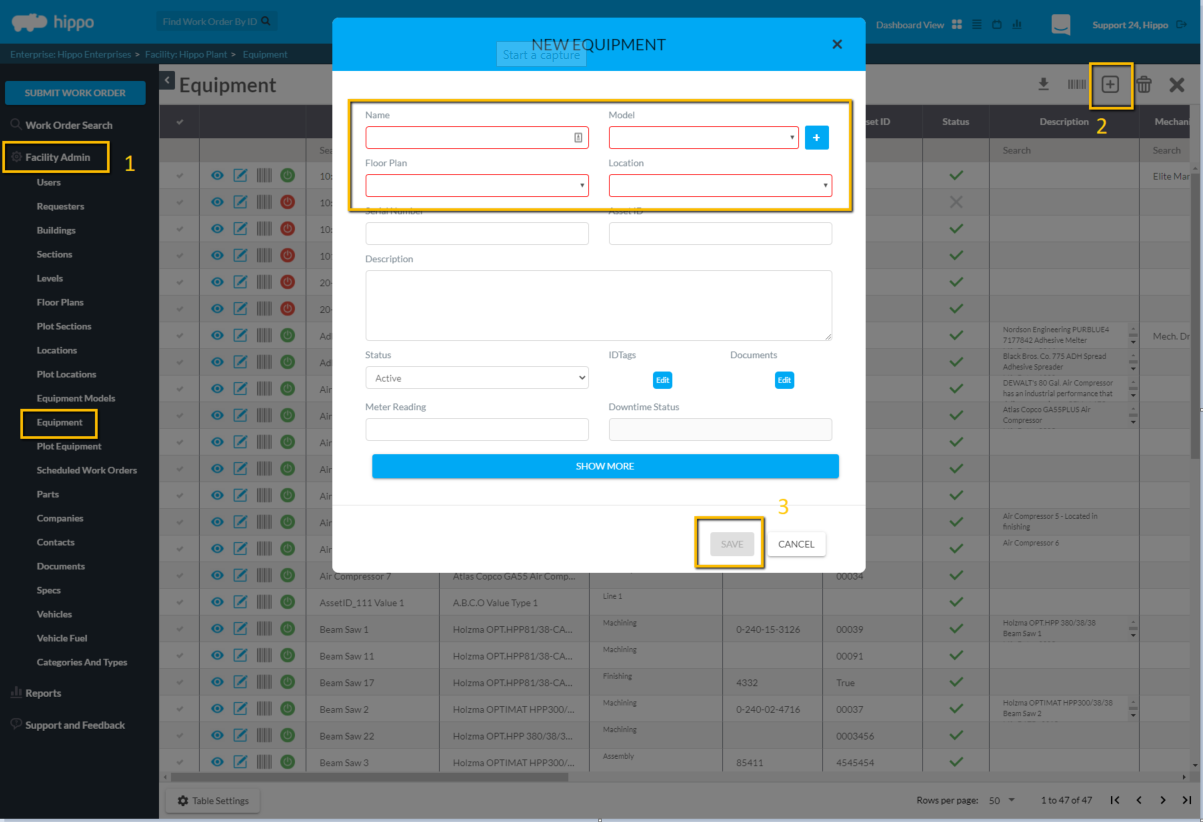
- To add Equipment, access the Facility Admin panel and open the Equipment grid.
- Click on the New icon (+) located in the top right corner and a new pop-up window will appear.
The mandatory fields for entering equipment are as follows:- Name – Click in the name field to enter the name of the piece of equipment.
Note: The Equipment Name must be unique in each facility.
- Model – Click in the model field to select a model name from the drop-down list. To enter a new model name, click on the Add button (+) or go to the Equipment Models grid under the Facility Admin panel.
- Click in the Floor Plan field and select a floor plan from the dropdown.
- Click in the Location field to associate this equipment with its exact location and floor plan.
- Once the mandatory fields have been entered, click on the Save button at the bottom of the popup window, or you can add any additional equipment details.
Note: all fields can be edited. All other fields on this form are optional. Read on for details.
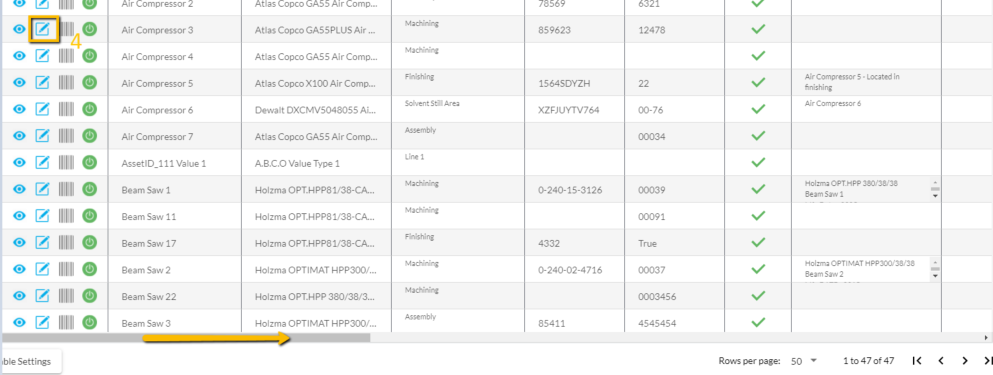
- Click on the Edit icon next to the equipment name to open the popup window and add more information to the equipment. It is best practice to enter in as much information as possible regarding the equipment, as Hippo should be used as a database to store all asset information.
- Click in the Serial Number field to enter the serial number for a piece of equipment.
- Click in the Asset ID field to enter the Asset ID information for a piece of equipment.
- Click in the Status field and mark the equipment as Inactive, so no additional tickets can be created when mark as so. By default, all equipment is marked as Active.
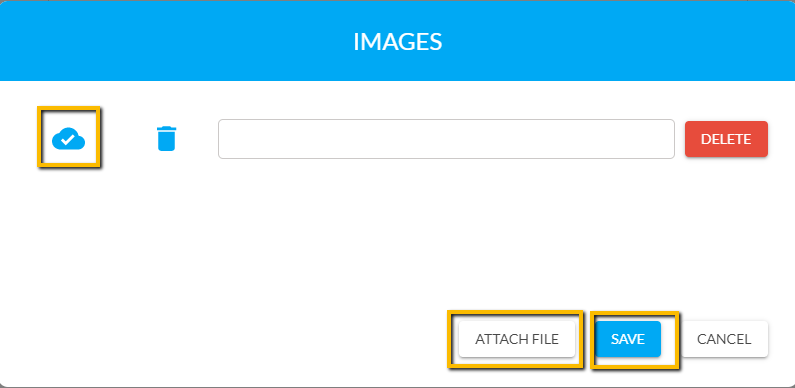
- Click on Edit near the ID Tag field to upload an image for the equipment ID tag. Click on Attach File in the Images pop-up window. Click on the upload icon and browse your computer to find the file. Click “Open” and then click on “Save”. The file size shouldn't be larger than 30 Mb.
- Click in the Description field to add additional information about a piece of equipment. Any information that does not fit in one of the other columns on the Equipment grid can be entered into the description field.
- Click on the dropdown menu in the Mechanical Drawing field to associate a mechanical drawing with a piece of equipment. Click on the + button, to add a new name for mechanical drawing, and click on “OK” after entering the name.
- Click on the drop-down menu in the Electrical Panel field to reference an electrical panel to a piece of equipment. Click on the + to create a new reference.
- Click on the drop-down menu in the Distributor field to associate a distributor to a piece of equipment. The available distributor list is taken from the Company list. To add a new distributor, go to the Company grid under the Facility Admin panel and add a new company.
- Click on the drop-down menu in the Installer field to associate an installer to a piece of equipment. The available installer list is taken from the Company list. To add a new installer, go to the Company grid under the Facility Admin panel and add a new company.
- Click in the Install Date field to enter Install Date for a piece of equipment. A user can enter a date manually or click on the Calendar icon and select a date on the calendar. Use the left and right arrows on the calendar to go back or forth for a month. To jump to a different year, click on the year and then select the correct year.
- Click in the Purchase Date field to enter Purchase Date for a piece of equipment. A user can enter a date manually or click on the Calendar icon and select a date on the calendar. Use the left and right arrows on the calendar to go back or forth for a month. To jump to a different year, click on the year and select the correct year.
- Click in the “Warrant Expiry Date” field to enter Warrant Expiry Date for a piece of equipment. A user can enter a date manually or click on the “Calendar” icon and select a date on the calendar. Use the left and right arrows on the calendar to go back or forth for a month. To jump to a different year, click on the year and then select the correct year.
- Click in the Meter Reading field to enter meter reading for a piece of equipment.
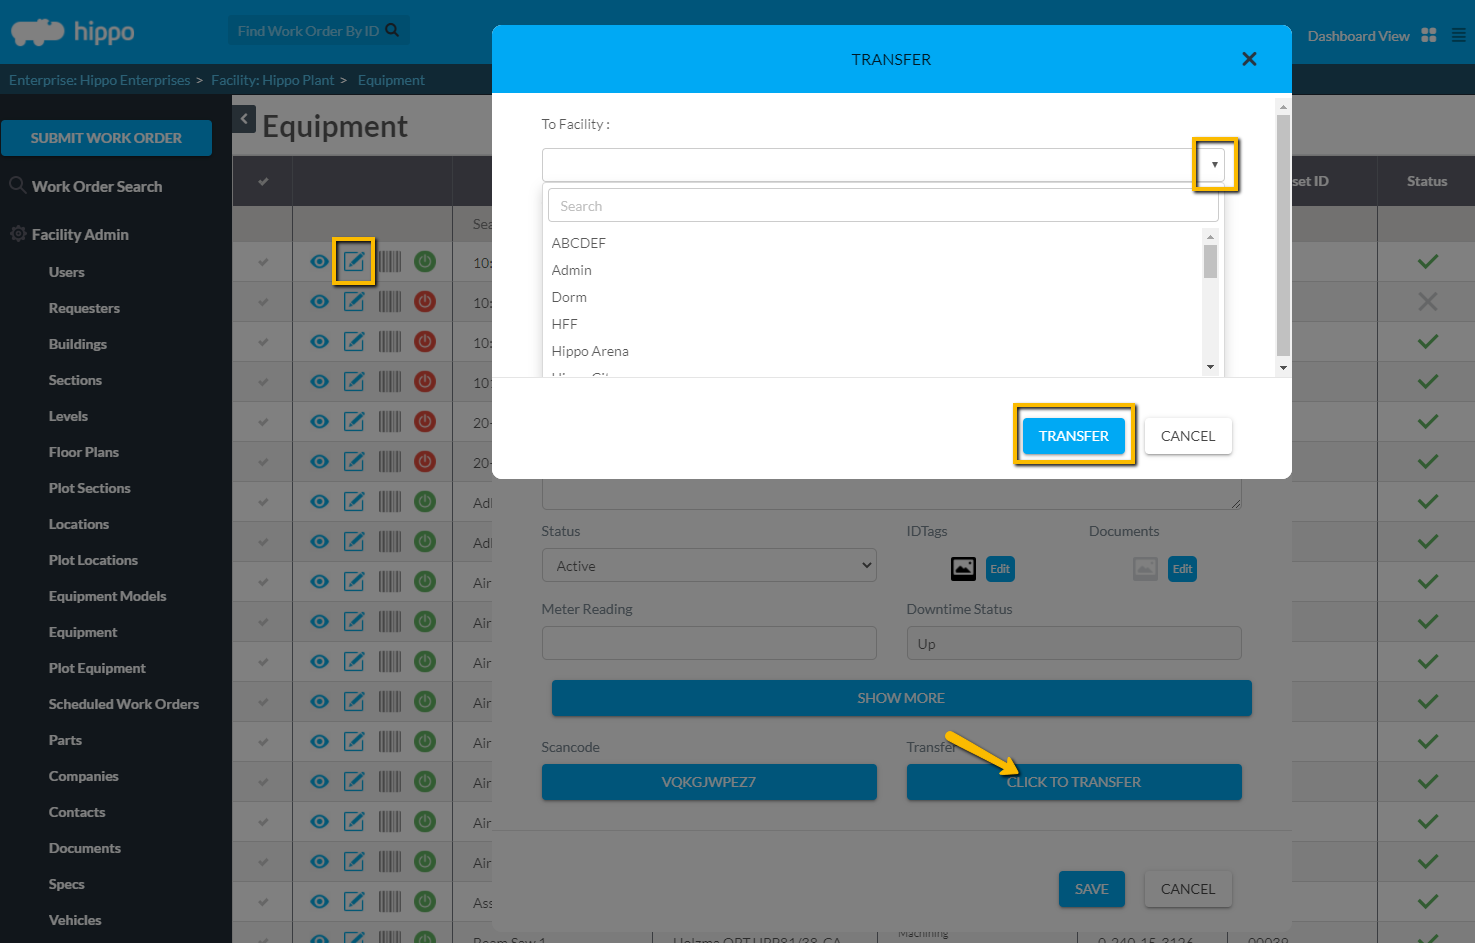
- Make use of the Transfer column to transfer a piece of equipment from one facility to another. Select the facility to which equipment needs to be transferred and click Transfer.
- The Downtime Status column shows the Downtime Status for a piece of equipment.
- Click in the Life Expectancy field to enter Life Expectancy for a piece of equipment. A user can enter Years and Months manually or use up and down arrows.
- Click in the “Purchase Cost” field to enter Purchase Cost for a piece of equipment.
- Click in the “Salvage Value” field to enter Salvage Value for a piece of equipment.
- Click in the “Replacement Cost” field to enter Replacement Cost for a piece of equipment.
- Scancode: Click on the Scancode button to enter the barcode for a piece of equipment. You can choose to type in the code manually if you already have an existing code.
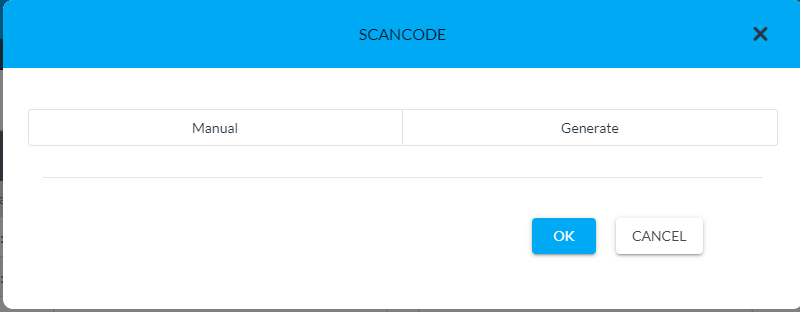
You can also generate a code for a piece of equipment through Hippo by clicking on the Generate tab in the Scancode pop-up window.