Contacts
Learn about the Contacts grid.
This article shows a User how to add contacts. Contacts can be associated with several different areas in Hippo, and used in a variety of different ways. A contact is someone who works for a Company. All contacts are associated with companies. A User can add Contacts at the Enterprise Level as well as the Facility Level. If a contact is created at Enterprise Level, a User will be able to associate it with multiple facilities.
Definitions
Contact: Contact is someone who works for an outside vendor and cannot directly log into the Hippo database. If an email is associated with a contact, they can receive emails about work orders.
Instructions
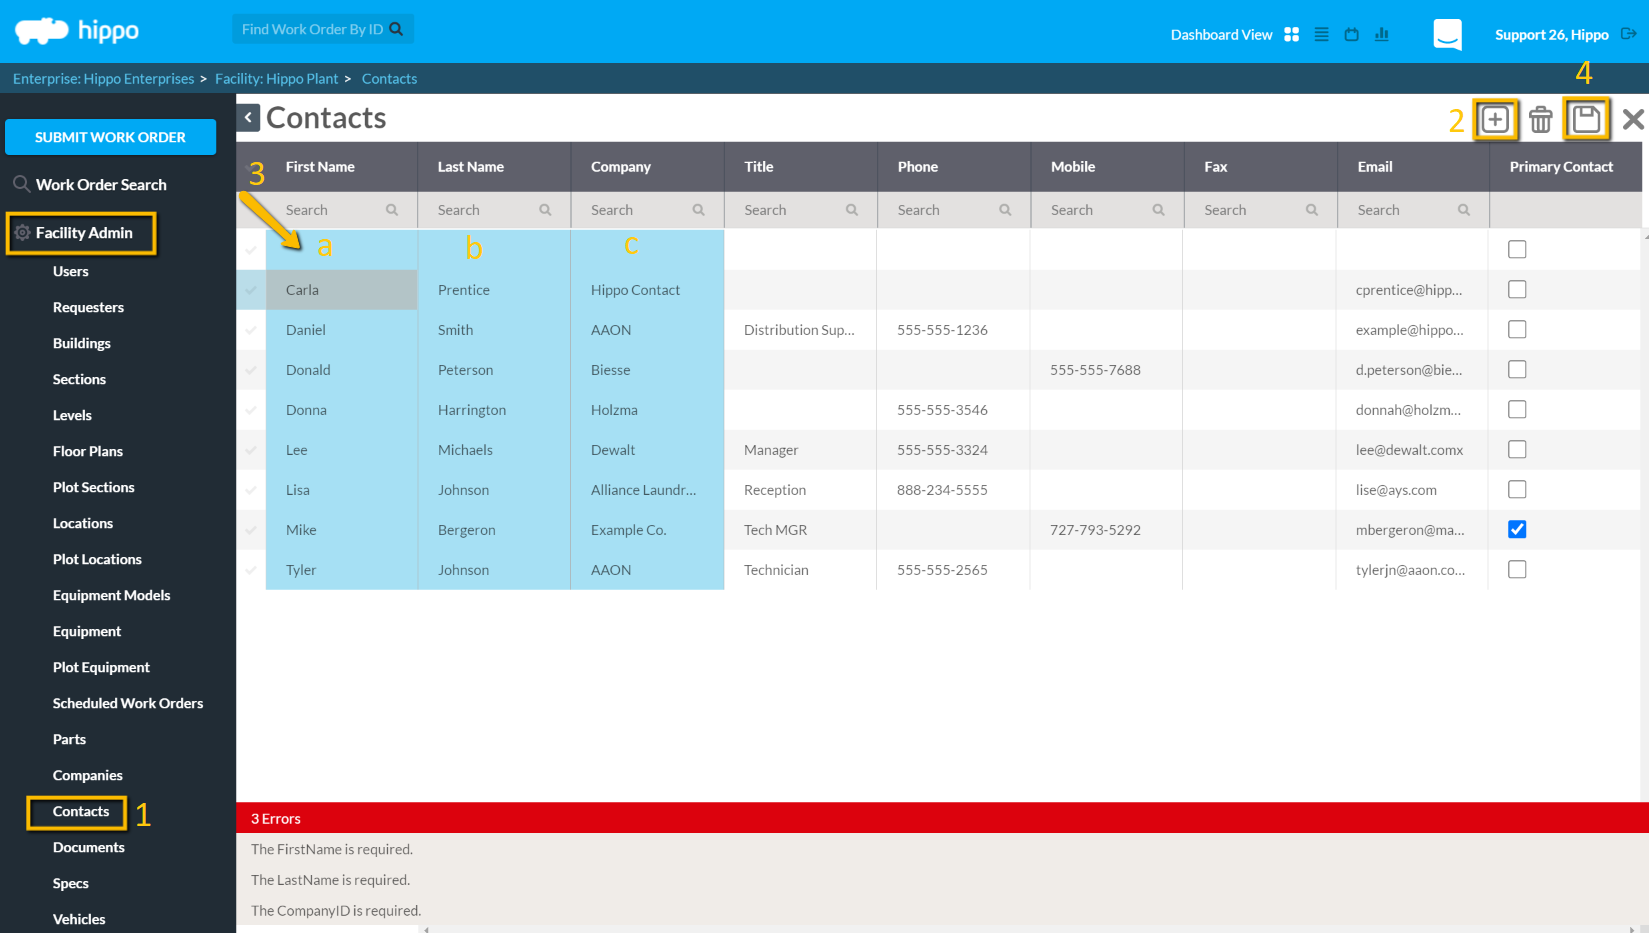
- To create a new contact, access the Contacts grid under the Facility Admin panel or Enterprise Admin panel.
- Click on the New icon (+) located in the top right corner
- An empty row will appear at the top of the Contacts grid.
The mandatory fields for entering a Contact are as follows:- First Name – Click in the “First Name” field to enter the first name of the contact.
- Last Name – Click in the “Last Name” field to enter the last name of the contact.
- Company - Click on the dropdown menu in the Company filed to associate a contact to the respective company.
- Once these pieces of information have been entered, make use of the Save icon located in the top right corner to save the record.
- The rest of the fields on this grid are optional. A User can use the Hippo software successfully without entering in any other information. However, it is best practice to enter in as much information as possible about Contacts, as the Hippo system should be used as a database to store all contact information for future reference.
- Title – A User can assign a job title to a contact. Assigning a job title to a Contact allows the User to quickly locate a contact based on their job title, as he/she can sort the grid by this column. Click in the “Title” field and enter the job title for a contact.
- Phone – Click in the “phone” field to enter the phone number for a Contact.
- Mobile – Click in the “mobile” field to enter the mobile phone number for a Contact.
- Fax – Click in the “Fax” field to enter the Fax Number for a contact.
- Email – Click in the “Email” field to enter the email address for a Contact. If you want to email a Contact from a work order, a correct address must be entered.
- Primary Contact – Check off the “Primary Contact” field if the contact being entered is a primary contact at that company.