Facilities Grid
The Facilities grid found under Enterprise Admin is where new facilities in Hippo are created. This guide explains.
Introduction
The Facilities grid, located under Enterprise Admin stores the name of facilities as well as a few other optional details when your program is first set up.
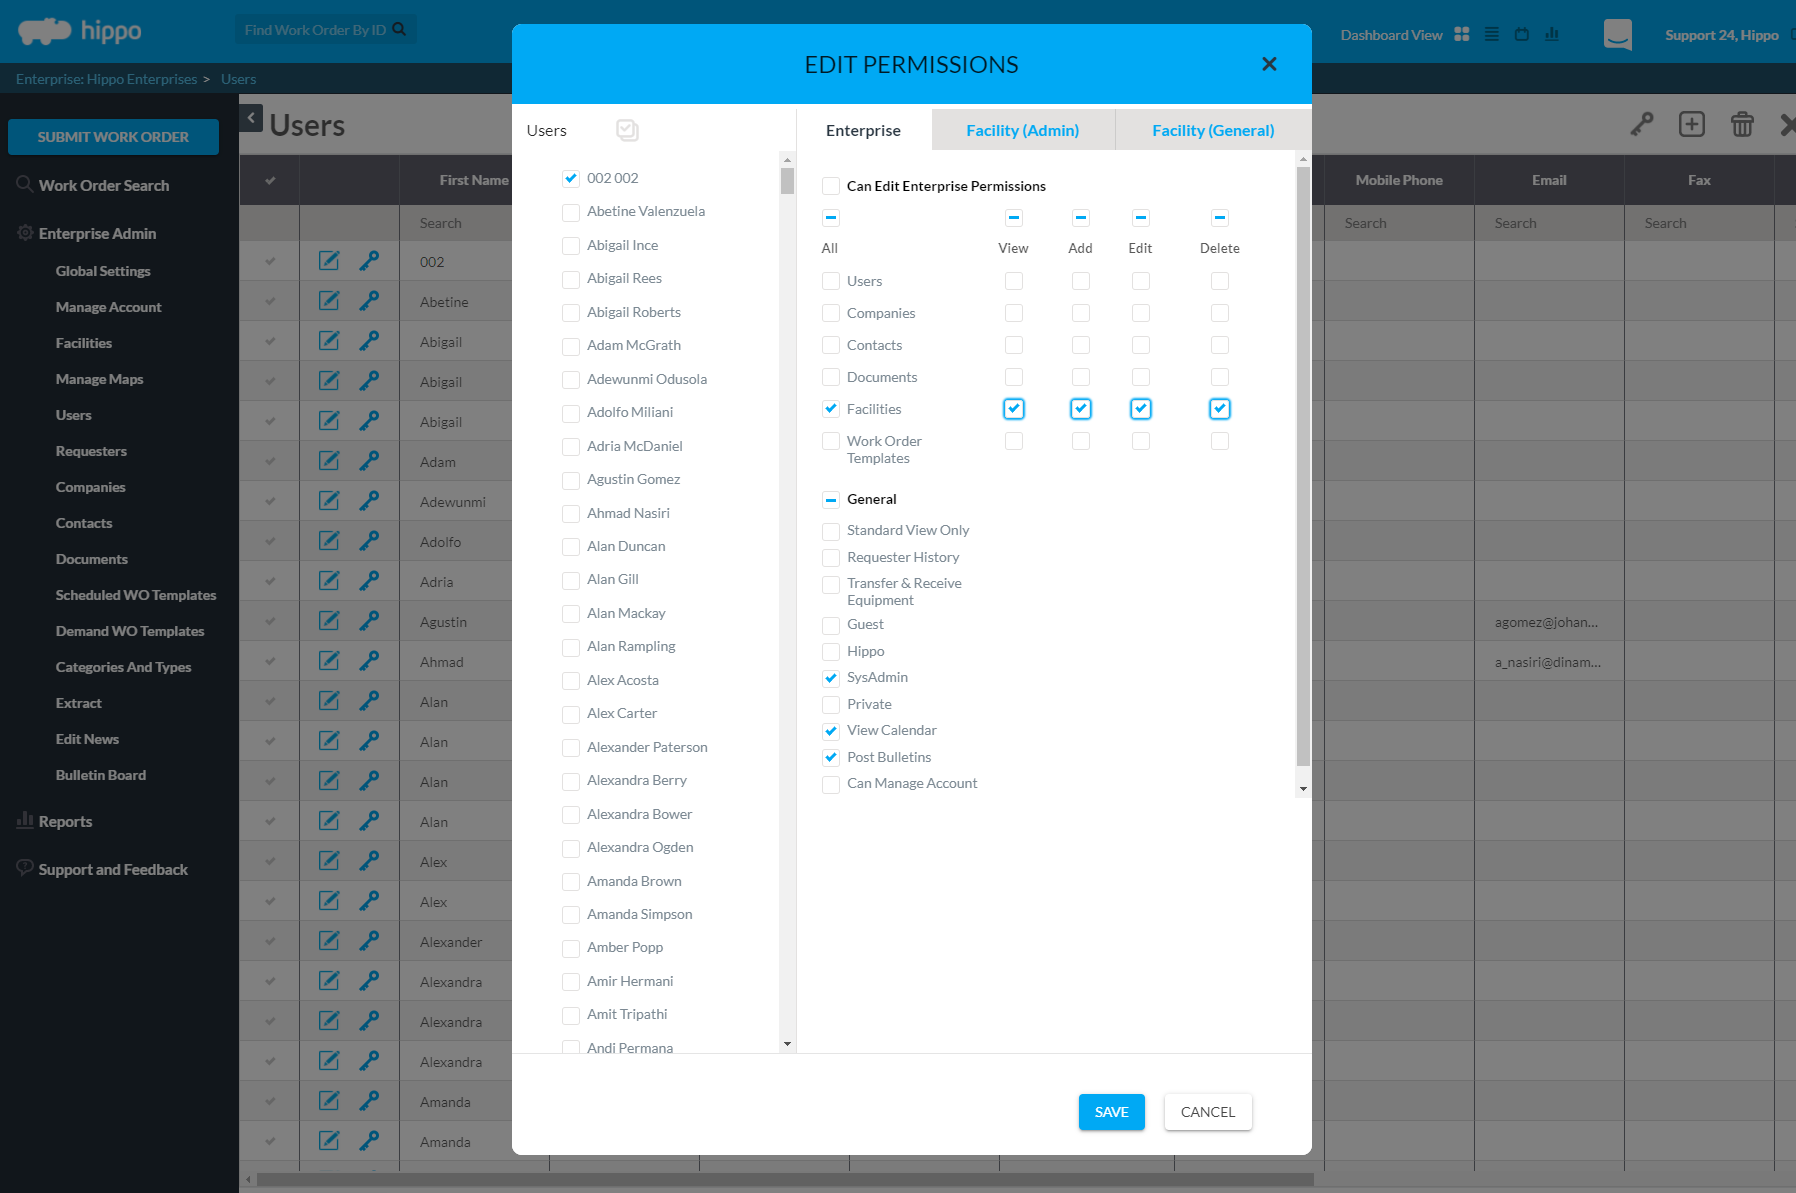
Note: A User must have Enterprise Admin - Facilities permissions in their Edit Permissions form to view, edit, or delete facility information.

Steps
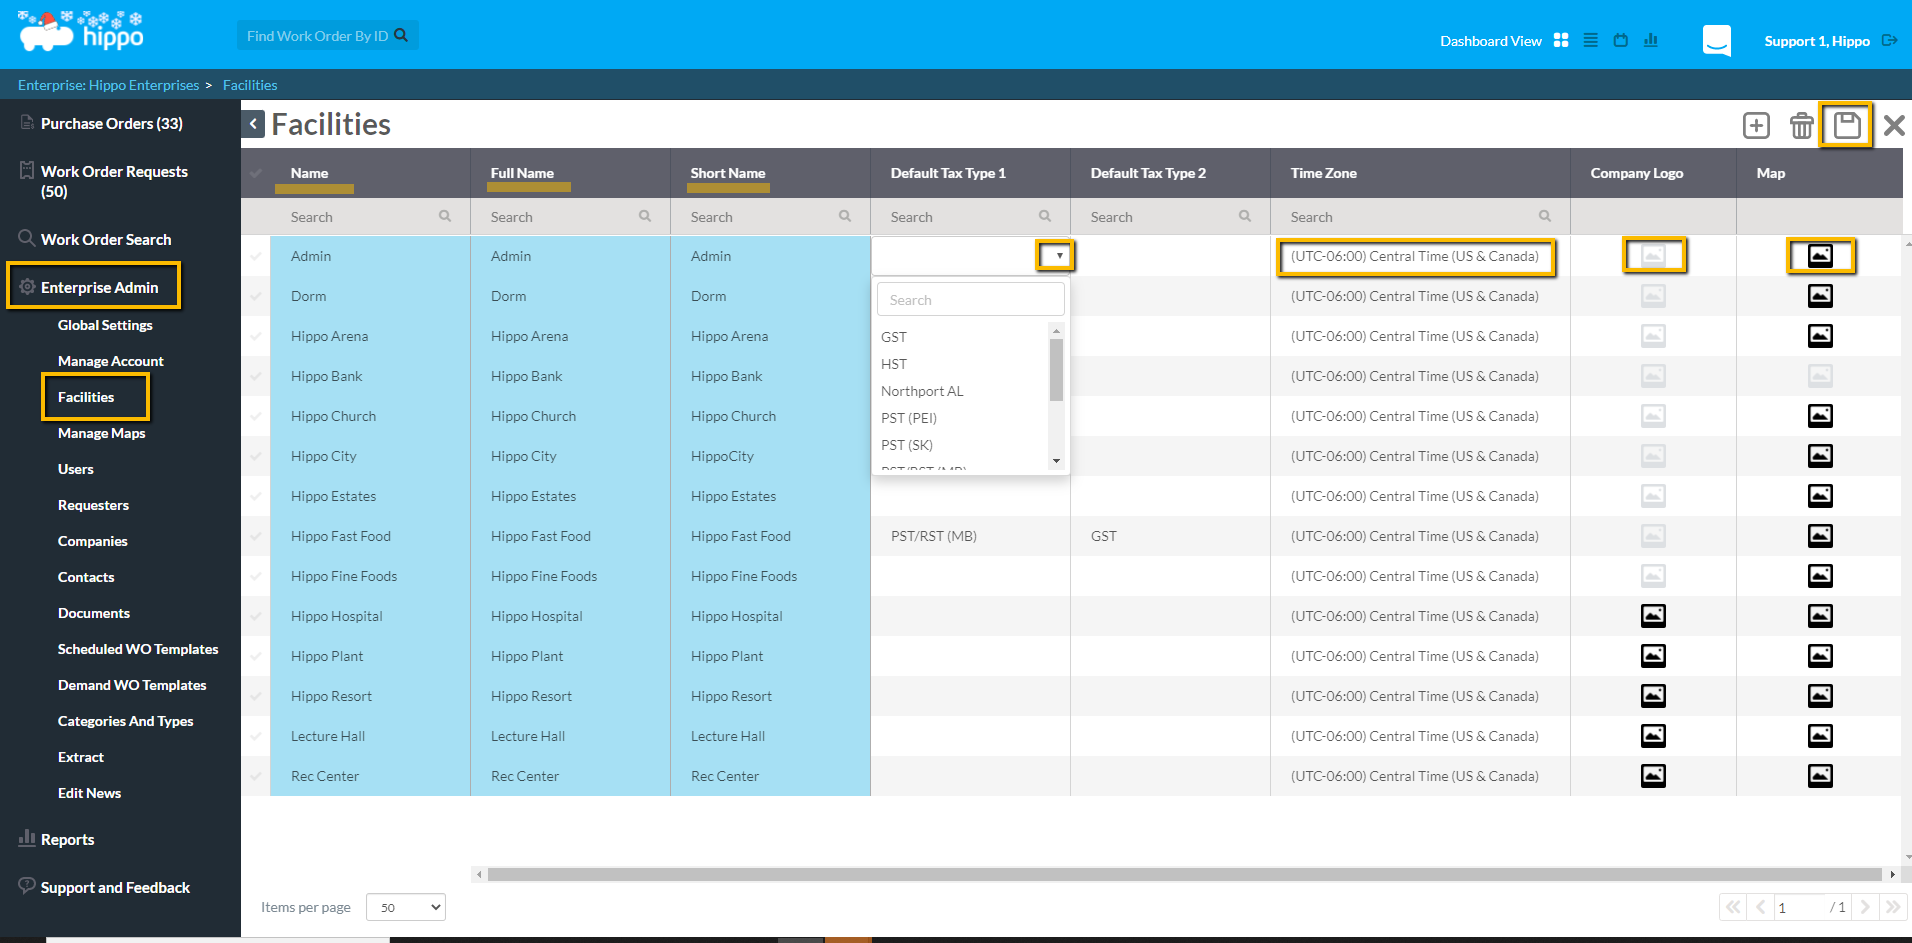
- Click on the Facilities panel, Enterprise Admin, to open the Facilities Grid.
- The first three columns of Facility Name, Full Name, and Short Name are mandatory for creating a facility. Click in the column to type the names. They can be edited.
Facility Name is used internally. The name does not appear anywhere in the database. It cannot contain any spaces or special characters.
Short Name appears on the overview boxes displayed on the right of the screen on both the Enterprise and Facility level. This is the name that also appears on email notifications.
Full Name is used in place of the Short Name only if you have Sub Enterprises. - Optionally, double click in the “Default Tax Type 1” field to select a tax type from the dropdown menu. This tax type is associated with invoices on work orders.
Note: Tax types are customized by a System Admin Use on the Tax Type grid, via Categories and Types.
- You can also optionally double click in the “Default Tax Type 2” field to select a second Tax Type associated with invoices on Hippo work Orders.
- The Time Zone field allows you to select your local time zone so that timestamps on work orders are accurate.
- To include your company logo on a work order, click in the “Company Logo” field and a “Logo” pop-up window opens. Click on the ”Browse…” button to select a file from your computer. Once the image uploads hit the Save button at the bottom of the pop-up window. A grey image icon means no file has been loaded.
- The Map field is usually set up by the Hippo Implementation team already and only applies to Hippo accounts that have the Advanced Dashboard. Click in the Map column, to view the Map pop-up window. Select the Browse button to upload a file from your computer, then hit Save. This file is the image that will display on your Facility screen.
- After you have made any changes to this grid, do not forget to hit the Save button in the top right corner to keep any changes.

