Demand Work Order Templates
This feature is available to certain Hippo packages and must be enabled by Hippo Support. Contact Hippo Support by clicking the Conversation Window icon or emailing us.
The system admin must first grant a user work order template permissions.
Granting permission
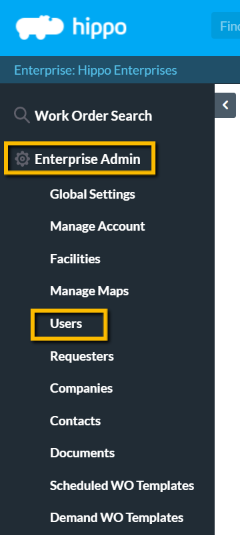
- Click the User panel, under Enterprise Admin.
- Click the key icon next to the user's name.
- On the Enterprise page of the Edit Permission form, check View, Add, and Edit permissions for Work Order Templates. Delete templates can also be checked.

Note: These permissions apply to both demand and PM work order templates.
Setting up templates
-
Once everything is set up, click the Demand Work Order Template panel, under Enterprise Admin.
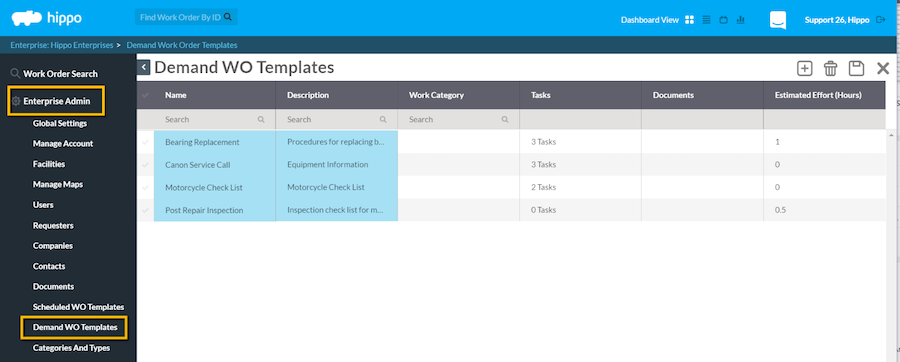
You can view/add/edit demand templates from this grid. - Click the Add button in the top-right corner. Create Work Order Template window appears.
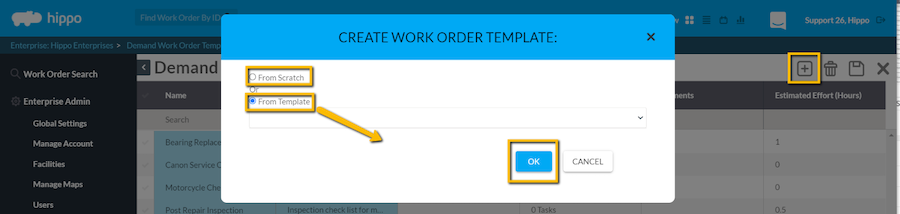
- Click inside the circle next to From Scratch to create a brand new demand template or you can select From Template to copy a template from the drop-down list.
- Hit OK to return to the grid. You can find your new template in the top row.
Note: Name and Description fields are mandatory when creating a template.
- Click inside the Name field and type the name of the work order.
Pro Tip: Each template name should be unique.
- Click inside the description field to add or edit work order details.
Pro Tip: the message to the resource should be added here.
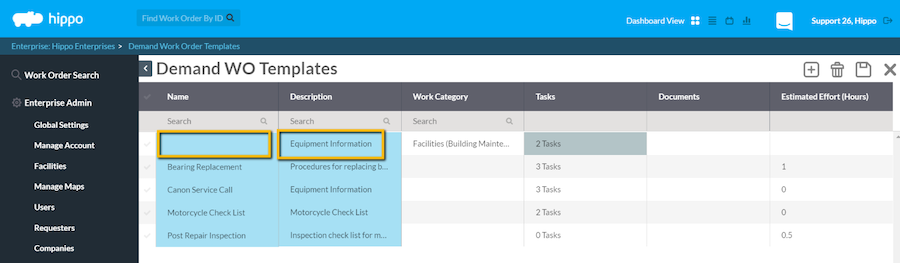
Note: Work Category, Tasks, Documents, and Estimated Effort (Hours) fields are optional.
- To add a Work Category, click inside the column and select a category from the drop-down list.
- Click inside the Tasks column to open the Tasks pop-up window.
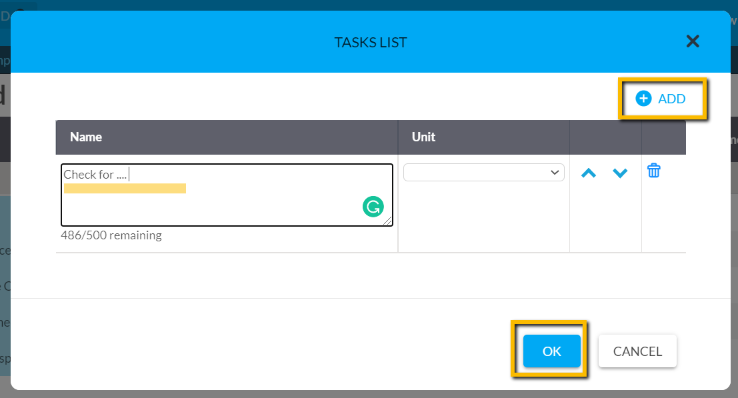
Click the Add button to create a new task that appears as a Demand Work Order checklist. Hit OK after adding all required tasks.
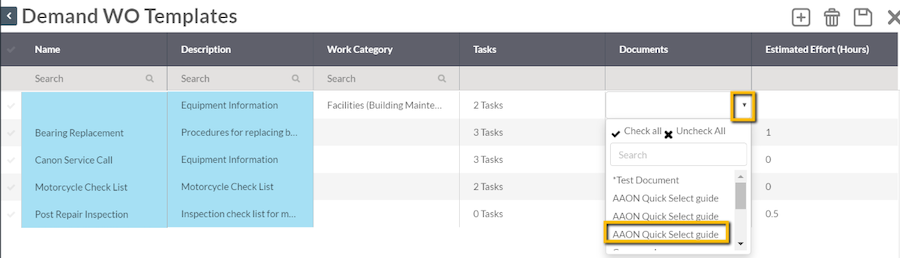
- Click inside the Documents column to select a document from the drop-down menu.
Note: Document files are added to the Documents grid.
- Click in the Estimated Effort (Hours) to add the amount of time to approximately complete the work order.
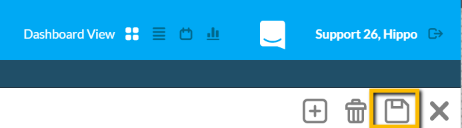
- Once you have added or edit all the details, click the Save icon in the top-right corner.
Using templates
- Click the Submit Work Order button. There is a template icon next to the Work Order Name field.
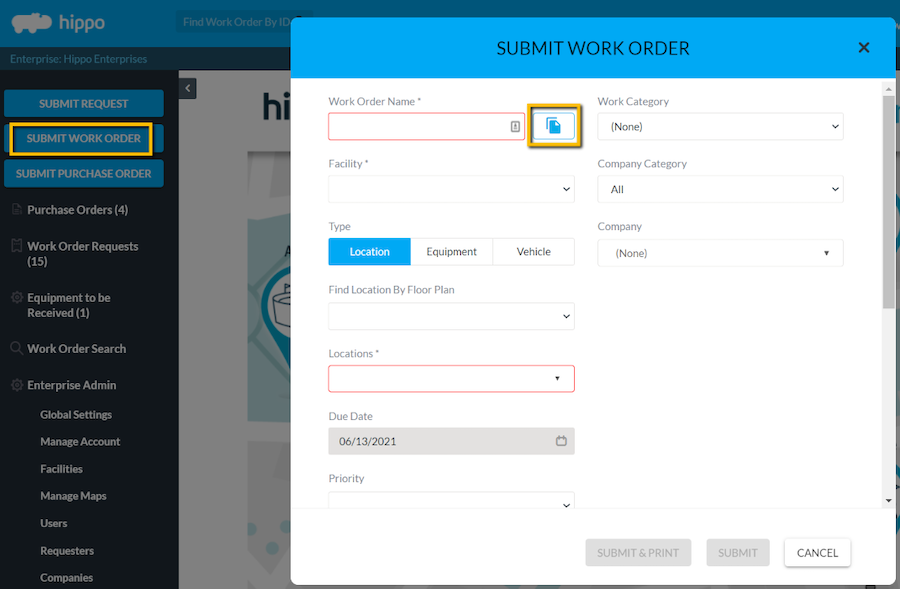
- Click the template icon. The Select Work Order Template pop-up window appears.
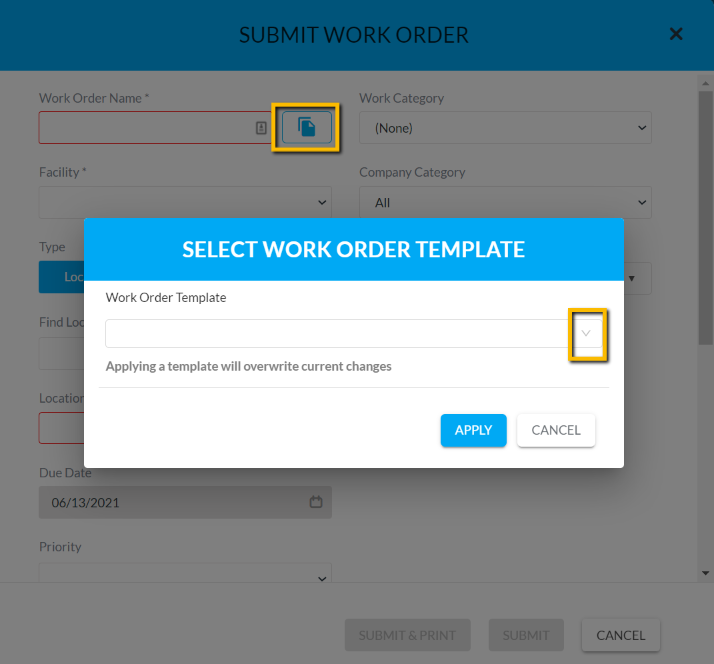
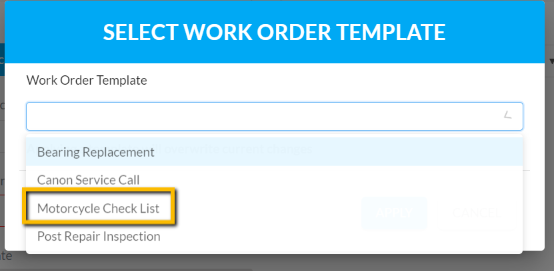
- Click the drop-down arrow in the Work Order Template field. The demand template list appears.
- Click the name of the template you want to use.
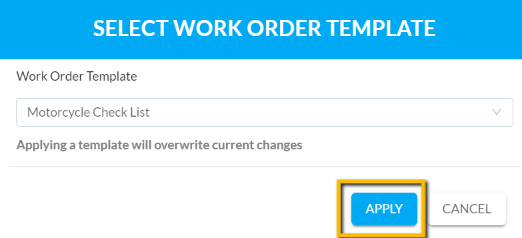
- Click Apply. The Submit Work Order form is automatically filled in.
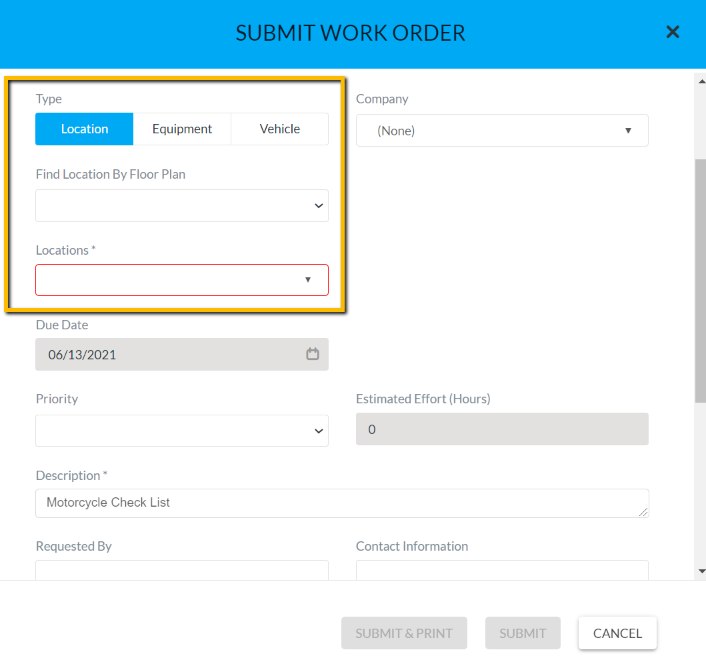
- Add the work order Type details.
Note: The template overrides any previous information on the Submit Work Order form. If the description field comes from a Request, the template field will add to the information the requester included.
- Click Submit to create the new work order.