How to Manage Purchase Orders
Manage projects and purchases by approving, rejecting and receiving purchase order requests. Increase efficiencies by streamlining inventory levels and gain a better understanding of which suppliers, parts and items are utilized the most. The Purchase Order feature is part of some Hippo packages. Need an upgrade? Contact our sales team here.
Set Up Purchase Orders
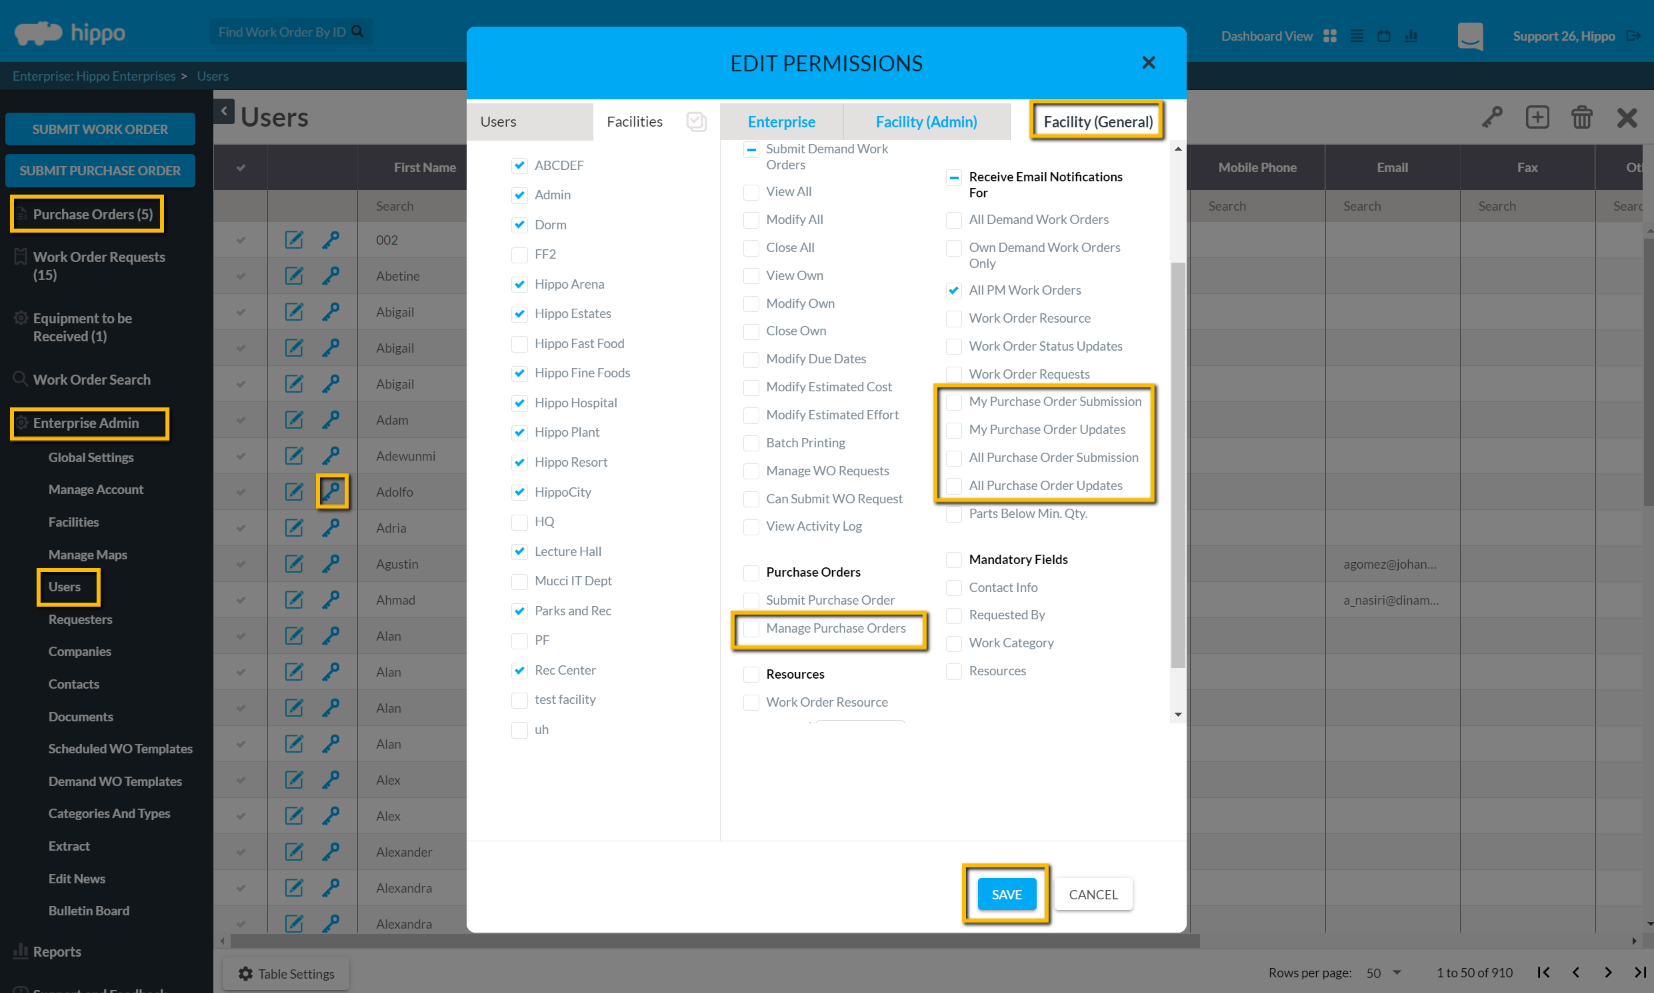
Initially, the permissions for Manage Purchase Orders will need to be enabled. Jump to the Manage section in this article if you have already done so. The system admin will want the ability to Manage purchase orders, so they can approve, reject and receive PO’s. This is found on the Facility General page in a User's Edit Permission form. Likewise, determine if you want to receive any emails about submitting your own or all purchase orders and status updates.
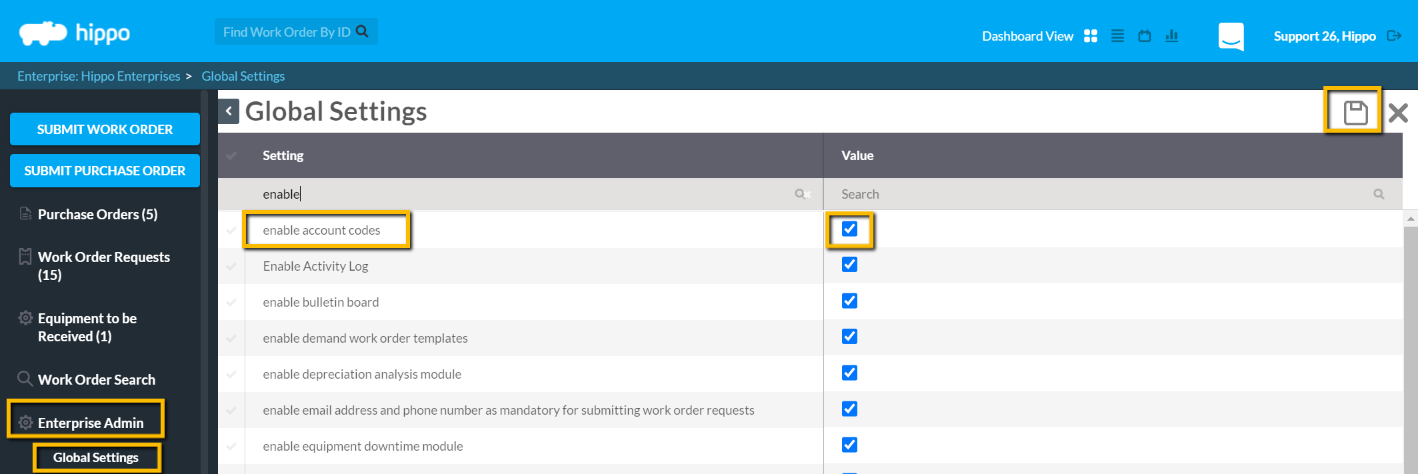
If your team uses Account codes for your Purchase orders, you can enable this field as well under the Global Settings. Put a check in the box next to Enable Account Codes, then hit the Save icon in the top right corner.
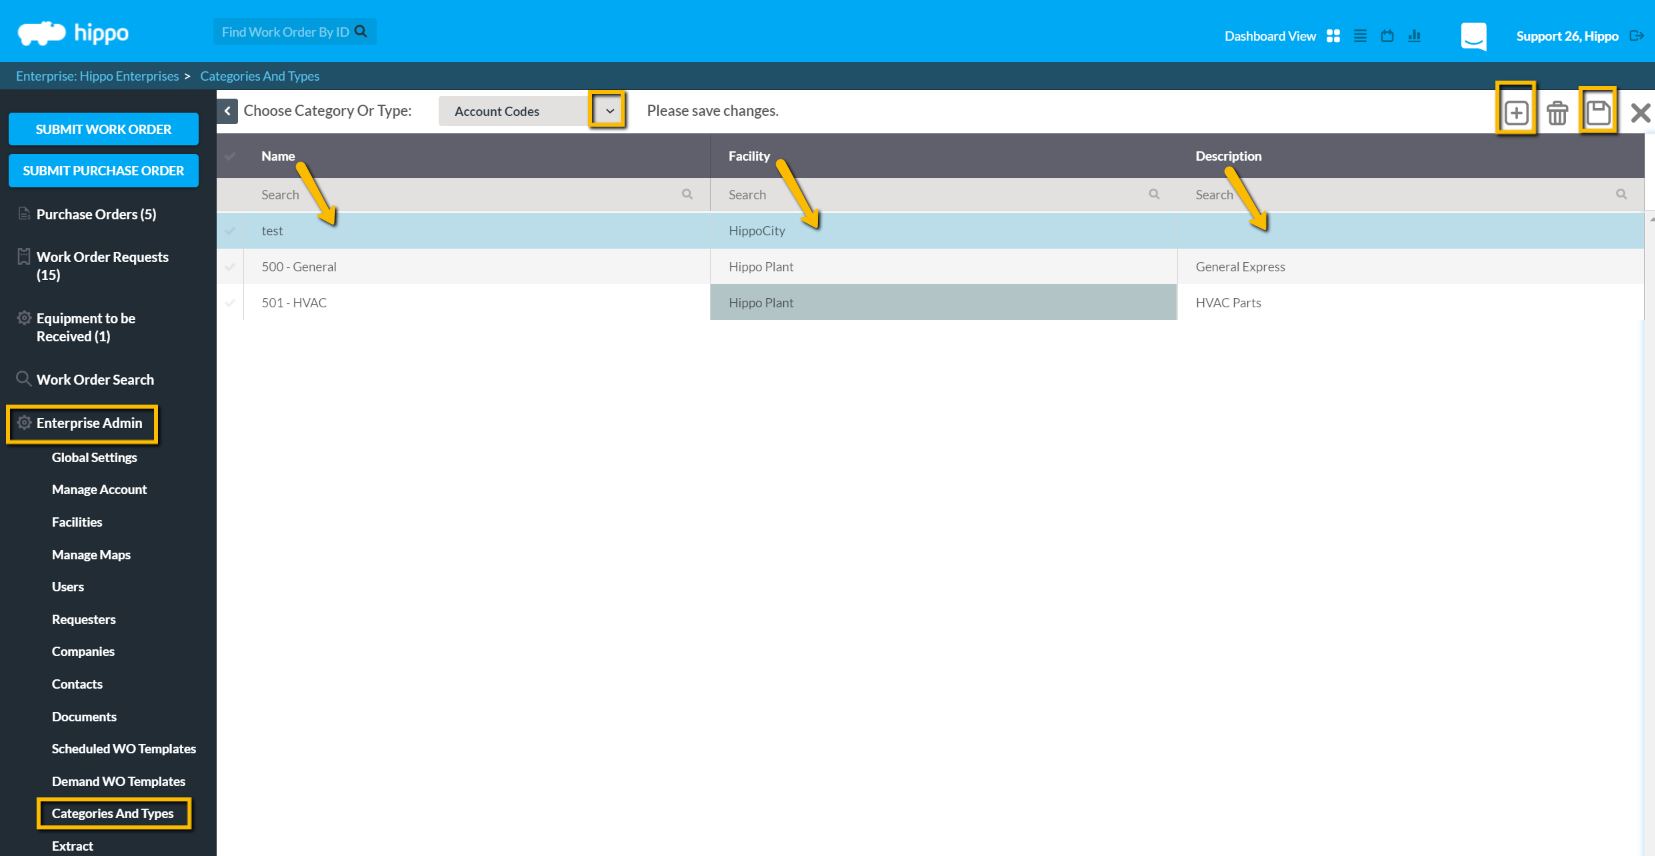
Click on the Categories and Types panel, then select the Account Codes grid, from the drop-down. Hit the Add button in the top right corner to add new account code details on the top row. Don't forget to hit Save. This will allow a drop-down menu of Account Codes to select from the Purchase Order form.

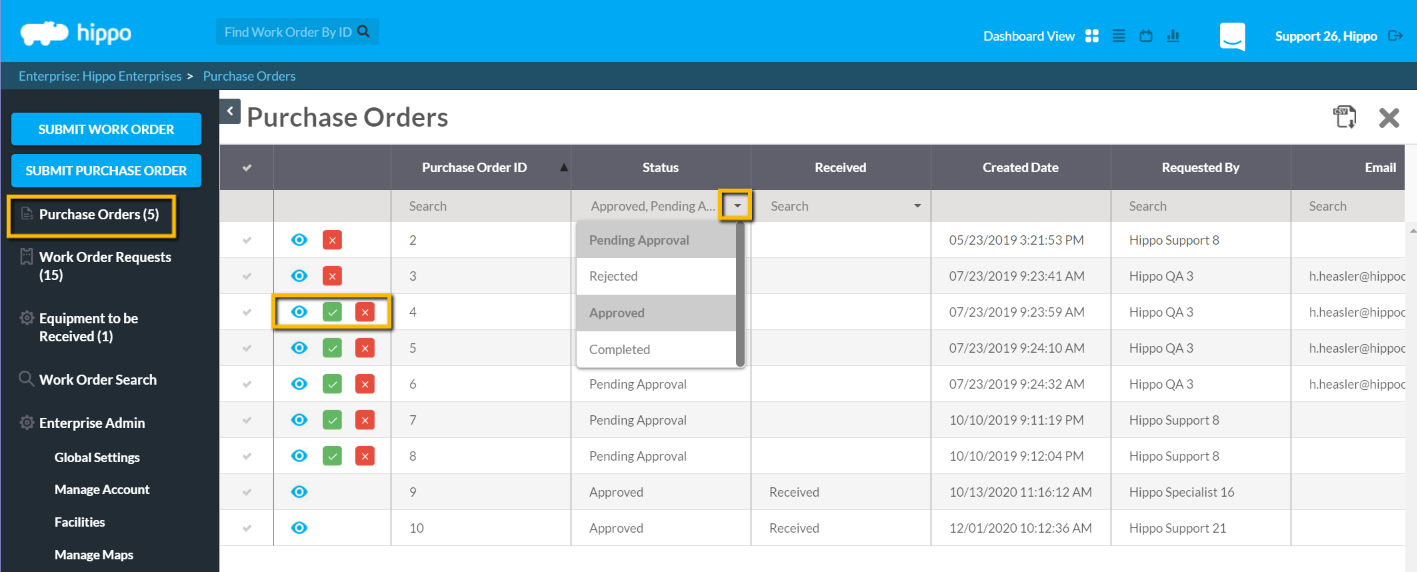
Manage Purchase Orders:
- To view further details about the purchase order click the view button
- To approve a purchase order click the green checkmark.
- To reject a purchase order click the red X.

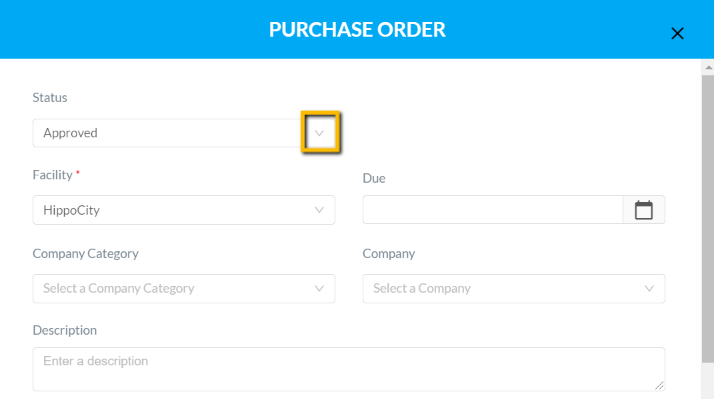
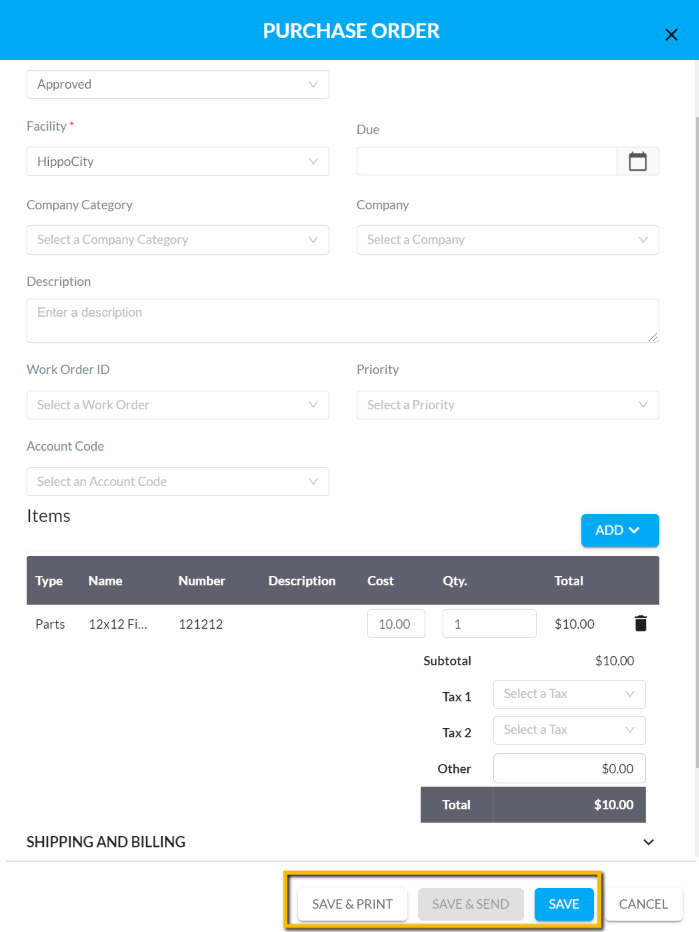
When you open a Purchase Order form, you can edit or add any additional items or parts prior to approving the order it if necessary, as well as change the Status.
There are three options to complete your PO:
- 'Save & Send’: This will download the PO as a ‘PDF’ document. Your default email client will open with the Company as the recipient of the email. Attach the downloaded PDF document and compose your email.
- 'Save & Print'.
- 'Save'
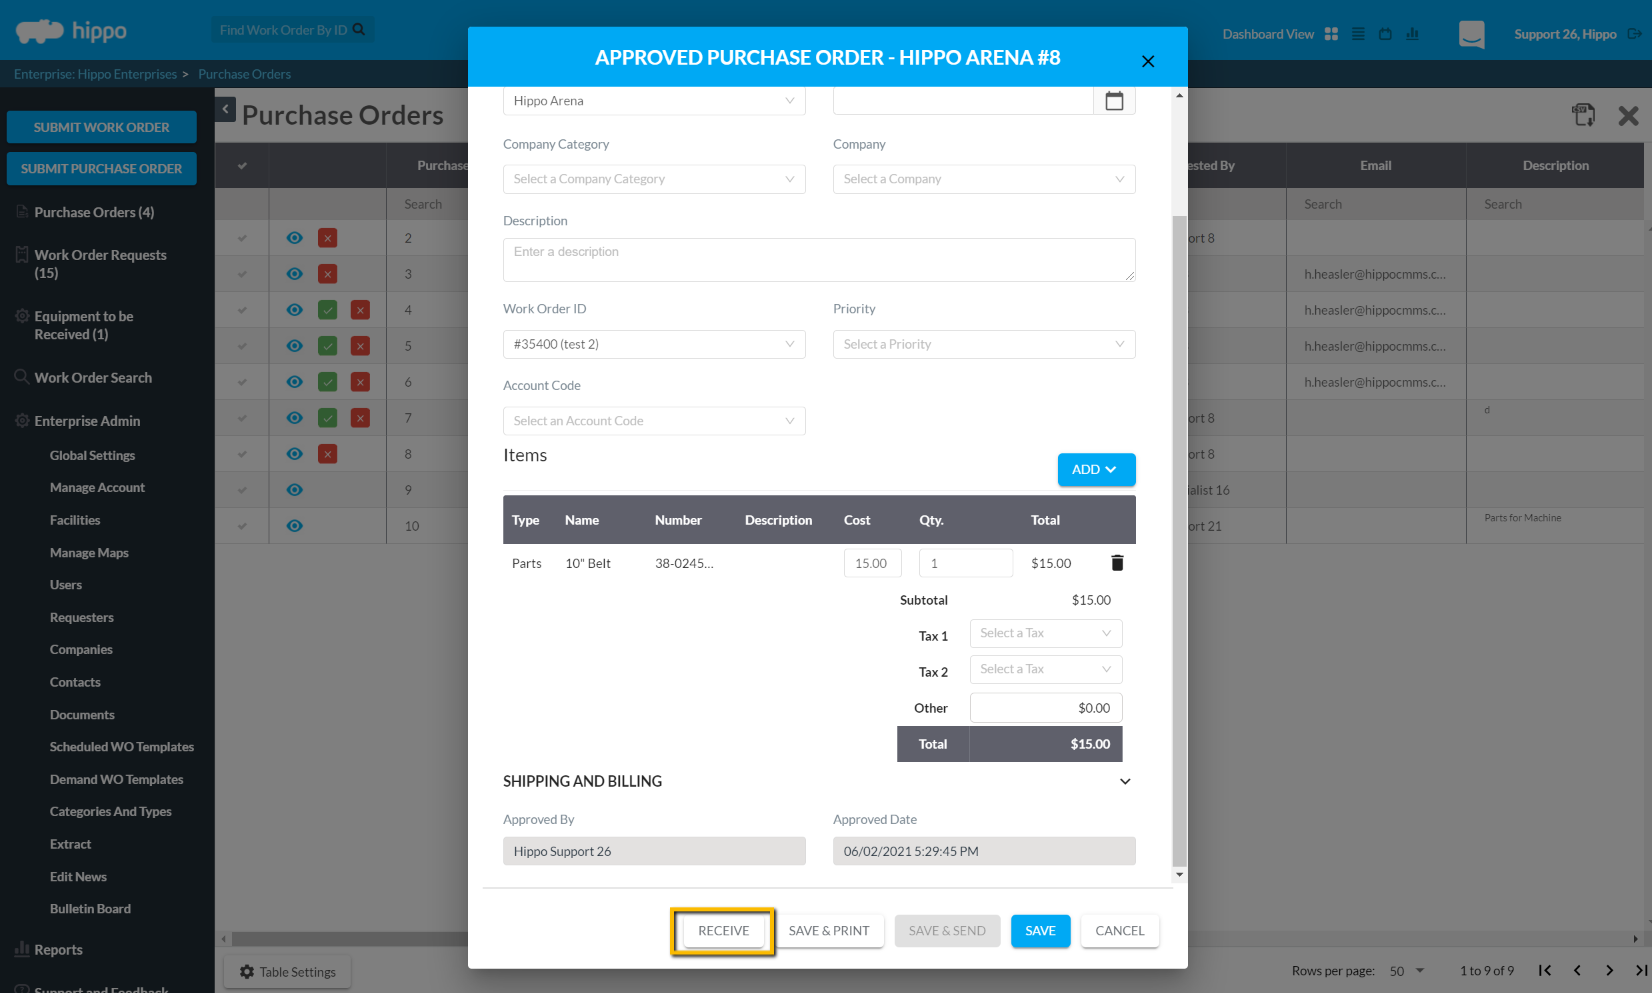
Receiving Purchase Orders:
Once the PO has been Approved, and you have the inventory, hit the Receive button.
First, click the View button next to the Purchase Order ID number.
Secondly, click the Receive button found at the bottom of the form.
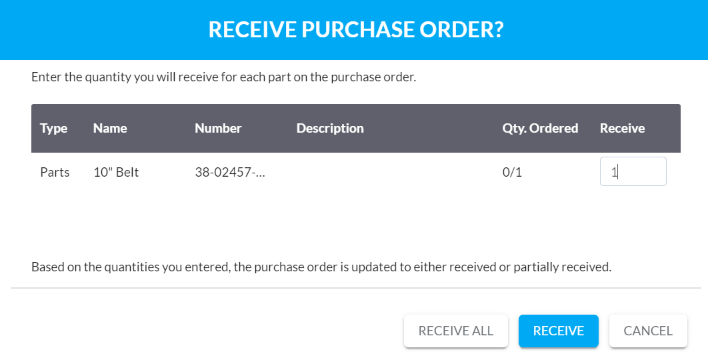
Next, you'll be prompted to either, Receive All or Receive. If you select Receive, you will need to enter the exact quantity received, so it will update the Quantity on Hand accordingly on your Parts grid.

Hippo is always here to help. We want you to succeed. Whether you need support, extra training, or have any questions about how your database is set up, feel free to reach out.
For any questions, please do not hesitate to contact us through the conversation window or at support@hippocmms.com.