Managing Work Order Details with Work Order Templates
Hippo offers two types of work orders - Scheduled Work Orders (PM) and Demands. Scheduled Work Order Templates can help manage things like cleaning and sanitization schedules. Demand Work Order Templates can help troubleshoot unplanned maintenance and cleaning issues. They’re easy to set up and help streamline your operating procedures.
Creating Templates
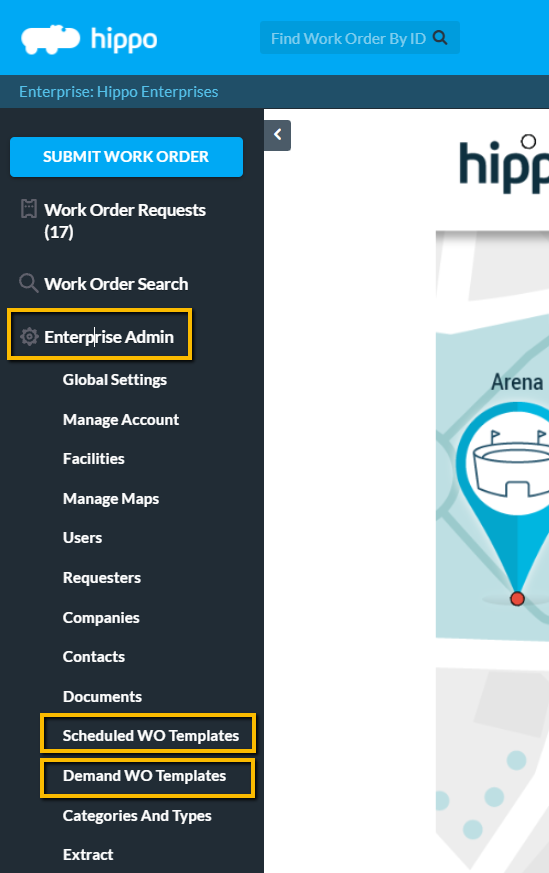
To create a Scheduled WO or Demand WO template, go to the Enterprise Admin menu and look for the Scheduled WO Templates panel or the Demand WO Templates panel. Please note that Demand WO Templates are only available with certain versions of Hippo CMMS software and are enabled by Hippo. A user must also have permission to view/add/edit/delete Work Order Templates. Remember, we are here to help. If you have any questions about using work order templates or need us to walk you through setting them up, contact us here.
Best Practices
Include the required frequency in the work order’s name. For example, Daily, Weekly, or Monthly. For tasks that are done multiple times a day, including the time in the name. For example, the name of the work order can be: 9 am Room Cleaning and Sanitation.
Instructions
Creating Scheduled WO Templates
When creating a Scheduled WO Template, use the add button found in the top right corner. This gives you a new row and you have several fields available. Blue columns of information are mandatory. All other columns are optional. Any details within the template will be on the work order.

Mandatory
- Name
- Type (Location, Equipment, Vehicle)
- Description
Optional
- Work Category
- Schedules
- Days to Complete
- Tasks
- Documents
- Lockout Procedures
- Job Hazard
- Estimated Effort (Hours)
Do not forget to hit the Save icon in the top right corner once done creating your template.
Applying a Scheduled Work Order Template
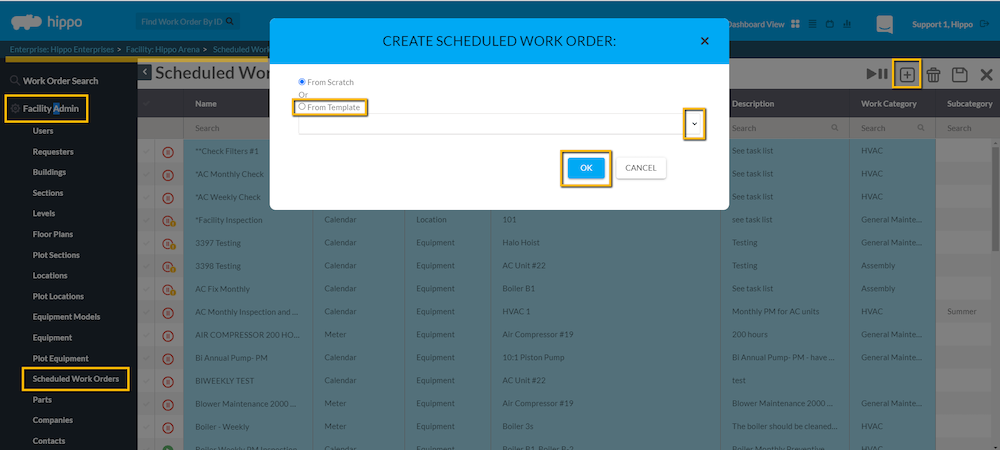
You can use the Schedule work Order Template in any of your facilities or multiple times in one. Click on the Scheduled Work Order panel, Facility Admin. Hit the Add icon in the top right and the Create Scheduled Work Order window appears. Select "From Template" then select the template name from the dropdown list. Hit OK and the new template appears on the top row of this grid. Add or edit any other details to this PM.
Creating Demand WO Templates
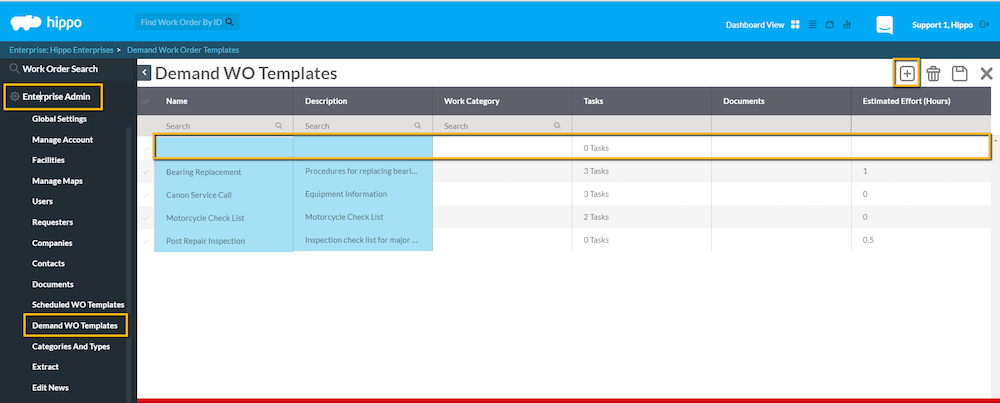
A demand work order template can be used to easily submit a new demand work order with pre-populated details. When creating a Demand WO Template, use the add button found in the top right corner. This gives you a new row at the top of the table. Click in the correct field to add all the details. Blue columns of information are mandatory and all other information is optional.
Mandatory
- Name
- Description
Optional
- Work Category
- Tasks
- Documents
- Estimated Efforts (Hours)
Do not forget to hit the Save icon in the top right corner once done creating your template
Note: Template Documents
Attaching a document to your template allows you to attach files that can have important information on:
- Company Standard Operating Procedures (SOPs)
- Policies and procedures
- Safe handling of chemicals and cleaning supplies
- Proper use and disposal of personal protection equipment
Documents must be added from the Documents grid. Click here to learn more about Documents.
Applying Demand Work Order Templates
Once a Demand template is saved it can be used from the Submit Work Order form.
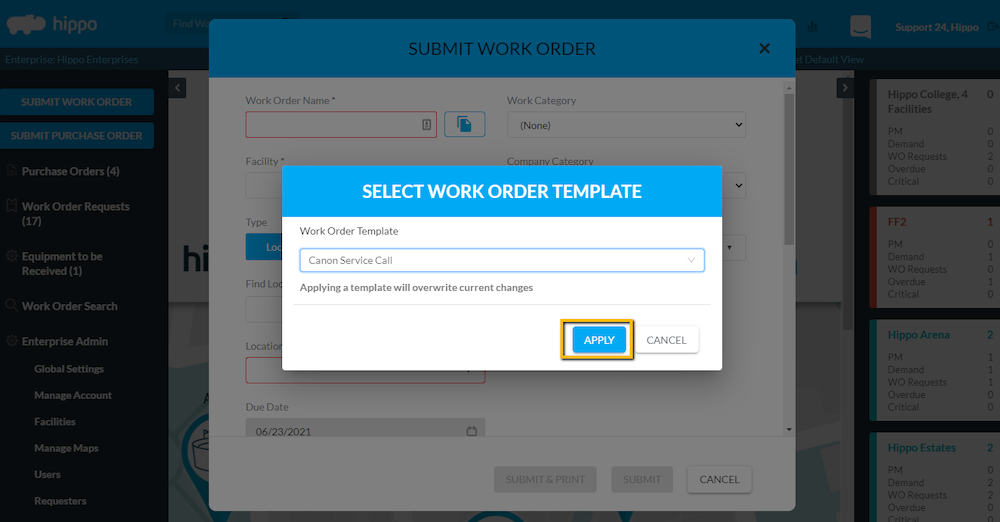
Note: When using Demand work order templates it overwrites any of the template fields. If coming from a Requester, it adds to the information in the description field.
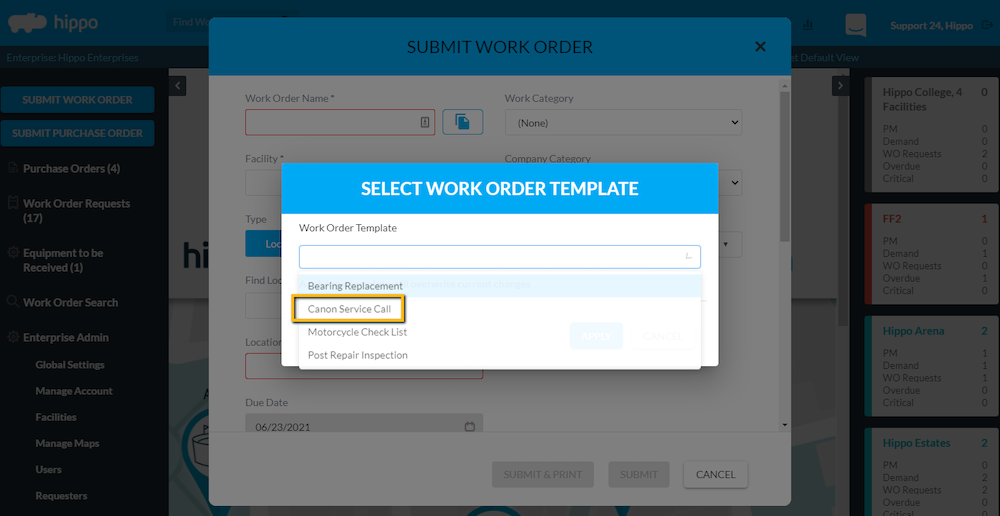
- Click the page icon beside the Work Order Name.
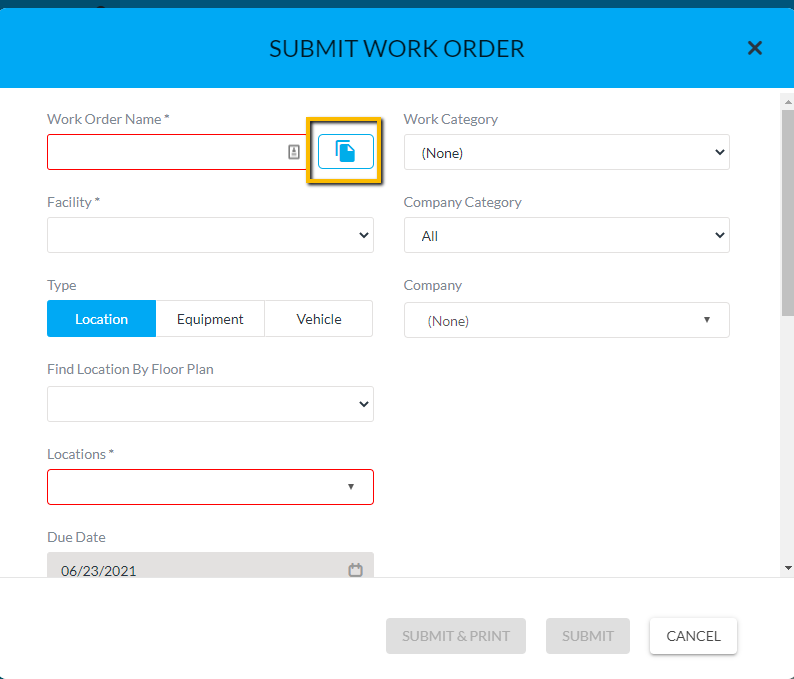
- In the Select Work Order Template window, select a template and click Apply. The work order is automatically filled with the information from the template.
- Select the Facility and Type to associate to the work order or any mandatory field outlined in red.
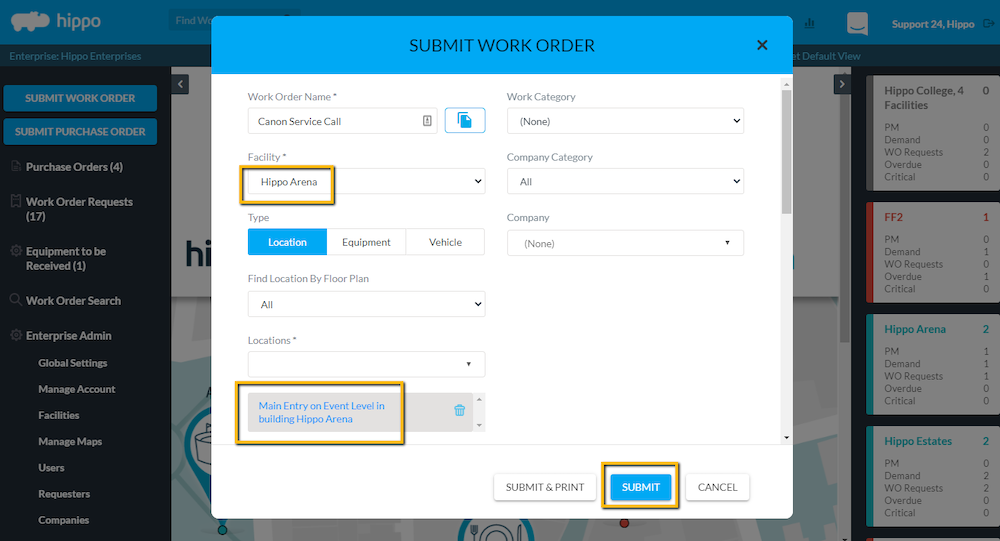
- Optional to add more information or adjust certain fields if required, including:
- Name
- Description
- Work Category
- Assign Resources
Once finished, simply hit Submit to add the new Demand work order.
Best Practice: For easier tracking and reporting, use a relevant Work Category. Remember, you can update/add new categories in your Hippo database. When all the work orders have the same category, it’s much easier to track them or pull them into a report. Click here to learn more about Work Categories.