
Save Visitor Data for Future Visits
Why save visitors' details
Saving your visitors' details can improve the check-in experience by reducing the amount of information that needs to be entered for returning visitors - either by the visitors themselves when checking in, or by the host and the front of house teams. If visitors are required to sign an agreement, they will only need to do so once, provided the agreement remains within its defined validity period.
In addition to speeding up these processes, using the same visitor profile when creating visits stores the visit history for future reference and analysis.
When a returning visitor's details are saved, they can be automatically entered when:
- A visit is created in the Visitor logbook
- The visitor checks in at the Kiosk
- The visitor checks in via a Permanent pass (QR code)
The Visitor logbook
When a returning visitor's details are stored in the address book, their profile can be selected when their name is entered on the New visit page. Selecting the profile automatically populates the visit fields with the stored details.
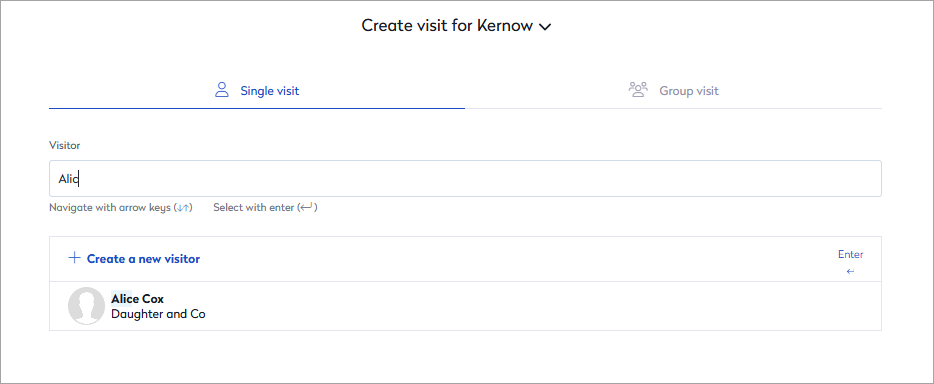
To save a visitor’s details for future use:
- On the New visit page, enable Add to address book > Add to shared address book so the visitor profile can be selected for future visits.
- Enable Remember visitor profile on the kiosk to automatically populate the visitor’s details at check-in.

The person saving the visitor details to the shared address book must have the Add visitor profiles to a shared address book permission applied. Learn more: User management
The Kiosk
When a returning visitor's details are stored in the address book and they check in at the kiosk, they can tap Been here before on the kiosk to automatically populate their details.

The Been here before? option is only displayed on the kiosk when Visitor identification is set to recognize returning visitors by email.
If identification is set to mobile number or 3 letters of their name, the option is not shown. Instead, visitors can enter their mobile number or the first three letters of their name (depending on the selected setting) to automatically populate their details.
To display the Been here before? option on the kiosk, enable Recognize returning visitors > Based on email in the Visitor identification settings:
- Sign in to Eptura Visitor and open Settings > Visitors > Configure kiosk > Visitor identification.
- Enable the following:
- Visitors can check in by typing in their name
- Recognize returning visitors
- Based on email (more confidential)

If 'Based on email' is not selected, and either Based on mobile number or Based on 3 letters is selected instead, the 'Been here before?' option is not displayed. Instead, visitors can enter their mobile number or the first three letters of their name (depending on the selected setting) to automatically populate their details.
Permanent Pass (QR code)
For regular visitors at a location that don't keep a set schedule or need visits arranged in advance - IT, contractors, delivery couriers, etc. - it can be useful to provide a permanent pass (QR code) that they can use to check in. The returning visitor can scan the permanent QR code and automatically populate their details when checking in.
To request a permanent QR code, the visitor must first check in at the kiosk. At the end of the check in process, they can tap the option to request a permanent pass. The QR code is then sent to their email address.

To display the option on the kiosk to request a permanent pass, the Visitors can ask for a scannable permanent pass that saves their answers option must be enabled for the Summary screen. Learn more: Set up the Summary screen
