Wi-Fi Integration
Improve visitor experience by providing Wi-Fi credentials when your visitors check in, enabling them to immediately connect to your guest network and access the internet.
The Eptura Visitor Wi-Fi integration provides access to a remotely hosted RADIUS server. By directing your guest network to these servers, visitors can be authenticated through them.
Both a primary and a backup IP is provided. A wide variety of regions is available; we'll pick the servers closest to the region configured in your Eptura Visitor settings to ensure a fast and reliable connection when authenticating.
You can customize the password length, the type of password (numeric or alphanumeric), the type of username (Guest1234 or johndoe1234), and add a short text to the default message shown to the visitor.
What your visitors see
The default message is provided in English, Dutch, and French, and reads:
Welcome to {CompanyName}. Here are your Wi-Fi credentials:
Username: {Username}
Password: {Password}
{MessageAddition}
The credentials are only valid from when the visitor checks in and are automatically invalidated when they are checked out. This ensures your guest network is only used by visitors who are currently on site and checked in.
Wi-Fi controllers
Any Wi-Fi controller which supports WPA-Enterprise with custom RADIUS server ports can be used with this integration. Some of the more common controllers that can be used are:
- Aerohive
- Aruba
- Cisco ISE
- Cisco WLC
- Fortigate
- Meraki
- pfSense
- Ubiquiti
Configuring the Wi-Fi integration and RADIUS server
To provide your visitors with credentials to your guest Wi-Fi when checking in, an administrator must enable and configure the Eptura Visitor Wi-Fi integration, and the RADIUS server.
Enable the Wi-Fi integration
- Sign into Eptura Visitor as an Administrator, and open the Location to configure the Wi-Fi access.
- Navigate to Settings > Integrations > Wi-Fi > Show integration and click the IronWiFi Settings.

- Toggle Enable Wi-Fi integration button to enable (or disable) the service, and configure as below.
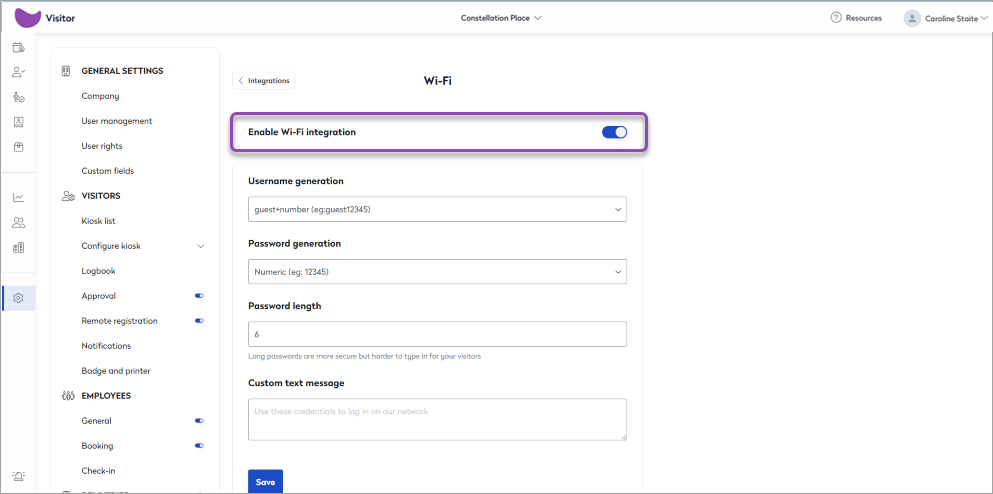
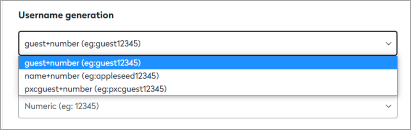
- Click the Username generation drop-down and select the type of usernames to create; either anonymous guest usernames (guest+number) or you can include the visitor's last name (useful for monitoring and auditing purposes).
- Click the Password generation drop-down and select the type of password to create; either numerics or alphanumerics.

- Enter the Password length. The password length can be between 3-18 characters.

- If required, you can add a Custom text message to include with the default message shown to your visitors.

- Click the Username generation drop-down and select the type of usernames to create; either anonymous guest usernames (guest+number) or you can include the visitor's last name (useful for monitoring and auditing purposes).
When the Wi-Fi integration is enabled, visitors who have provided either a mobile phone number or an email address, are sent a message containing the user credentials they can use to connect to your guest network during their visit. An SMS to the mobile number is the default method and is always used if the visitor has entered a valid mobile number. User credentials are not created or provided to visitors who do not provide either a mobile number or email address.
If the Wi-Fi integration is disabled (by toggling off the Enable Wi-Fi integration option in Settings), all settings are retained and the RADIUS server continues to operate, however, no visitors are added or removed from the RADIUS authentication pool when the integration is disabled. This can be useful when performing the initial configuration or if you want to disable access temporarily during special events or security incidents.
RADIUS Server Settings
When the Wi-Fi integration is enabled, the RADIUS server is automatically generated in our partner system, IronWiFi. When the server is provisioned and linked, the connection information appears automatically in the same Settings view as the above configuration options (Settings > Integrations > IronWiFi > Settings).

Your Wi-Fi network administrator can configure the RADIUS server as follows:
- Set the Guest network to WPA 2 Enterprise authentication. Some controllers might further require that you define the RADIUS server(s) as being external to your local environment.
- Enter the RADIUS primary IP address as the AAA/RADIUS server for guest authentication. Some controllers support the configuration of additional servers for backup in the event that the primary controller cannot be reached; for backup controllers, enter the RADIUS backup IP address.
- Enter the Authentication and optionally, Accounting port information, along with the Shared Secret. The same ports and secret is used for both the Primary and Backup servers. These ports, along with the Shared Secret, comprise the identity and authentication pair used to ensure your visitors are checked against the correct records at our partner service, and cannot be modified at this time.
Depending on your network security configuration, you might need to alter your outbound firewall to allow TCP traffic from your Wi-Fi controller(s) to the Primary and Backup IP addresses over the listed ports.