Implement SSO and User Provisioning through OneLogin
Single-Sign-On (SSO) based on SAML 2.0
First, go to the Eptura Visitor Marketplace and install OneLogin.
Step 1: enter your company ID
-
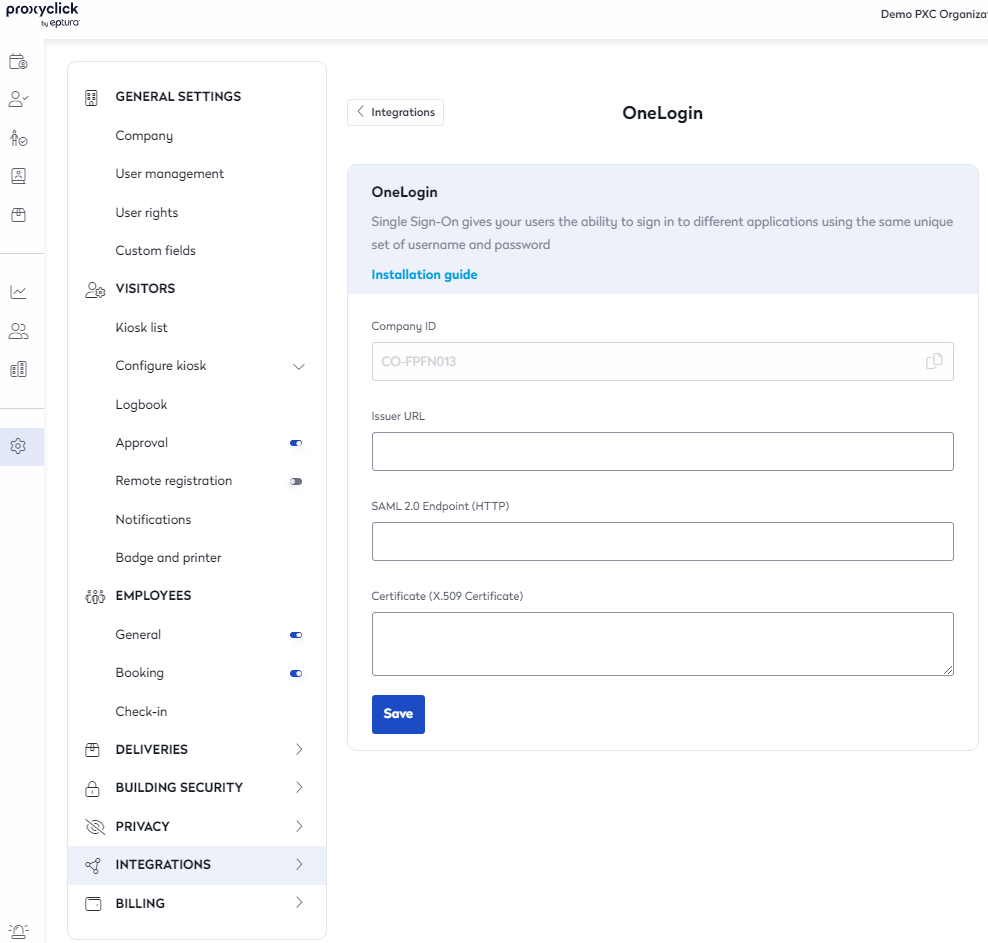
Go to OneLogin configuration page in Eptura Visitor and copy your company ID.
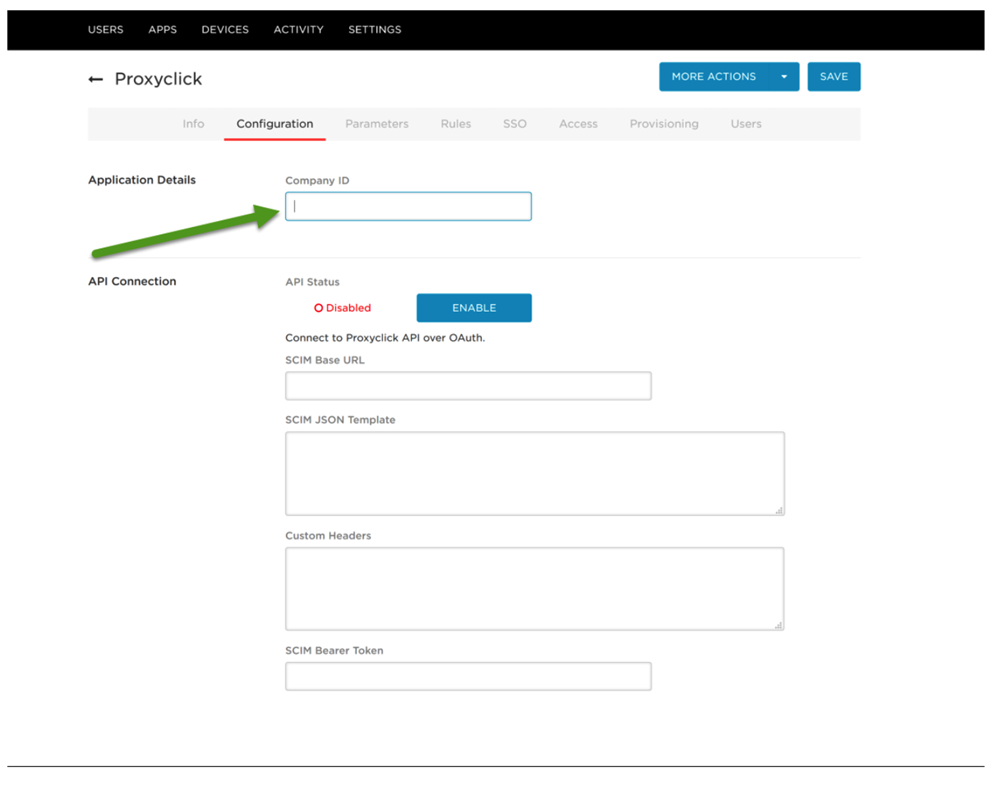
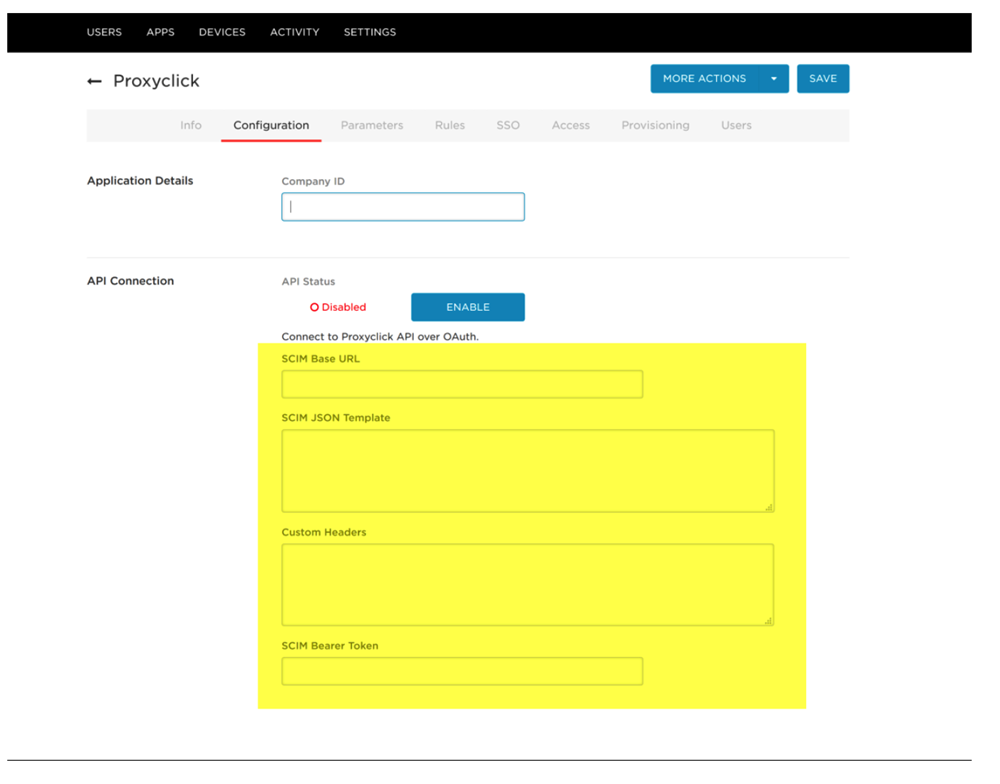
Paste the company ID into OneLogin > Configuration and Save changes.
Step 2: Copy the SSO information
Go to OneLogin > SSO and copy the following 3 values: certificate, Issuer URL, and SAML 2.0 Endpoint (HTTP).
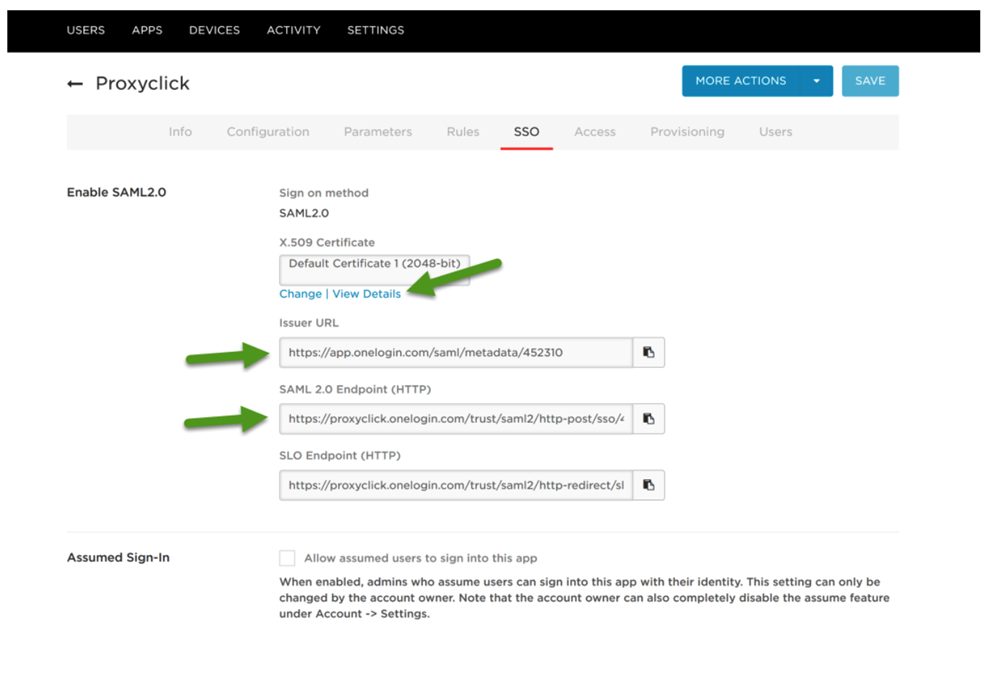
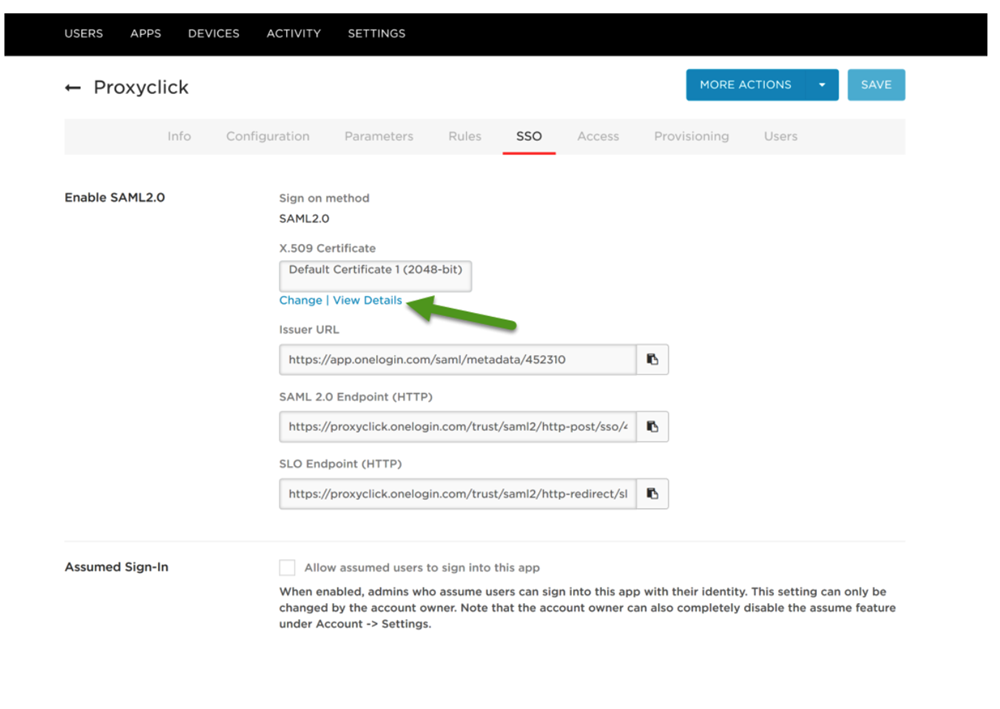
Note: for the certificate, please click on “view details” to copy the full X.509 certificate (see 2 screenshots below)
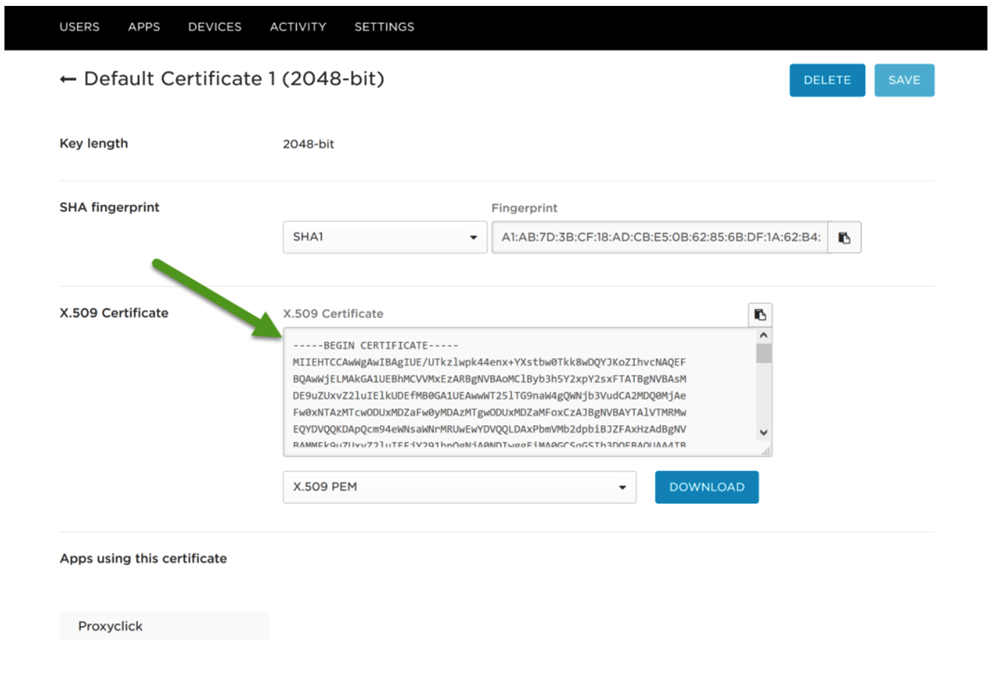
Go back to OneLogin configuration page in Eptura Visitor and paste these 3 values in the Issuer URL, SAML 2.0 Endpoint (HTTP), and Certificate (X.509 Certificate) (including BEGIN and END header and footer) fields.
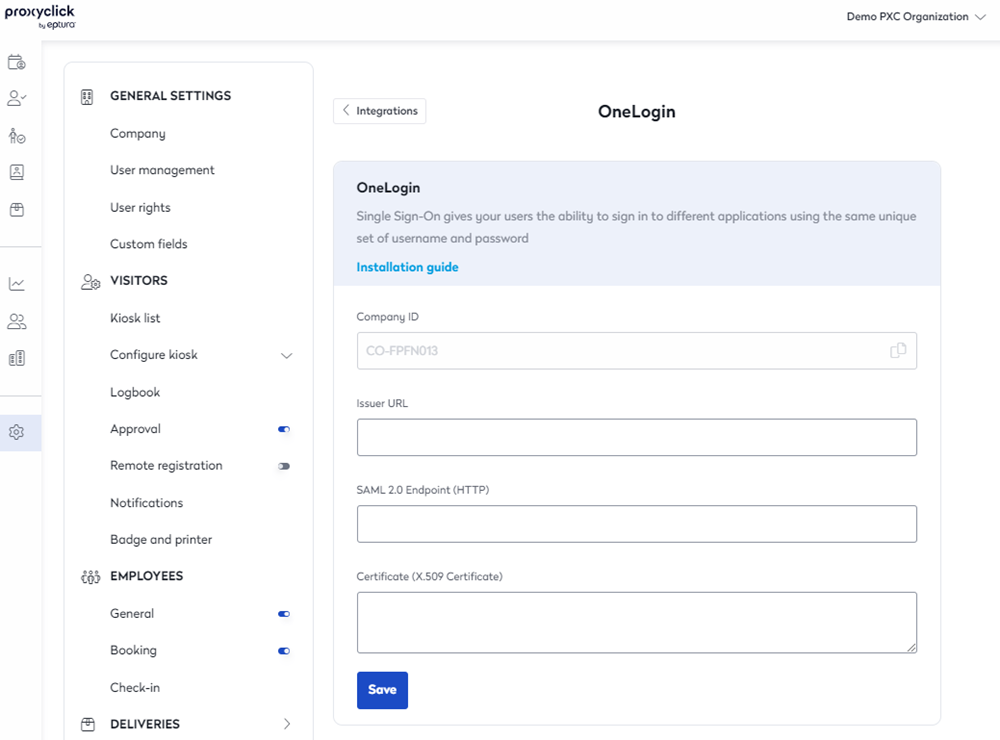
Click on Save.
Your OneLogin connection is ready. You can now use the URL https://saml.proxyclick.com/init/CO-XXXX (where CO-XXXX is your Company ID) to log into Eptura Visitor using OneLogin SSO or log into OneLogin as a user and choose the Eptura Visitor Kiosk app. But you will still need to add users in Eptura Visitor before you try to log in with SSO (you can do it manually, in bulk, or via User Provisioning. See the next steps to configure User Provisioning with OneLogin).
User provisioning
If you didn’t do it already, go to the Eptura Visitor Marketplace and install OneLogin.
Step 1. Copy info from your Eptura Visitor account to OneLogin
-
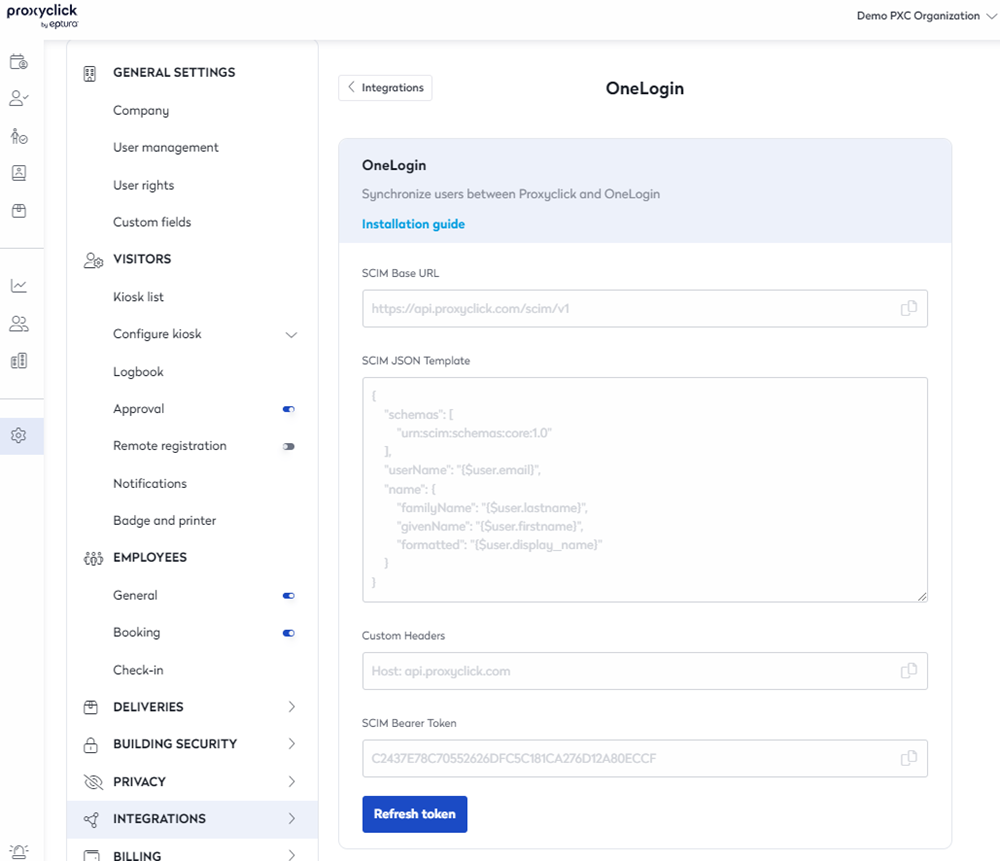
Go to OneLogin configuration page in Eptura Visitor and copy the SCIM Base URL, the SCIM JSON Template, the Custom Headers, and the SCIM Bearer Token.
-
Paste them in to OneLogin > Configuration > API Connection
-
Click the Enable button, the API status will change to Enabled.
Step 2. Configure User Provisioning
Go to OneLogin > Provisioning and perform the following actions:
-
Check the Enable provisioning for Eptura Visitor option.
-
Define admin approval in the function of your needs.
-
Select the action “Delete” when users are deleted in OneLogin (This is important).
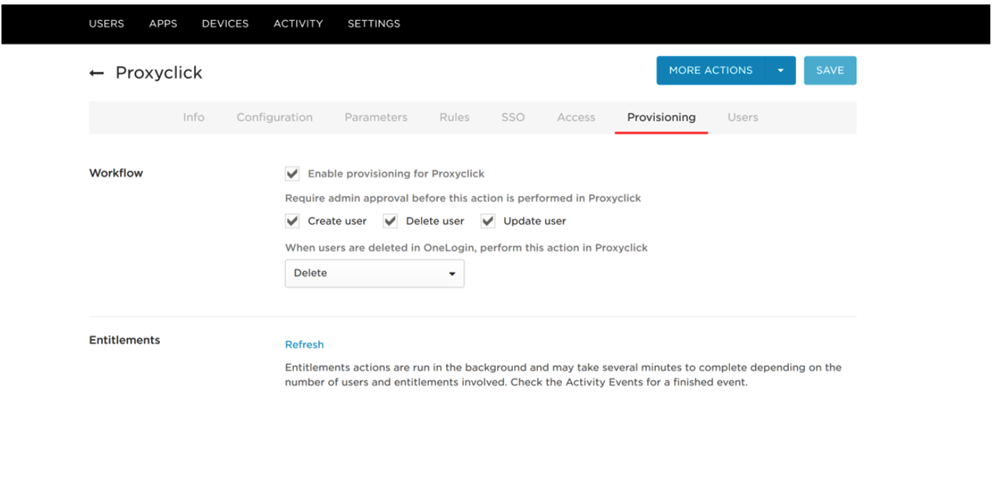
Then save the changes.
Setting up OneLogin in many locations
User Provisioning
You can configure OneLogin and manage users across multiple locations from a single Eptura Visitor account.
-
Connect OneLogin in your main location (follow the steps above)
-
Click on Multi-location mapping on the OneLogin integration in your Integration List
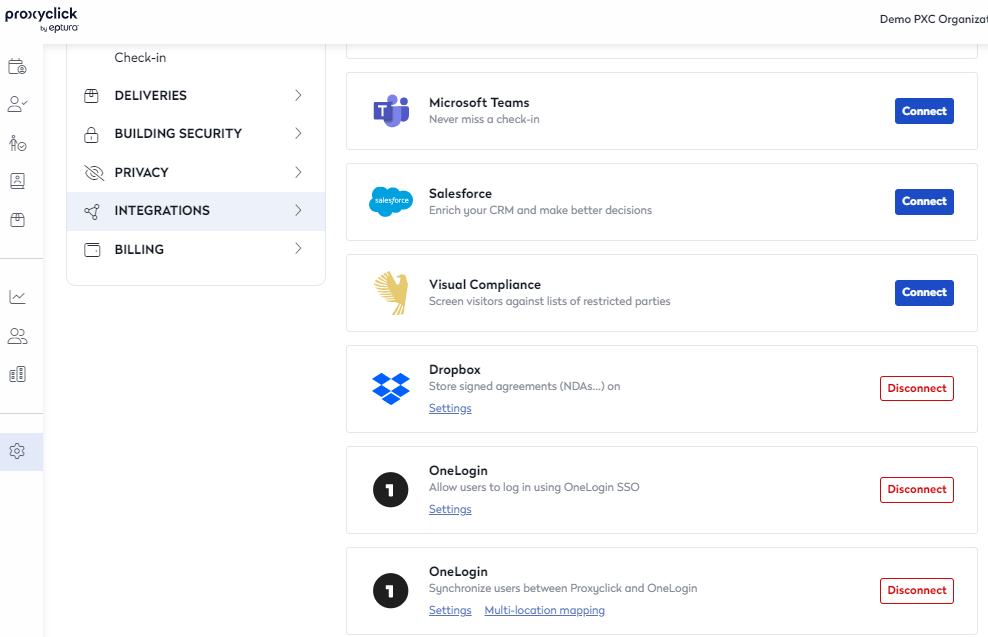
Important to note: If you do not see the Multi-location mapping button, you are running on an older version of our OneLogin integration. All you have to do is disconnect the integration and then reconnect it before continuing with the remaining steps.
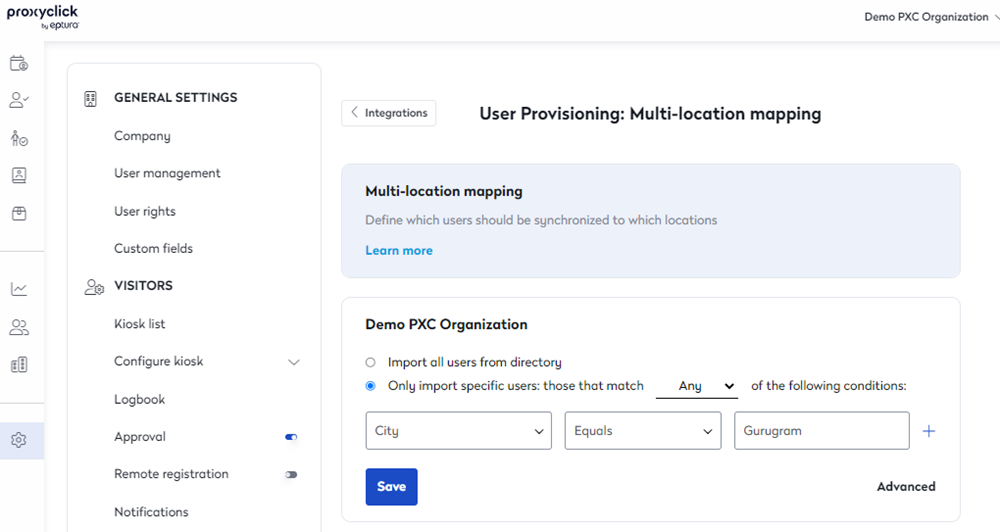
You will then see the list of all the locations for which you’re an Admin. Using the toggle button, you can enable/disable User Provisioning for each location from this list.

Once enabled, you can import all users for provisioning in that location or define your filters for specific users.
You can filter users based on their city and language using the appropriate conditions.
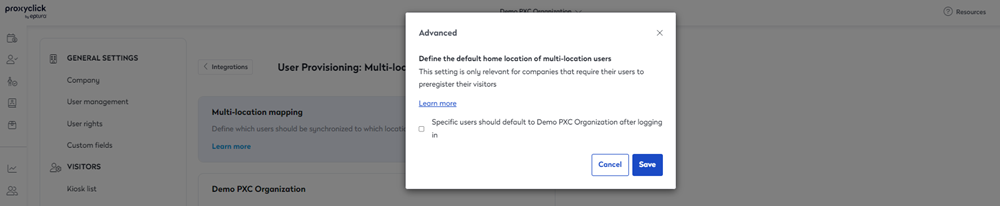
Advanced
If you provision the same users in multiple locations, you can use the Advanced menu to force their “home location.” Eptura Visitor would then use this as the default location for new visits created (e.g. when using the Generic Calendar Integration or the Outlook integration).
OneLogin User Provisioning and Single Sign-On require the corresponding add-ons to your subscription plan.