Visitor agreements
About Visitor agreements
A visitor agreement is a digital document sent to visitors in advance of their visit, or reviewed and signed at the kiosk on arrival. It can set out terms and conditions that the visitor must review and agree to before their scheduled visit - a non-disclosure agreement (NDA) for example. The document is signed electronically by the visitor and is stored with the visit in a PDF file.
When signed, the agreement remains valid for a specified period, ensuring compliance and streamlining the check-in process on the day of the visit. The agreement signing can be tracked from the Visitor Logbook.
A default agreement is provided with Eptura Visitor which can be edited to suit your requirements. If required, you can add alternative agreements that are sent to specific visitors as determined by information collected via custom fields.
Contents
How to enable Visitor agreements
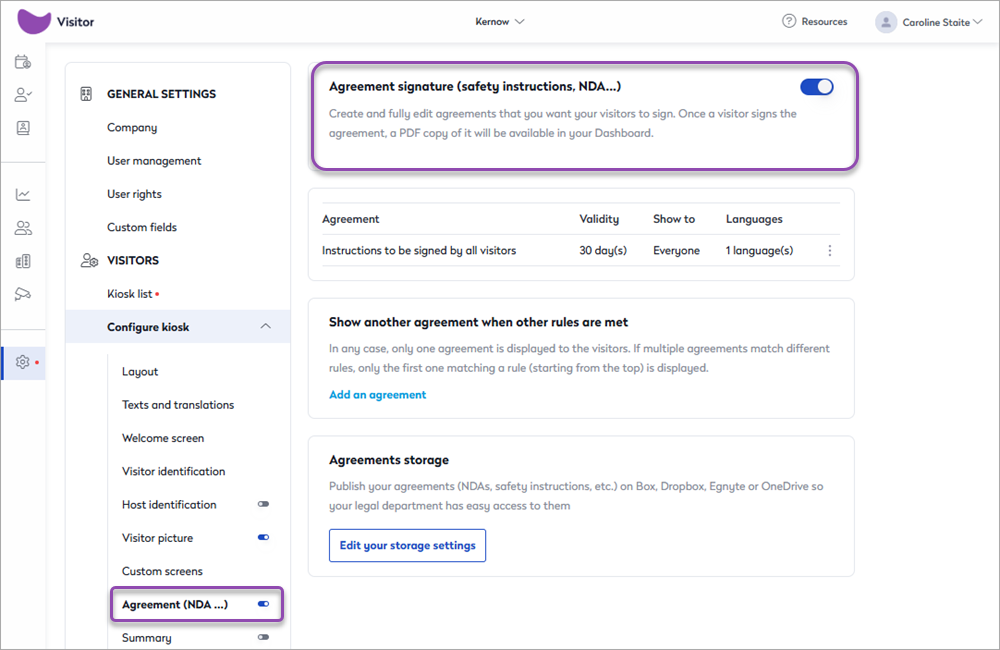
To enable visitor agreements, the Agreement signature must be activated for the kiosk:
- Enable: Settings > Visitors > Configure kiosk > Agreement (NDA...) > Agreement signature
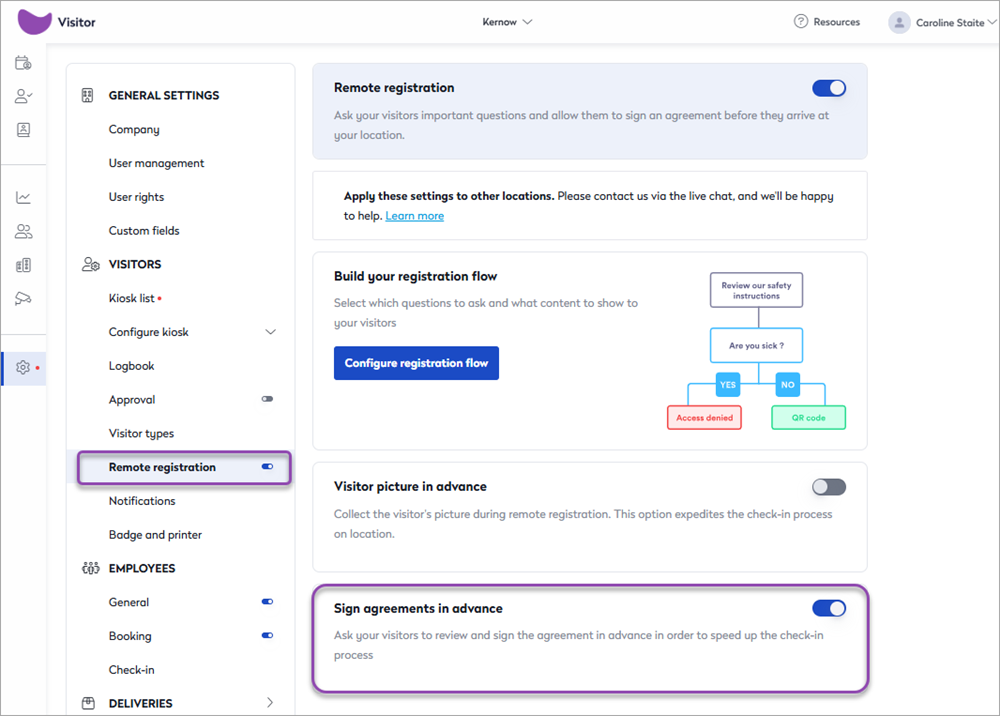
And, if you want to send the visitor agreements to visitors in advance, you also need to enable Remote registration and the Sign agreements in advance option:
- Enable: Settings > Visitors > Remote registration
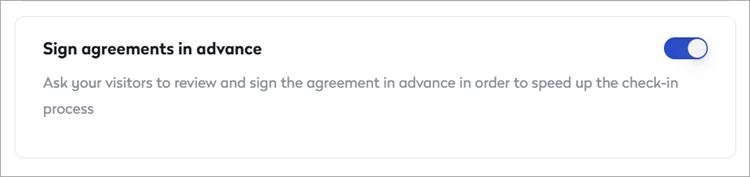
- Enable: Settings > Visitors > Remote registration > Sign agreements in advance
Personalizing Visitor agreements
A default agreement is provided that can be edited to suit your particular requirements. Additional agreements can be created, allowing you to send a different agreement to visitors, depending on the details provided - such as whether they are an employee or a contractor, for example. Only one agreement can be sent per visit/visitor.
Follow the steps to edit and configure agreements.
- Sign in to Eptura Visitor as an Admin and navigate to Settings > Visitors > Configure kiosk > Agreement (NDA...)
- From the three dot menu to the right of the provided agreement, select Edit.
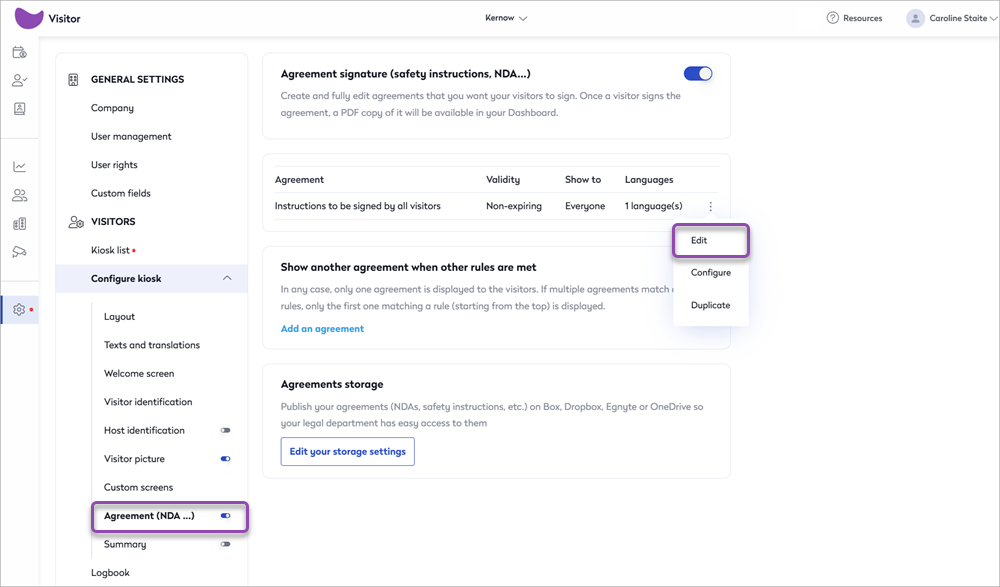
- The editable agreement is displayed in an editor.
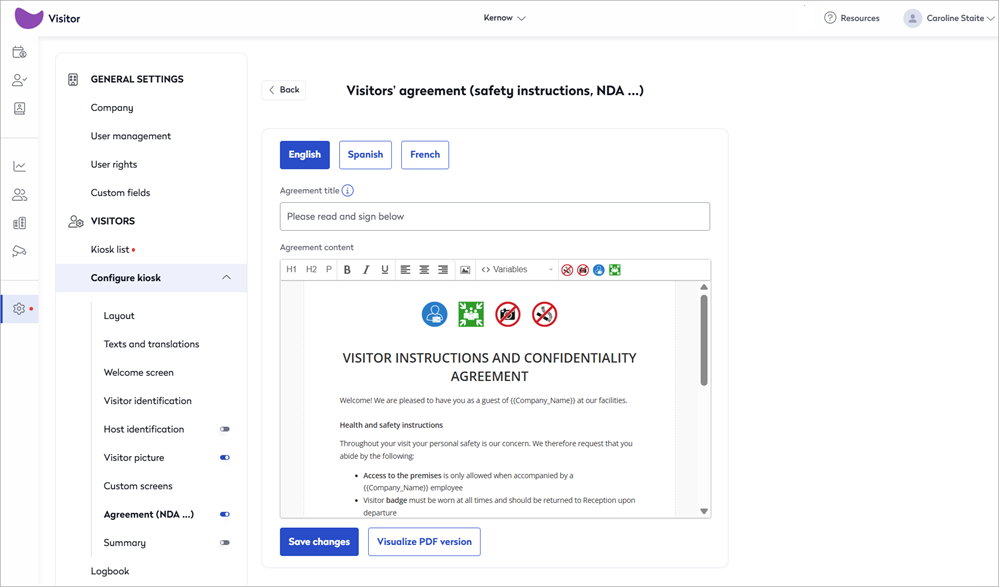
- Agreement title: Edit the agreement title if required. The agreement title is displayed on the top bar of the kiosk app, and if remote registration is enabled, is the subject line of the email containing the link to the agreement.
- Agreement content: The agreement content is displayed in an editor, where you can write and format your content, add your company logo and include custom fields, as required. If multiple languages are configured, you must edit and each language version individually as the edited content is not automatically translated. Learn more: Text and translations
If you copy content from another document, only paste plain text.
- Visualize PDF version: Download a PDF version of the agreement to preview. A PDF version of the signed agreement is stored with the visit in the Visitor Logbook. It can also be sent to the visitor via email.
- Click Save changes when you've finished editing the agreement.
Add additional agreements and configure who sees them
While only one agreement can be assigned to a visitor (per visit), you can add additional agreements and set a rule that decides which agreement is shown to a visitor, depending on details provided via a custom field. The custom field is either completed by the host when the visit is created, or on the kiosk by the visitor on arrival, or via remote registration. The answer given, determines which agreement the visitor is asked to sign.
When multiple agreements are configured, which agreement to show the visitor is considered in order from the top down - the first one that matches the conditions of the custom field is shown to the visitor.
You can create additional agreements either by duplicating one that already exists, or by adding a new one that uses the default template.
To duplicate an existing agreement, from the three dot menu to the right of the agreement, click Duplicate (A).
Or, to create a new agreement using the default template, click Add an agreement (B).

If signing agreements in advance is enabled for remote registration, a message is displayed advising that this option will be disabled if you continue. However, the option can be enabled again when you have saved your additional agreement, so go ahead and click Continue.
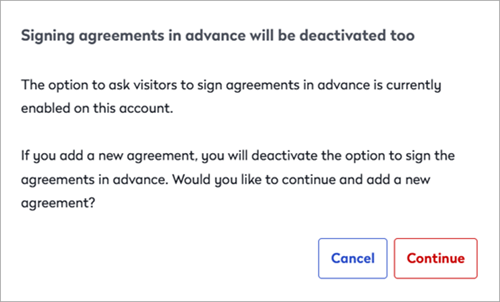
If you see this message, click Continue and then enable the option again from Settings > Visitors > Remote registration > Sign agreements in advance
The additional agreement is saved to the bottom of the list and either shares the same name as the duplicated agreement, or has the default name 'Instructions to be signed by all visitors'. We recommend changing the name of the agreement to distinguish them from one another in the list. You can change the name when you configure the agreement. See below: Configure the agreement
Configure who sees which agreement
The conditions that determine which agreement is shown to which visitors is set in the configuration settings. See below: Configure the agreement
Ordering the agreement list
Visitors are shown the first agreement in the list for which their details meet the defined conditions. The order of the agreement list cannot be changed, so it is important to save your different agreements in an order that ensures the right agreement is shown to the visitors, as per the conditions set.
You can consider not setting any conditions on the final agreement in the list, as this will then be shown to all remaining visitors who do not meet the conditions of the preceding agreements.
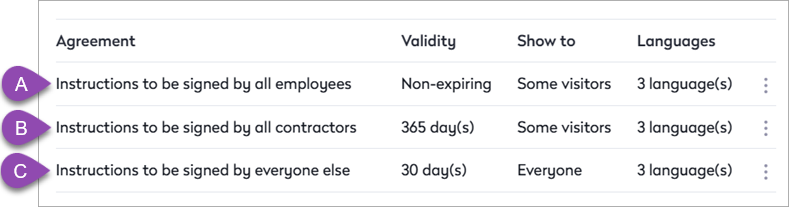
For example, in the image below of an agreement list containing three different agreements:
- The condition for the first agreement checks if the visitor is an employee, and if so, they are shown the employee agreement, which does not expire when signed.
- If the visitor is not an employee, then the condition checks if they are a contractor, and if so, they are shown the contractor agreement, which is valid for 1 year when signed.
- If neither of those conditions are met, then the visitor is assumed to be an external guest and they are shown the standard agreement, which is valid for only 30 days when signed.
Configure the agreement
You can change the name of the agreement, set the conditions to decide which visitors are shown which agreements (if you have multiple agreements), set a validity period, and choose how visitors accept the agreement.
Setting validity periods is available for Eptura Visitor Kiosk app version 2.9.0 or above
- From the three dot menu to the right of the agreement, click Configure.
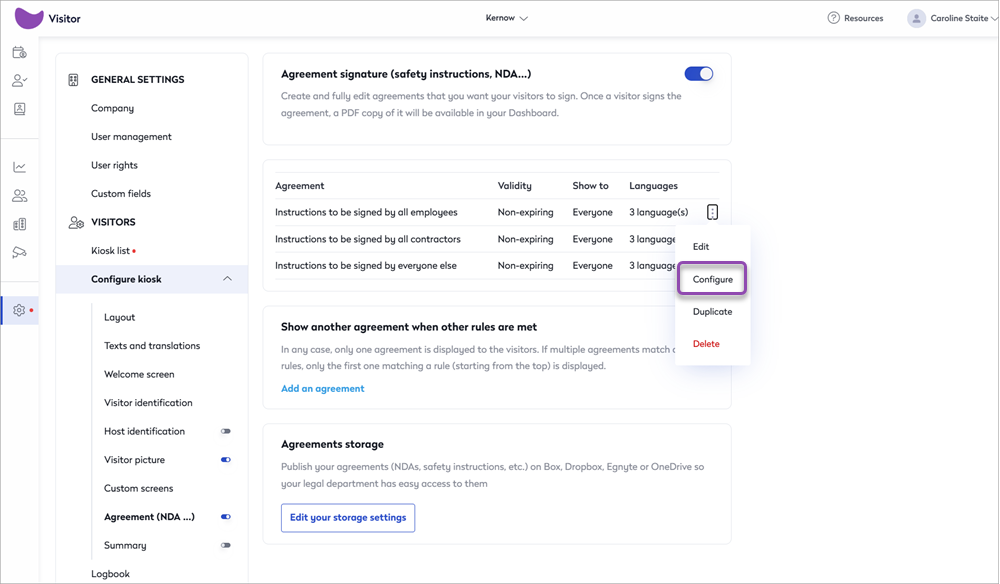
- Set the options for the agreement as described below.
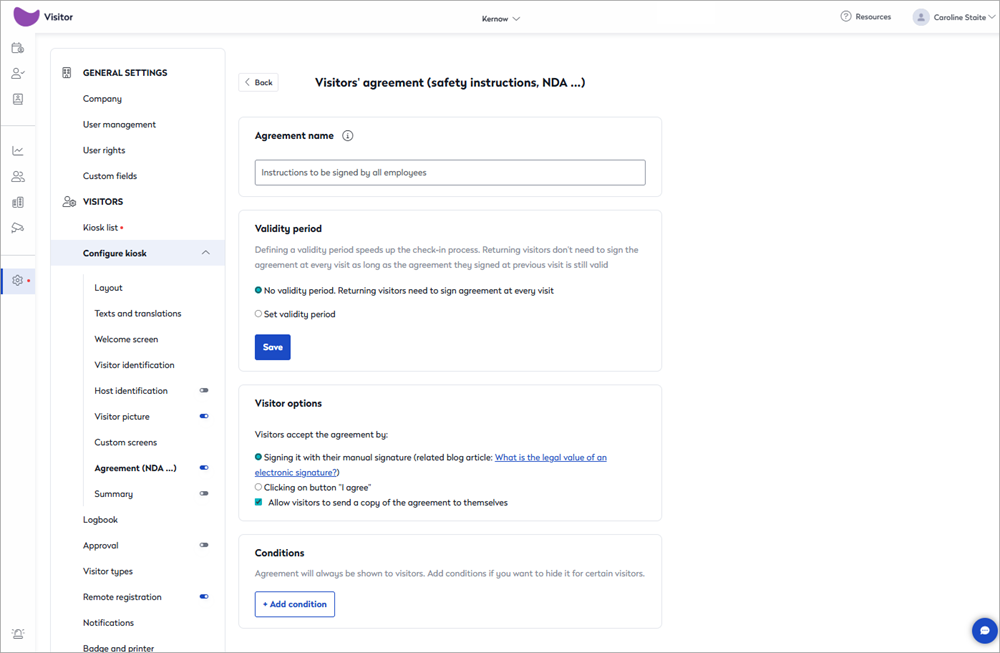
- Agreement name: Enter a name for the agreement so you can differentiate it from your other agreements - this name is not shown to visitors.
- Validity period: Sets how long a signed agreement remains valid:
- No validity period: Returning visitors need to sign an agreement each time they visit.
- Signed agreements stay valid for: Select the number of days, months, or years the signed agreement is valid for. After which, the visitor will need to sign a new agreement. Learn more: Editing validity periods
- Visitor options: Choose how visitors accept the agreement:
- Signing with their manual signature: The visitor signs the agreement from the kiosk, or from their desktop/mobile if signing via remote registration.
- Clicking an 'I agree' button: An 'I agree' button is added to the bottom of the agreement.
- Allow visitors to send a copy of the agreement to themselves: Enable to allow a copy of the agreement to be emailed to the visitor.
- Conditions: To determine which agreements are shown to which visitors, click Add condition to expand the section and select the appropriate custom field and value.
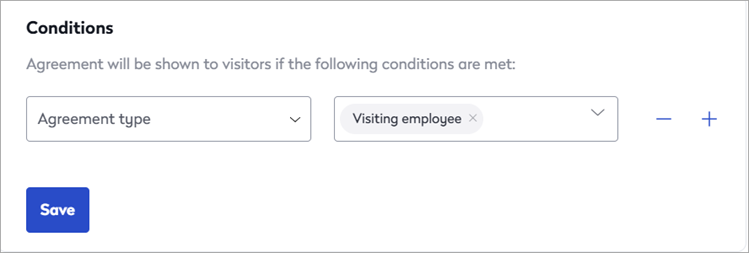
- Custom field: From the left box, select the field to use to determine the condition.
- Field value: From the right box, select the option that will determine if the visitor is shown this agreement.
- To add another condition, click the plus ( + ) sign, or click the minus ( - ) sign to remove the condition.
- Click Save when done. Learn more: Ordering the agreement list
Editing validity periods
After an agreement is saved, if required, you can change the validity period:
- From the three dot menu to the right of the agreement, click Configure. Set the validity period as described above, and click Save.
- Review the notice and click Confirm.

The new validity period is only applied to agreements signed after the new validity period is set. Previously signed agreements remain valid until the end of the validity period that was in place at the time of signing.
However, it is possible to reset the validity period of all signed agreements, past and present, by editing the agreement. See below: Editing an agreement
About recurring visits and validity periods
When an agreement is signed, it remains valid for the duration of the validity period set for the agreement. If the agreement expires before the end of a recurring visit, a new agreement request can be sent from the Visitor logbook.
Editing agreement content
The content of your agreements can be edited. When saving the revised agreements, you can choose to only show the revised agreement to new visitors, or to reset the validity of all previously signed agreements so that all visitors are shown the new revised agreement the next time they visit your premises, which they must then review and sign.
- From the three dot menu to the right of the agreement, click Edit. Edit the title and content as required, and click Save changes.
- Review the notice about resetting validity and make your selection as described below.
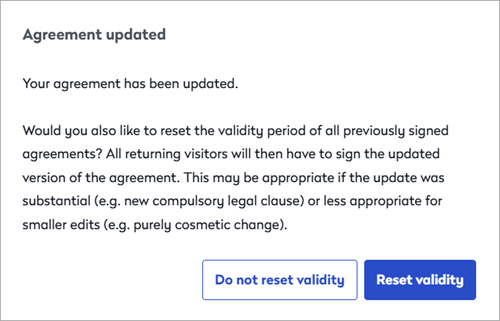
- Do not reset validity: The validity period of previously signed agreements is maintained. The revised agreement is only shown to new visitors or returning visitors whose agreement has expired. Returning visitors who have previously signed an agreement and the agreement is still valid, do not need to review and sign the revised agreement.
- Reset validity: The validity period of previously signed agreements is reset. All visitors are shown the revised agreement, including returning visitors who signed the previous version.
Storing agreements
You can publish agreements on integrated cloud drives, providing easy access for departments such as your legal team, to access them. Click Edit your storage settings to open the Integrations and apps web page and configure your cloud storage integration.
Learn more: Cloud storage integrations
Signing agreements in advance of visit via remote registration
You can request that an agreement is reviewed and signed in advance of a visit, via remote registration.
When enabled, a Please prepare for your visit email notification is sent to the visitor. This email is sent separately from the visit invitation and contains a Prepare visit link that directs them to the remote registration web page, where they can review and sign the agreement (and complete any other required actions configured for remote registration).
To enable signing agreements in advanced via remote registration:
- Navigate to Settings > Visitors > Remote Registration and enable Sign agreements in advance.
Learn more: Remote registration
Managing agreements from the Visitor logbook
You can check if visitors have signed an agreement from the Visitor logbook.
The 'Agreement' column indicates if the agreement has been signed, and you can click the Signed button to view the signed agreement. If an agreement is not yet signed, the Agreement column shows either Link sent, or None if remote registration is not enabled.

To resend the agreement, you can either click the Status drop-down and select Resend registration request or click the visit to open the side panel, and select Resend (Remote registration).

Learn more: Visitor logbook