Create a Group Visit
About Group Visits
A Group Visit allows multiple visitors to be grouped together for an event. Creating a Group Visit is a convenient and efficient way to manage events and large meetings that include a large number of guests. Guest details can be added manually or imported via a Microsoft Excel workbook.
By default, only Administrators can create Group Visits. Learn more: User groups and rights
About the Excel workbook
The guest list for the Group Visit can be imported via a Microsoft Excel workbook. The workbook can contain any or all of the following fields:
- First name
- Last name
- Full name (If used, the full name will be split into first and last name fields during the import)
- Company name
- Visitor Type
- Pass
- Mobile phone
- Visitor language
- Visitor license plate
The fields are formatted as columns in the spreadsheet, and each visitor's details are entered in a different row. Column names and the column order are not important, as columns are matched to fields during the import process.
The number of visitors added to a Group Visit is unlimited, however, for best performance, we recommend including up to 500 visitors on each uploaded workbook.
How to create a Group Visit
- From the Visitor Logbook, click New visit.

- Select Group Visit.
No Group Visit option? By default, only Administrators can create Group Visits. Learn more: User groups and rights
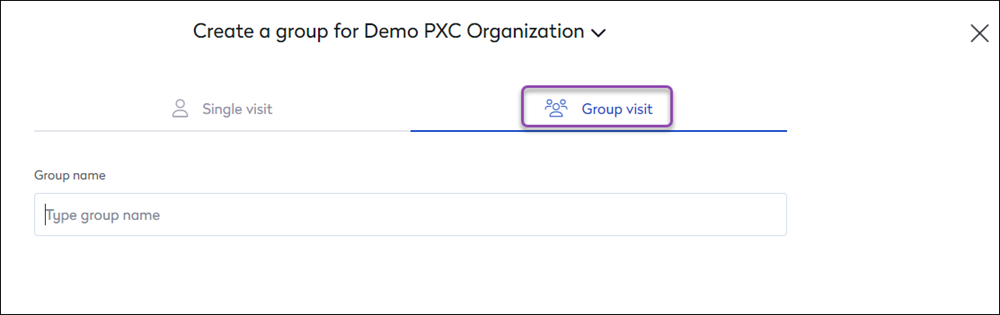
- In the Group name field, enter a name for the Group Visit.
- Visitors can be added manually or imported from an Excel spreadsheet.
- Manually add visitors - Enter the first visitor's name and details, then select the Visitor Type* from the drop-down list. Click + to add another visitor until all visitors for the Group visitor are added.
*COMING SOON! Selecting the Visitor Type for a visitor in a group visit is expected in July 2026
- Import visitors - Click the Import a list of visitors link at the bottom of the screen.

- From your drive, select the Excel spreadsheet containing your visitors' details, and click Open. to open the Import your visitors dialog box.
- Edit import settings - Check and set the Import settings:

- First row contains headers: Enabled by default. Disable if your data does not contain column headings.
- First name and last name are in the same column: Disabled by default. Enable if first and last names are included in the same column.
- First row contains headers: Enabled by default. Disable if your data does not contain column headings.
- Now select the columns to import. For each field, click the drop-down and select the appropriate column to associate with the field. If the spreadsheet does not contain the relevant data, select Don't import and leave blank.

- Alternatively, you can set or select a Custom value for all visitors. Depending on the field selected, you can either type in free text to add to the field for all imported visitors, or select from the list of available options.

- Click Show more to see all available fields that can be imported, and make your selections.

- When you've aligned your data with the visitor fields and made your selections, click Continue to import the data.
- Manually add visitors - Enter the first visitor's name and details, then select the Visitor Type* from the drop-down list. Click + to add another visitor until all visitors for the Group visitor are added.
- The visitors are displayed in the list for the Group Visit. Click Set host and date to continue.
- Set the date and time for the visit and make any other changes.
- If you have more guests to import or add, click Edit list of visitors.
- When done, click Save group.
When your Group Visit is saved, all the visitors are individually listed in the Visitor Logbook. However, the visit details for the Group Visit cannot be individually edited.
How to edit a Group Visit
Group Visits can be opened for editing in the following ways:
Edit a Group Visit via a visitor's Status
From the Visitor Logbook, click the Status drop-down for any of the visitors added to the Group Visit, and select Edit to open the visitor details. At the top of the screen is a banner stating that some fields are not editable because they are part of a group. A link to the Group Visit is displayed - click the link to edit Group Visit.

Edit a Group Visit via the side panel
From the Visitor Logbook, click a meeting link in the Group column for any of the visitors added to the Group Visit, to open the side panel and view the details. From here you can Edit, Duplicate, or Delete the Group Visit.

Editing a Group Visit
From the Edit Group screen, you can:
- Edit the name of the group
- Set it as a recurring visit
- Edit the list of visitors
- Change the date and time of the event
- Set the host
When you've made your changes, click Extra actions at the bottom to send an invitation to the visitors and/or yourself. Click Save Group when done.

Edit list of visitors
To add or delete visitors in the group, click Edit list of visitors from the 'Edit group' form to view the current visitors.

From here, you can:
- Delete a visitor: Hover over the visitor you want to delete to display the bin icon on the left - click the bin icon to delete the visitor from the group.
- Add a visitor: Enter the new visitor's name, company, and email address in the fields across the top, and click the plus ( + ) to add the visitor to the group.
- Import a list of visitors: Import visitors via an Excel workbook. Learn more: About the Excel workbook
Click Set host and date when done.
Editing visitor details from a Group Visit
Visitors added to a group visit share certain fields, such as the visit schedule and host name. Other fields are specific to each visitor, such as their name, and email address etc.
When you edit an individual visitor from a group visit, only the fields specific to that visitor can be edited, not the shared group fields. This prevents the shared values from being inadvertently changed for all visitors in the group.