Print to different printers from different kiosks
Using a dedicated printer for each kiosk can be useful in many situations. Whether you have a busy reception or you have multiple entrances to your location, giving each kiosk its printer will ensure your visitors have a smooth, efficient check-in experience.
These features are included in our Essential plan.
Before you begin setting up
-
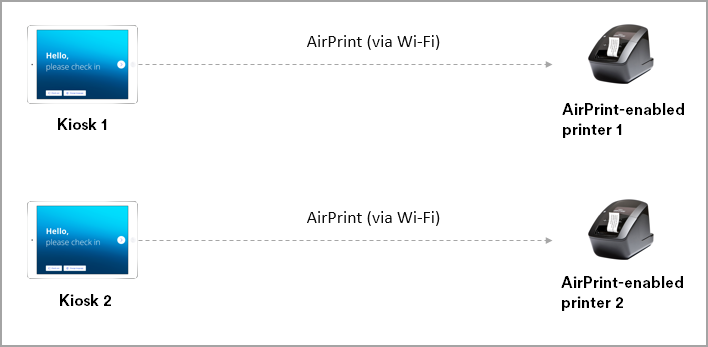
The example uses a 1:1 ratio of the printer to the kiosk. It is possible to set up any combination of printers to kiosks (for example, 3 kiosks to 2 printers)
-
The AirPrint option is only available when using AirPrint-enabled printers. If you are unsure of your printer's features, please check your instruction manual
-
Ensure the printers you want to connect to are on the same network as the kiosk they will be connected to. For example Kiosk 1 and printer 1 must be on the same network and Kiosk 2 and printer 2 must both be on the same network
Connect your printers
Step #1:
Set up Kiosk 1 to Printer 1. If you have not yet done this, please go here to set up an Airprint printer or here to set up a printer using Print Proxy.
Step #2:
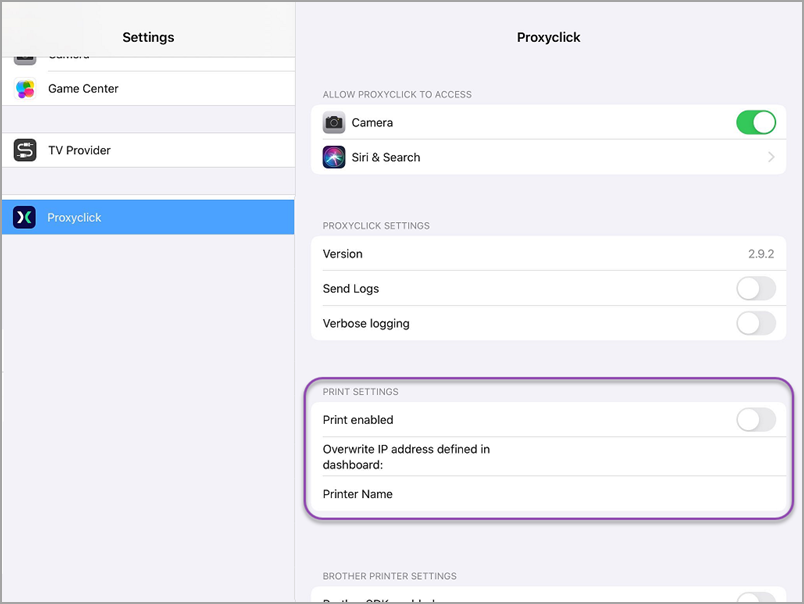
Access the device settings for Kiosk 2, scroll to the Eptura Visitor Kiosk app, and click to open the settings. Ensure the Print-enabled toggle is green (this must be done for all printers).
Step #3:
Copy the IP address from the printer you want to attach to the kiosk and enter it into the Overwrite IP address defined in Dashboard field.
The Printer Name is not mandatory. You do not have to complete that field to connect the kiosk to the printer.
You are all set once the new IP address is in the field!
Repeat as needed to connect additional printers and kiosks.