Install the Outlook Add-in
With the Eptura Visitor Outlook add-in, you'll save time and have more options when you create new visits from Microsoft Outlook.
- Creates a seamless process. Users will see an Eptura Visitor button in the ribbon of their Outlook calendar.
- Ability to select different Eptura Visitor locations directly from Outlook.
- Enrich the visit with a comment to reception and/or any custom field.
- The add-in minimizes errors by detecting missing information.
The Outlook Add-In allows users to create visits from their Outlook client without using the Eptura Visitor dashboard.
Prerequisites
- Supported Versions - Check the Outlook versions that can be used with the Eptura Visitor Outlook add-on, these are listed in System Requirements.
- Eptura Visitor User Profile - The user sending the meeting request must have a user profile in Eptura Visitor. Make sure the user email exists in at least one Eptura Visitor location.
- Subscription Add-on - The subscription add-in must be active, see Calendar integration.
- Custom Fields - When the host creates a visit, you can include custom fields. Learn more in Manage and Edit Custom Fields and make sure the "Only show this field to receptionists and admins during visit creation or editing" is toggled on.
Your IT team will determine if the deployment will be the Local or Centralized Deployment.
Local Deployment
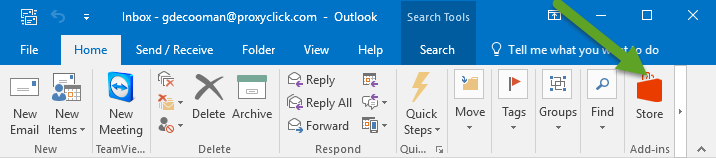
- Open Outlook and go to Email > Store.
If the Microsoft Add-In Store does not appear in Outlook or the Add-In Store does not show the "Add by URL" option, you must use centralized distribution (see below).
-
Click on “Click here to add a custom add-in”

- Click on “Add from URL”
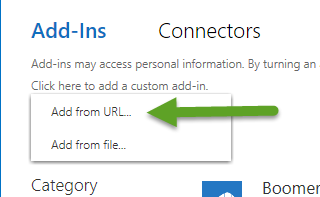
If the Microsoft Add-In store does not show the “Add by URL” option – You must use centralized deployment (see bottom of this article)
- Finalize the installation
-
If you are not using SSO, paste the following URL: https://outlook.proxyclick.com/manifest
-
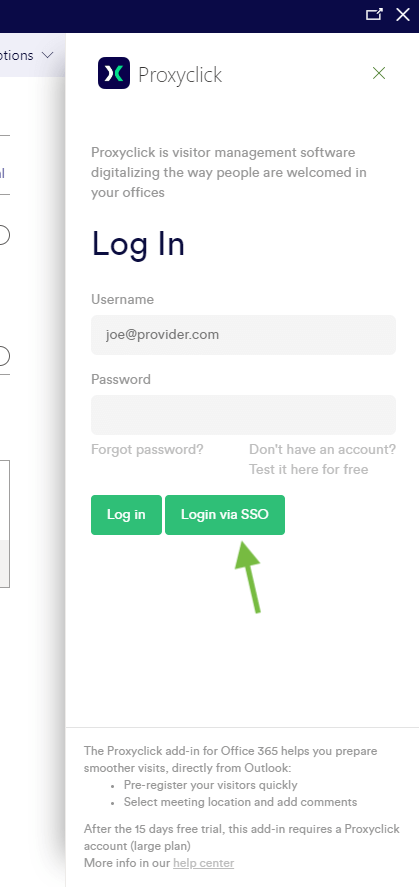
If you are using SSO, use the following URL: https://outlook.proxyclick.com/manifest?companyId=CO-XXXX where CO-XXXX is your Company ID (found in the SSO URL e.g. https://saml.proxyclick.com/init/CO-XXXX). Your users will have the option to log in through your SSO provider:
-
To provide only the SSO login option, add the flag "showLogin=false" to the manifest URL: https://outlook.proxyclick.com/manifest?companyId=CO-XXXX&showLogin=false
Confirm the installation.
Centralized Deployment
You can enable centralized deployment of the Eptura Visitor Outlook add-in by following this Microsoft How-to-guide .
When asked, choose the “I have a URL for the manifest file” option and provide the appropriate URL:
-
If you are not using SSO, paste the following URL: https://outlook.proxyclick.com/manifest
-
If you are using SSO, use the following URL: https://outlook.proxyclick.com/manifest?companyId=CO-XXXX where CO-XXXX is your Company ID (found in the SSO URL, e.g. https://saml.proxyclick.com/init/CO-XXXX).
-
To provide only the SSO login option, add the flag "showLogin=false" to the manifest URL: https://outlook.proxyclick.com/manifest?companyId=CO-XXXX&showLogin=false
Install using Exchange server (2013+)
-
Log in to the Exchange Admin Center (EAC) and select organization > apps (for Exchange 2013) or organization > add-ins (for Exchange 2016).
-
Select the add icon (+) and then Add from the URL.
-
Supply the Eptura Visitor Outlook Add-In URL (see above) and select Next.
-
The Eptura Visitor Outlook Add-In will appear in the list
-
Double-click the Eptura Visitor add-in to edit it.
-
Select Make this add-in available to users in your organization.
-
Select the user defaults appropriate to your organization, then save (we suggest “Mandatory, always enabled” for best uptake)
-
After a re-launch of Outlook, your users will see the Eptura Visitor Add-In in a meeting creation view.
Deploy by File
If you cannot deploy the add-in directly via the above URLs, in either Exchange Admin Center or Microsoft 365 Admin Center, you can instead deploy by file. Navigate to the appropriate manifest URL (see above) in the browser of your choice and save the resulting document as "ProxyclickManifest.xml." You can upload this file directly in your Admin Center instead of referencing the URL.
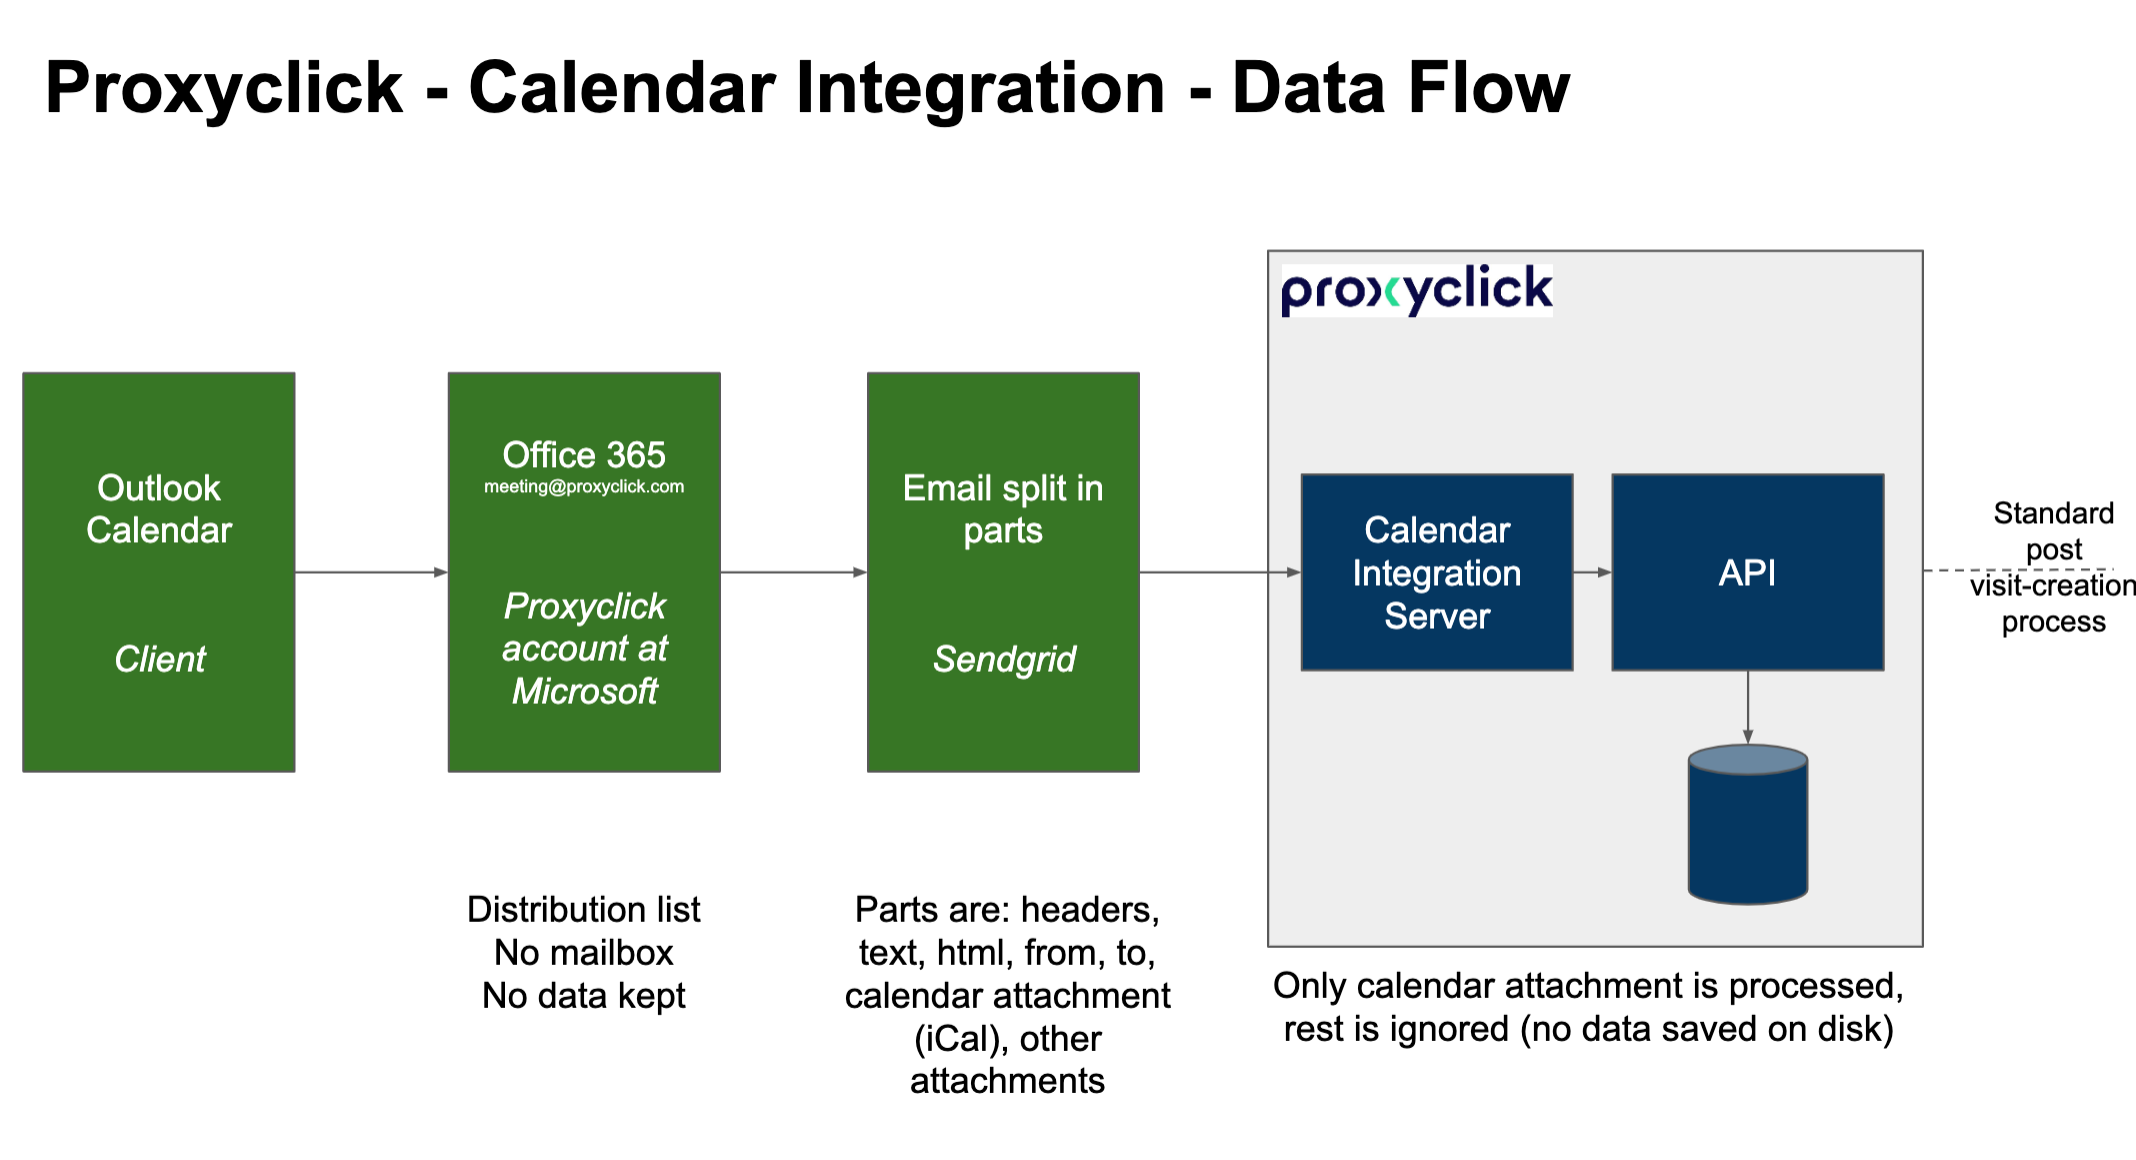
Calendar Integration's Data Flow
We take your privacy seriously. See how your data flows when using our Outlook Add-in.
Watch it in Action
Now, the Outlook Add-in is installed; see what your visitors and/or employees will experience in Preregister Visitor with the Outlook Add-in.