
✨Eptura Assistant
PREVIEW - Eptura AI Assistant is available for preview. To join the beta program, contact Eptura Support. Before participating, review the Eptura Beta Program Terms and Conditions: https://eptura.com/terms/beta/
Contents
About the Eptura AI Assistant
The Eptura Assistant is a conversational AI assistant, powered by Microsoft Copilot, that allows employees to manage workplace tasks using natural language. This intelligent assistant uses an orchestrator agent built on Model Context Protocol (MCP) server architecture to provide a unified interface across the Eptura ecosystem.

Conversation management, chat history, and authentication are centralized in one agent - no need to start a new agent or a new conversation when you want to complete a task with a different Eptura product.
The Eptura Assistant is available to customers who have subscribed to Eptura platform services and use one or more of the following products:
- Eptura Asset
- Eptura Engage
- Eptura Visitor
Employees can chat with the assistant in Microsoft Teams or Microsoft 365 Copilot to complete tasks such as creating visits, finding available meeting spaces, booking desks or parking spaces for office days, and searching for assets.

Employees can only complete tasks with the Eptura products they have access to.
Prerequisites
The Eptura Assistant is available for customers with:
- Eptura platform services with one or more of the following products:
- Eptura Asset
- Eptura Engage
- Eptura Visitor
- Eptura AI license
- Microsoft 365 license (a Microsoft 365 Copilot license is not required)
- Users require Microsoft Teams and/or Copilot to chat with the assistant
Usage and retention (preview version)
The following allowances are in place for the preview version:
- Maximum of 500 characters per user input
- Maximum of 80 chats per user, per day
- Chat history is retained for 24 hours from the last interaction
- Chat history is limited to the last 10 interactions
Deploying the Eptura Assistant
An Exchange Admin can install the Eptura Assistant centrally for your organization.
The Eptura Assistant is installed via a manifest file provided by Eptura. Contact support to request the manifest file.
The Eptura Assistant is uploaded to your Microsoft 365 admin center. Learn more at Microsoft: Upload to Microsoft admin center
The assistant's availability in Microsoft Teams depends on how it is configured by your Exchange admin in the admin center. It might either be automatically available to all users or be available for users to add themselves.
Manually adding the Eptura Assistant to Microsoft Teams
If the Eptura Assistant is not automatically made available via the Microsoft admin center, users can install it themselves in Microsoft Teams.
- From Microsoft Teams on your desktop, click the + Apps icon in the left-hand menu, then search for Eptura Assistant and select it.

- Click Add to install the Eptura Assistant, and when installed, click Open to add it to your Microsoft Teams.
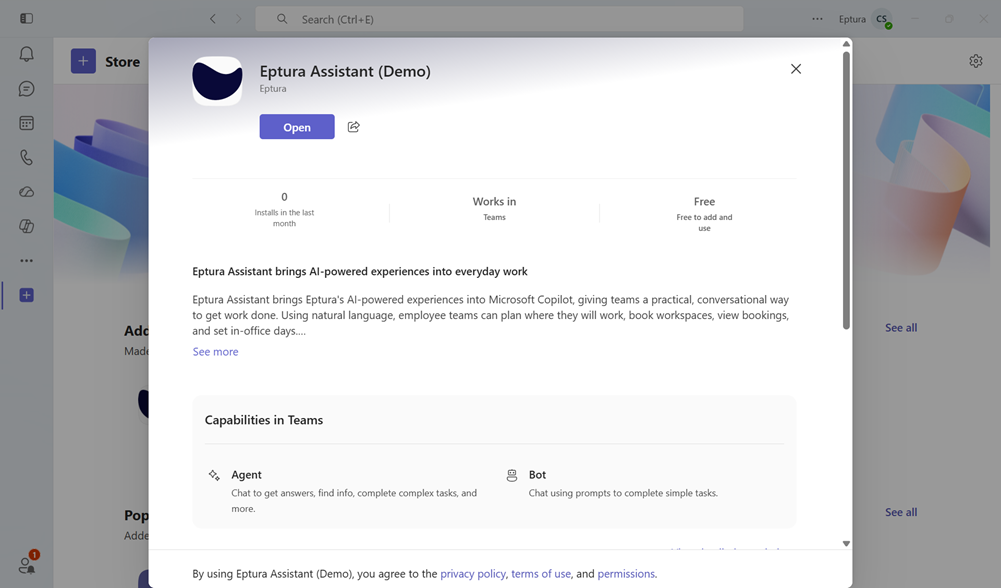
- If Microsoft Copilot is installed, an option to open the app using Microsoft Teams or Copilot is displayed. Make your selection to open the Eptura Assistant and start chatting.

Using the Eptura Assistant
Using the Eptura Assistant is similar to asking a colleague to complete a task for you. You can chat in natural language, and if all the required information is provided, the assistant completes the task immediately. If any details are missing - such as the visit duration or desk location - the assistant asks follow-up questions until it has enough information to proceed.
As you become familiar with the assistant and how to chat with it effectively, it can quickly become the tool of choice when performing tasks in Eptura products. No need to open another app in your web browser or reach for your mobile device - simply ask the Eptura Assistant from Microsoft Teams or Copilot.
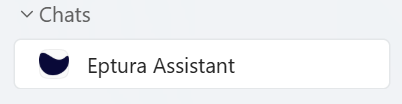
Microsoft Teams - Click the Eptura Assistant in your Microsoft Teams chat to start a conversation.
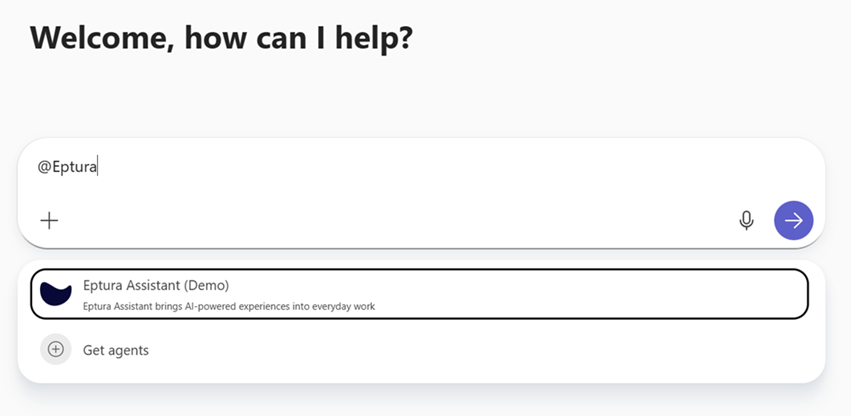
Microsoft Copilot - Tag @Eptura Assistant to start chatting directly from Microsoft Copilot.
Slight differences in behavior might occur when using Microsoft Teams or Microsoft Copilot; however, the overall capability remains the same.
Activities and tasks
The Eptura Assistant can help with the following activities and tasks:
Eptura Asset |
Eptura Engage |
Eptura Visitor |
|
|
|
See examples and guidance about chatting with the assistant in the Product-specific guidelines
Best practices when interacting with the Eptura Assistant
The Eptura Assistant is designed to understand natural language and help you complete workplace tasks through a conversational interface. Following these best practices can help improve response accuracy, reduce unnecessary follow-up questions, and provide a smoother experience when interacting with the assistant.
General guidelines
- Greetings - Inputs like "Hi," "Hello," or "Hey" will trigger a standard greeting/welcome message.
- Help / Product discovery - Type "help" or phrases like "Help me learn about your products" to get a list of supported products and services.
- Resetting the conversation - If the assistant gives an unexpected, inconsistent, or confused response, try clearing the chat history. Since Large Language Models (LLMs) can sometimes 'hallucinate' due to lingering context from earlier in the conversation, starting afresh often resolves this.
- Example input: "Clear my chat" - this clears the previous conversation history from the backend, allowing the assistant to respond with a fresh context.
- Example input: "Clear my chat" - this clears the previous conversation history from the backend, allowing the assistant to respond with a fresh context.
- Required vs. optional parameters - Every product-specific task (Engage, Visitor, Asset) has a set of required parameters and optional (non-required) parameters.
- It is recommended to provide all required parameters along with any relevant optional parameters in a single prompt.
- While it is possible to provide these across multiple prompts, doing so leads to multiple back-and-forth interactions, which:
- Consume token credits faster, and
- Might cause the bot to lose or miss important context.
- Refer to the product-specific guidelines section for examples of required and optional parameters for each task.
- One action per message - Each message should address a single, specific action.
- Combining multiple operations - whether within the same product or across different products - in one message is not recommended.
- Instead, send separate messages for each operation. This keeps responses accurate and reduces the chances of the assistant getting confused or mixing up context.
- Natural language for dates and times – There is no need to type dates or times in a specific format.
- Expressions such as "today," "tomorrow," "next Monday," "this Friday," "in 3 days," or "20th July" are understood automatically. The assistant resolves these expressions on its own.
- Date and time zone are automatically picked up from your Microsoft Teams or Microsoft Copilot 365 configuration.
Product-specific guidelines
Expand the sections to see guidelines specific to each product.
Eptura Asset
Eptura Asset
- Search assets
- All filter parameters are optional. The more context you provide, the more targeted the results.
- You can filter by any combination of free text, asset type, status, and manufacturer. The assistant automatically resolves type, status, and manufacturer names.
- If no filters are provided, all accessible assets are returned.
 |
Examples
|
- Get asset by code
- Use this when you know the asset's human-readable code. The assistant returns the complete asset profile - no further lookup is needed.
- The code is not case-sensitive.
|
Examples
|
- Get asset hierarchy
- Shows the parent-child component tree under a root asset, up to a configurable depth: 5 levels by default, with a maximum of 10 levels.
- Use this to explore sub-assets and component breakdowns of systems or equipment.
- The root asset can be identified by its code - the assistant resolves the ID automatically.
|
Examples
|
- List asset types
- Lists all asset types configured in the system. Useful when you want to filter assets by type but are unsure of the exact type name, or when you want to see what categories exist.
|
Examples
|
- List asset statuses
- Lists all asset statuses configured in the system. Useful when you want to filter assets by status but are unsure of the exact status names.
|
Examples
|
- List manufacturers
- Lists all manufacturers registered in the system. Useful when you want to filter assets by manufacturer but are unsure of the exact name.
|
Examples
|
Eptura Engage
Eptura Engage
The Eptura Assistant currently only supports bookings for the default workspace types: Desks and Meeting Rooms.
- Desk booking
- Date is a mandatory parameter. If not provided, the assistant will ask for it.
- It is recommended to include the date in your initial message to avoid extra back-and-forth.
|
Examples
|
- Meeting room booking
- Date, start time, end time, and number of attendees are mandatory parameters.
- Meeting title is an optional parameter.
- If the end time is not specified, the assistant will default to a 30-minute duration.
|
Example
|
- Retrieving bookings
- Bookings can be retrieved from today up to a future date, within a maximum interval of 15 days.
- A maximum of 10 bookings will be displayed at once.
|
Examples
|
- Delete a desk booking
- Date is a mandatory parameter. The assistant will look up your booking and display a confirmation card before proceeding.
- Reply with yes, ok, sure, or confirm to complete the deletion. Deletions are permanent and cannot be undone.
|
Examples
|
- Delete a meeting room booking
- Date is a mandatory parameter. The assistant will look up your booking and display a confirmation card before proceeding.
- Reply with yes, ok, sure, or confirm to complete the deletion. Deletions are permanent and cannot be undone.
|
Example
|
- Update / Reschedule a desk booking
- The current booking date and new date are mandatory parameters.
- Only the date can be changed; the desk, floor, and location are automatically assigned and cannot be modified.
- The assistant will show a confirmation card before applying the change.
|
Example
|
- Update / Reschedule a meeting room booking
- The current booking date is a mandatory parameter.
- You can change the date, time, duration, number of attendees, or meeting title, or any combination of these.
- Location and room cannot be changed via an update.
- The assistant will show a confirmation card before applying the change.
|
Examples
|
- Get the best day to visit the office
- No mandatory parameters are required. If no date range is provided, the assistant evaluates the next 15 days by default.
- You can optionally specify a start date and end date to narrow the recommendation.
|
Examples
|
Eptura Visitor
Eptura Visitor
- List Visitor Types
- Location is an optional parameter. If you have access to only one location, you do not need to mention it.
|
Examples
|
- Create visitor
- First name and last name are mandatory parameters. The assistant will ask for them if not provided.
- Location is a mandatory parameter; however, if you have access to only one location, you do not need to specify it - the assistant will use it automatically.
- Optional parameters - email, company name, visitor type, notes (about), and license plate.
- It is recommended to include as many details as possible in your initial message to avoid extra back-and-forth.
|
Examples
|
- List visitors
- Location is a mandatory parameter; however, if you have access to only one location, you do not need to specify it - the assistant will use it automatically.
- Optional parameters - first name, last name, email, and company name - include any combination to narrow results.
- If no filters are provided, all visitors at the location are returned.
|
Examples
|
- Get visitor
- Visitor name and location are sufficient for the assistant to look up the visitor's record. You do not need to know the visitor ID.
- If multiple visitors share the same name, the assistant will list the matches for you to confirm.
|
Examples
|
- Update visitor
- The assistant will first look up the visitor by name and location - you do not need to know the visitor ID.
- At least one field to update is mandatory. Updatable fields are: first name, last name, email, company name, notes (about), and license plate.
|
Examples
|
- Delete visitor
- The assistant will first look up the visitor by name and location, display their details, and ask for explicit confirmation before deleting.
- Reply with yes, ok, sure, or confirm to proceed. Deletion is permanent and cannot be undone.
|
Examples
|
- Create visit
- Visitor name and start time are mandatory parameters.
- Location is a mandatory parameter; however, if you have access to only one location, you do not need to specify it - the assistant will use it automatically.
- Optional parameters:
- Visit name - if not provided, the agent will create a name for the visit.
- End time - if not provided, the visit duration defaults to 1 hour.
- The assistant will look up the visitor by name automatically if no ID is provided.
|
Examples
|
- List visits
- Location is a mandatory parameter; however, if you have access to only one location, you do not need to specify it - the assistant will use it automatically.
- Date range (start date and end date) is a mandatory parameter. Natural language such as “next week”, “this week”, or “on 15th July” is supported.
- Visitor name is an optional filter - include it to see visits for a specific person only.
|
Examples
|
- Update visit
- The assistant will look up the visit by visitor name, location, and date - you do not need to know the visit ID.
- At least one field to update is mandatory. Updatable fields are: visit name, start time, and end time.
- The assistant will display the current visit details before applying the change.
|
Examples
|
- Cancel visit
- The assistant will look up the visit by visitor name, location, and date, display the visit details, and ask for explicit confirmation before cancelling.
- Reply with yes, ok, sure, or confirm to proceed. Cancellations are permanent and cannot be undone.
- Location does not need to be specified if you have access to only one location.
|
Examples
|