Add or Edit a Screen Theme
Eptura - Device Hub
You can quickly add or edit a theme.
Add Theme
- From the Manage Theme, click any of the Add Theme buttons and the Add Theme displays.
- Complete the Theme fields; see the Theme Fields below.
- Click the Save button.

Edit Theme
- From the Manage Theme, click the theme and the Edit Theme displays.
- Complete the Theme fields; see the Theme Fields below.
- Click the Save button and the message "Your theme has been updated. It may take a few minutes for the these changes to appear on your device."
Theme Fields
| Field | Description |
|---|---|
|
Device type |
For the device type, select either Eptura screen or Third party tablet. |
|
Theme name |
In the Choose a theme name field, enter a unique name. |
|
Background (with the Third party tablet selected as the device type)
|
Expand this section to see the background upload. Next, you can choose the background, either Use Image or Use Status Color. Use Image Either select a background or upload a custom background. Click the Browse button and then browse to the file and select it.
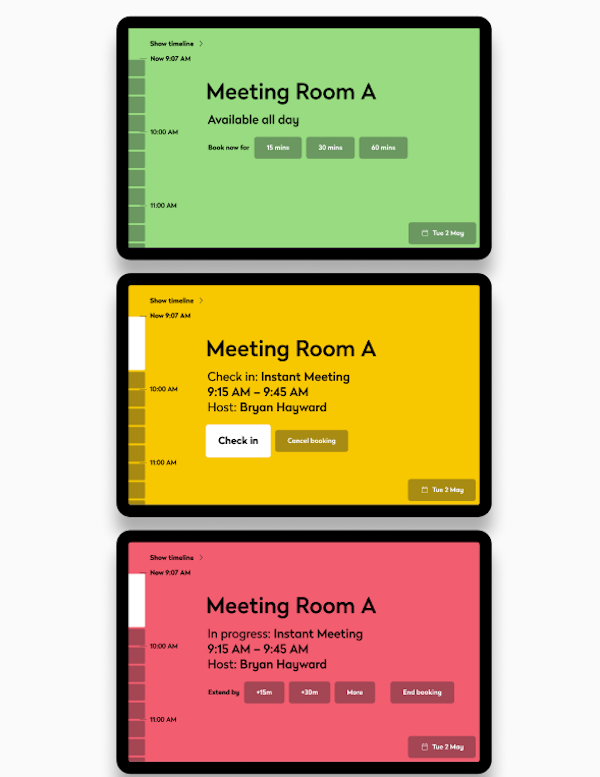
Use Status Color This will display the status of the room for the background color (green for available, amber for check-in and red for busy). For example:
|
|
Background (with the Eptura Screen selected as the device type) |
Expand this section to see the background upload. Either select a background or upload a custom background. Click the Browse button and then browse to the file and select it.
|
|
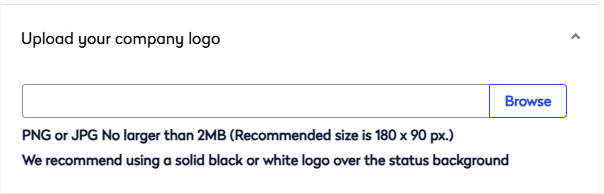
Upload your company logo
|
Expand this section to see the upload.
Click the Browse button and then browse to the file and select it. |
|
Set as default |
If you want this theme to be the default, then check the Set as default check box. |