Custom Attributes Mapping for Okta
When your organization needs custom attributes in Okta, these can be added.
- Prerequisites
- Mapping Custom Attributes
- Add Custom Attribute in Okta
- Step 1. Add attribute the application’s end
- Step 2. Add attribute at Okta’s end
- Step 3. Add attribute mapping
Prerequisites
- Configure SCIM provisioning for Okta.
Mapping Custom Attributes
User custom extension schema, if any organization required other attributes, then you can use CustomExtensionName URI to segregate attributes.
urn:ietf:params:scim:schemas:extension:CustomExtensionName:2.0:User
For example:
"urn:ietf:params:scim:schemas:extension:CustomExtensionName:2.0:User":
 {
       "group": "Grp2",
        "floor": "do-sou barah",
        "middleName": "",
        "phoneExtension": "+242",
        "workMode": "Work from Home",
        "image": "ishika_bajpai.png",
        "usageLocation": "UK",
        "officeLocation": "India"
 }
SCIM allowed URIs are as follows:
- User Core Schema
urn:ietf:params:scim:schemas:core:2.0:User
- User Enterprise Schema, it only allows below mentioned attributes.
urn:ietf:params:scim:schemas:extension:enterprise:2.0:User
- manager
- costCenter
- department
- organization
- employeeNumber
For example:
"urn:ietf:params:scim:schemas:extension:enterprise:2.0:User":
 {
       "department": "HR",
        "costCenter": "243777",
        "employeeNumber": "EP_ishika_bajpai",
        "manager": {
            "value": "32433d024-7fb7-73bc-2477e-7xxxxxxxxxx2e7",
        },
        "organization": "KPMG"
 }
Add Custom Attribute in Okta
Step 1. Add attribute at the application’s end
- Sign into Okta.
- From the menu, navigate to the Applications.
- Click the Application Name.
- Click the Provisioning tab.
On the Provisioning screen you will see the To App, To Okta, and Integration as shown in the screenshot below.

- From the menu, click To App.

- Click the Go to Profile Editor button.
- Click the + Add Attribute button.

- Complete the attribute's required information.
- Save the attribute.
Now you have you have added one extension attribute at application’s end.
Step 2. Add attribute at Okta’s end
The process of adding extension attribute at Okta’s end is almost same as we have added at application’s end.
- From the menu, select Applications.
- Click the Application Name.
- Select the Provisioning tab.
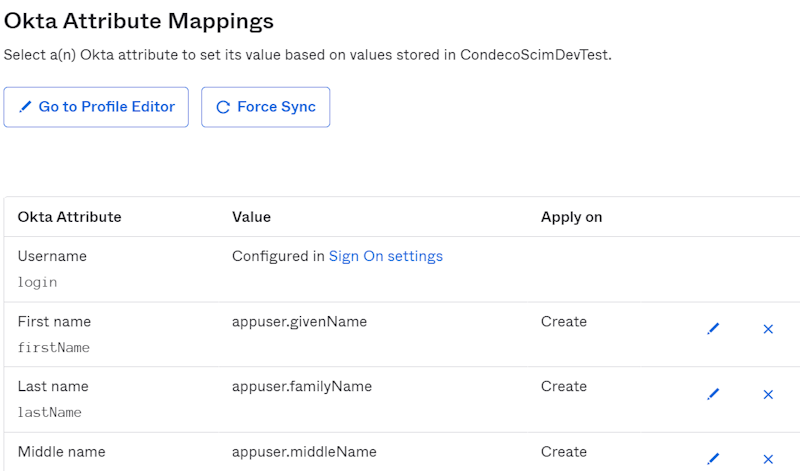
- Click the To Okta button.

- Scroll down to Okta Attribute Mappings.
- Click the Go To Profile Editor button.
- Click the + Add Attribute.

- Complete the attribute's required information.
- Save the attribute.
Now you have you have added one extension attribute at Okta's end.
The attribute has been added at both ends.
Step 3. Add attribute mapping
Next, add the mapping for the new attribute.
- Click To Okta.
- Scroll down and click Show Unmapped Attributes.
- For the and add mapping for newly added attribute.
- For attribute mapping go to (A) To App tab and scroll down.
- Click (B) Go To Profile Editor button.
- Click (C) Mappings.

- From the left-side select the SCIM APP attribute name and map it to the Okta attribute.

For example:

- Click the Save Mappings button.

- Click Apply updates now button.