Add, Edit, or Delete Couriers
Displays a list of couriers that are available to select from on the Check-In screen.
Access the Courier List
- Navigate to Admin > Mail > Couriers. The Couriers screen displays.
- Select the relevant center.
Add a Courier
-
Click the add courier link from the top right of the screen and complete the required fields.

The Add Mail Courier screen displays.
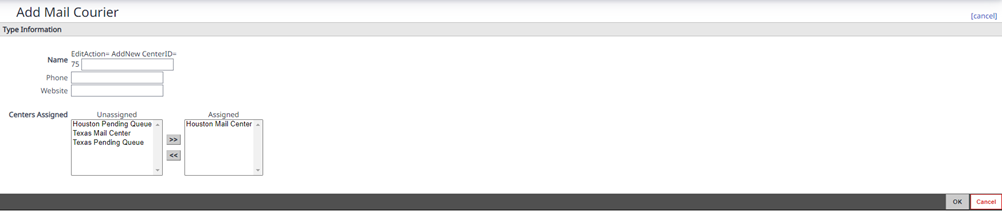
- In the Name field, enter the courier's name.
- In the Phone field, enter the courier's phone number.
- In the Website field, enter the courier's website URL.
- From the Centers Assigned, select the center and then click the right arrow
 icon to move it to the assigned list.
 - Click the OK button.
In order to have the courier barcode automatically detected during the scan, contact Eputra Support team.
Edit an Existing Courier
- For the courier you want to edit, click the edit link.
- Complete the edits to the fields.
- Click the OK button.
In order to have the courier barcode automatically detected during the scan, contact Eptura Support team.
Delete a Courier
-
Click the remove link from the Actions column. The message "You are about to remove this courier from this center. You will not be able to reassign it later. Proceed?"
-
Click the OK button and the courier is deleted.
Standard couriers such as UPS, USPS, FedEx cannot be removed.