Using the Teem Microsoft Office365 Add-in to Book a Room
Use the Teem Outlook Add-in to help find a room or desk straight from your Microsoft Outlook in the web browser. This means you can remain in Outlook and seamlessly create events without going to another app.
- Sign in to Teem - You will be asked to sign in when you first use the add-in.
- Change your Location - Teem lets you set your default location; when you visit another location, it can be easily changed.
- Book a Room - Find and book the perfect room for meetings by filtering meeting spaces by availability, location, capacity, and amenities.
When your IT Administrator has pushed out the add-in, it will exist in the meeting event's toolbar. Contact your IT Support team if you do not see the Teem icon.
Launch, Sign in, and Set the Current location
You can set a default location; when you visit another location, it can be easily changed.
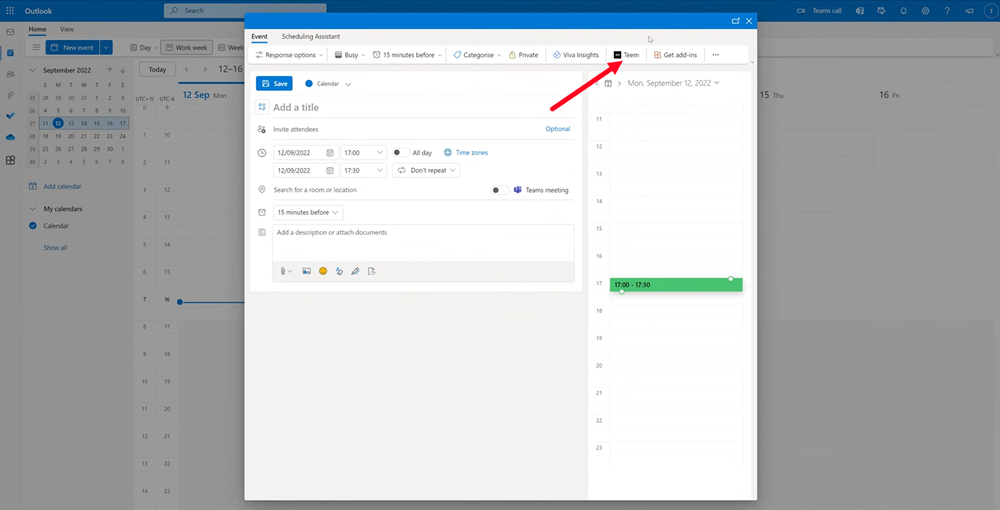
- From the Outlook (Office 365) calendar, create a New Event.
- Click the Teem
 icon.
icon.
The Teem form displays.
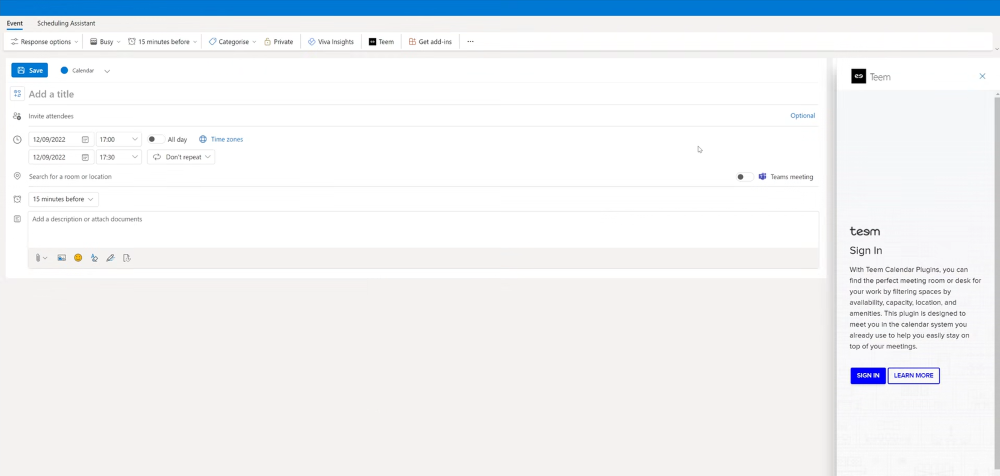
3. Click the SIGN IN button. The Teem Sign in to your account dialog displays.
The Teem Sign into your accounts dialog is a pop-up window; therefore, check that your browser allows pop-ups and it is not blocking them.
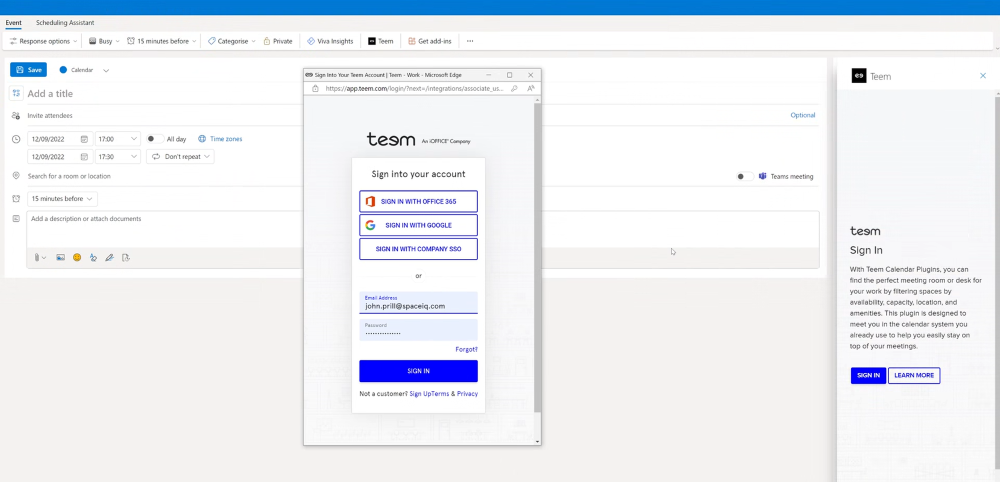
3. Choose the correct method to log in by clicking on the Sign in with OFFICE 365, Sign in with Google, or Customer SSO buttons, or sign in manually.
The Teem account Success dialog displays when you successfully sign in.
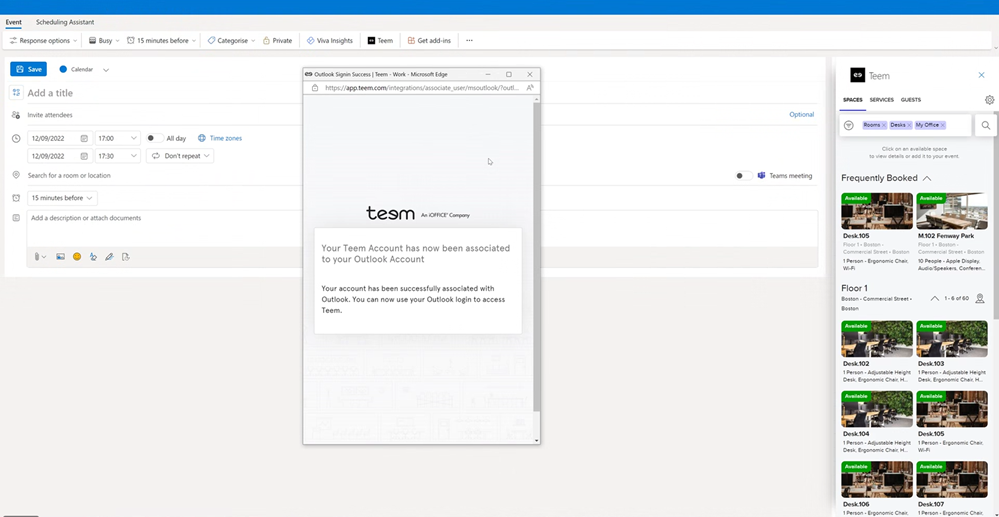
4. Click the dialog's X icon (top-right corner) to close the dialog.
Set the Current Location
Next, you can set a default location; when you visit another location, it can be easily changed.
1. Click the Settings  icon.
icon.
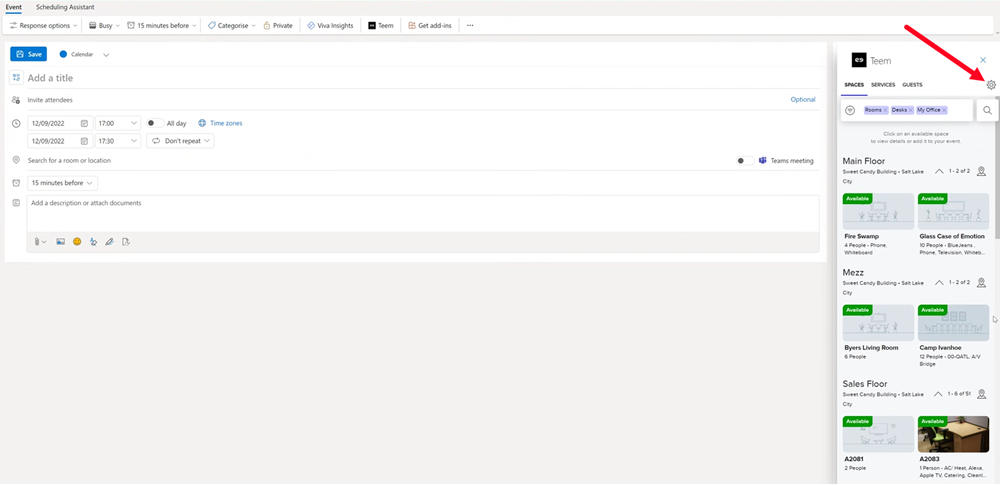
The Settings form displays.
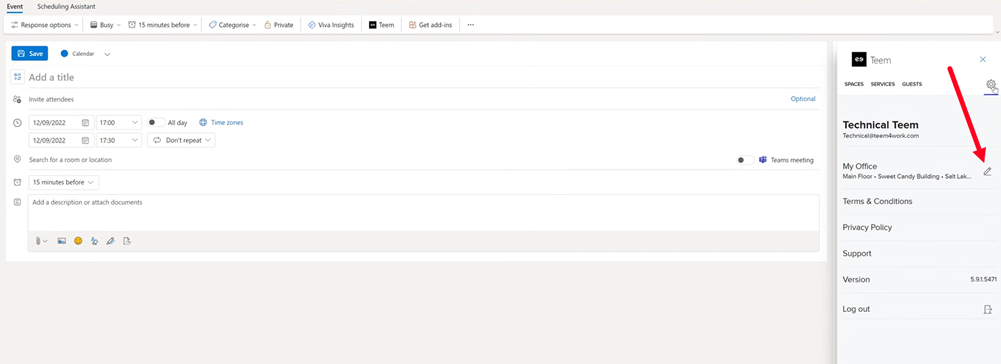
2. Click the Edit  icon.
icon.
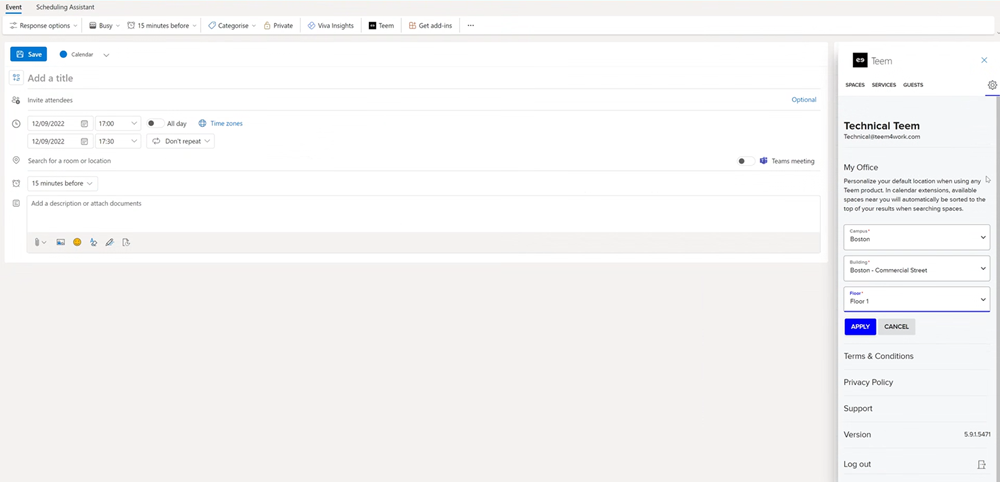
3. From the Campus drop-down, select the campus.
4. From the Building drop-down, select the building.
5. From the Floor drop-down, select the floor.
5. Click the APPLY button.
The Teem form now displays the desks and rooms for your location.
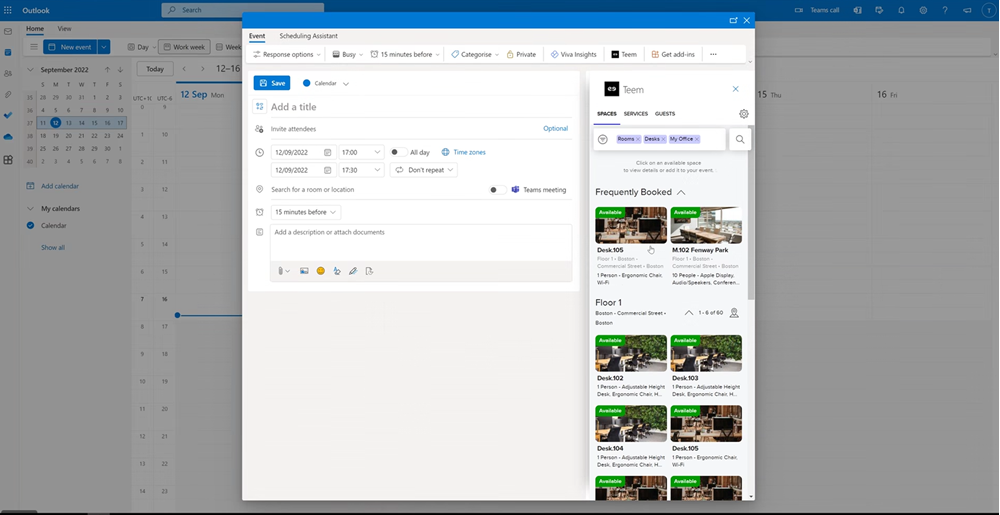
Book a Room
After you have signed into Teem and set a default location, you are ready to book a room.
- From the Outlook (Office 365) calendar, create a New Event.
- Click the Teem icon.
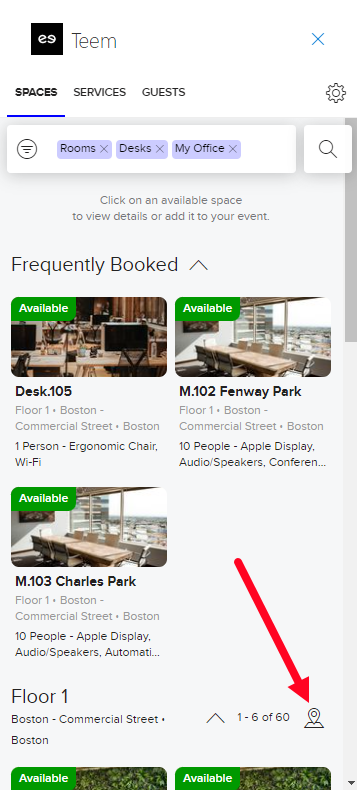
The Teem form displays the Frequently Booked spaces and the available floor spaces underneath this.
Using the Filter
Use the filter to add or remove specific meeting space requirements such as availability, location, capacity, and amenities (such as Apple TV or Chromecast). Clicking on the x in the filter bar will remove the specific selection. Specific amenities that are available in certain meeting spaces can be selected to assist with filtering.
When a change is made, the user must click on the Apply button to use those filter settings.
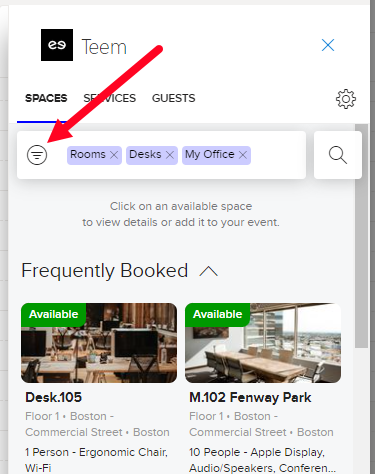
1. Click the Filter  icon and the Filters form displays.
2. Adjust the filters:
- Filter Space by Rooms or Desk - These filters are ON; click on the filter to turn it OFF.
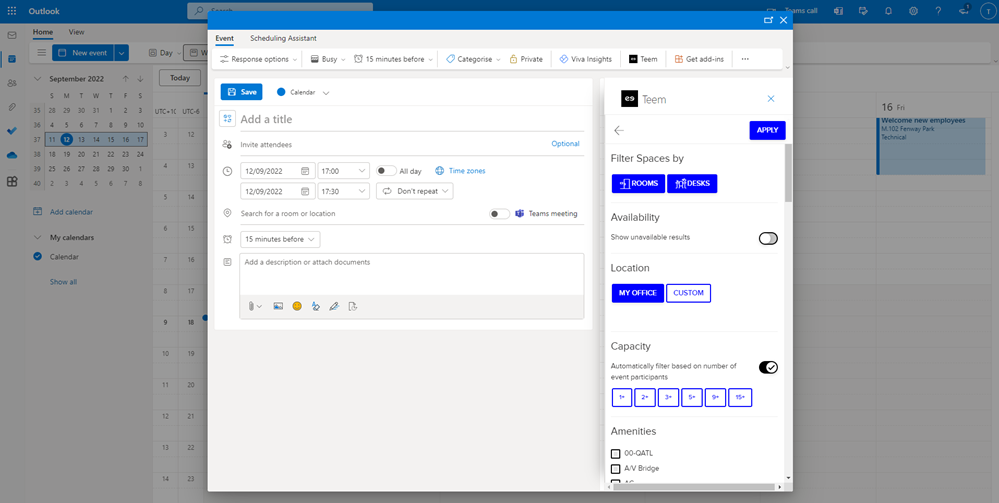
- Show unavailable results toggle - By default, this is OFF; click the toggle to turn it ON.
- Location - By default, this is set to MY OFFICE and will use your default location. To change this, click CUSTOM and then enter the location. This will change the listing for the available building.
- Capacity - By default, this will filter automatically based on the number of event participants. If a different-sized room is desired, click the toggle to turn it OFF, and then select the capacity number.
- Amenities - Select the amenities you want to filter for.
3. Click the APPLY button to return to the meeting space listing.
Search or Browse
1. If you know the room's name, you can search for it or scroll through the available rooms in the listing.
2. When you find the room you want, click the room's name.
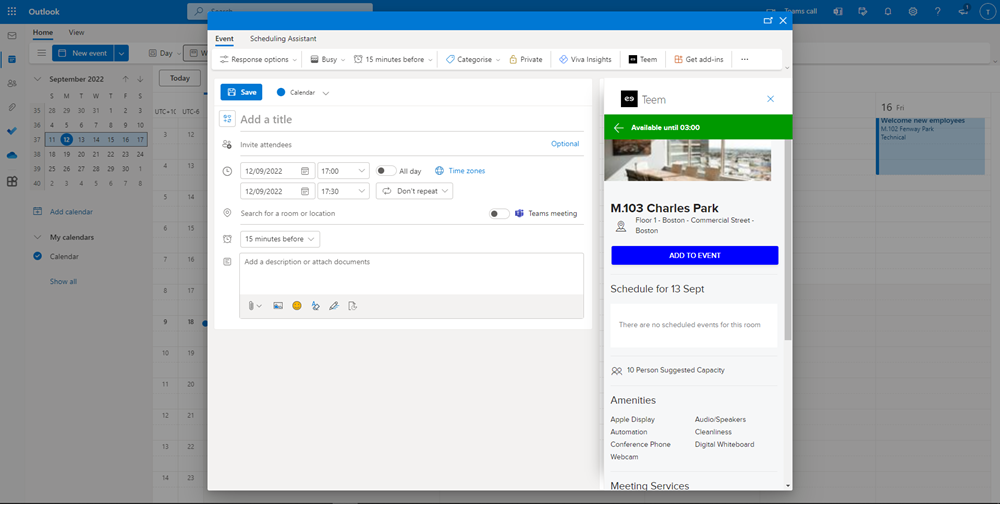
3. Click the ADD TO EVENT button.
This can be shown if you want to know where the room is on the map. Let's focus on the room details form, where you will see the Map icon.
Click the Map  icon, and the floorplan displays.
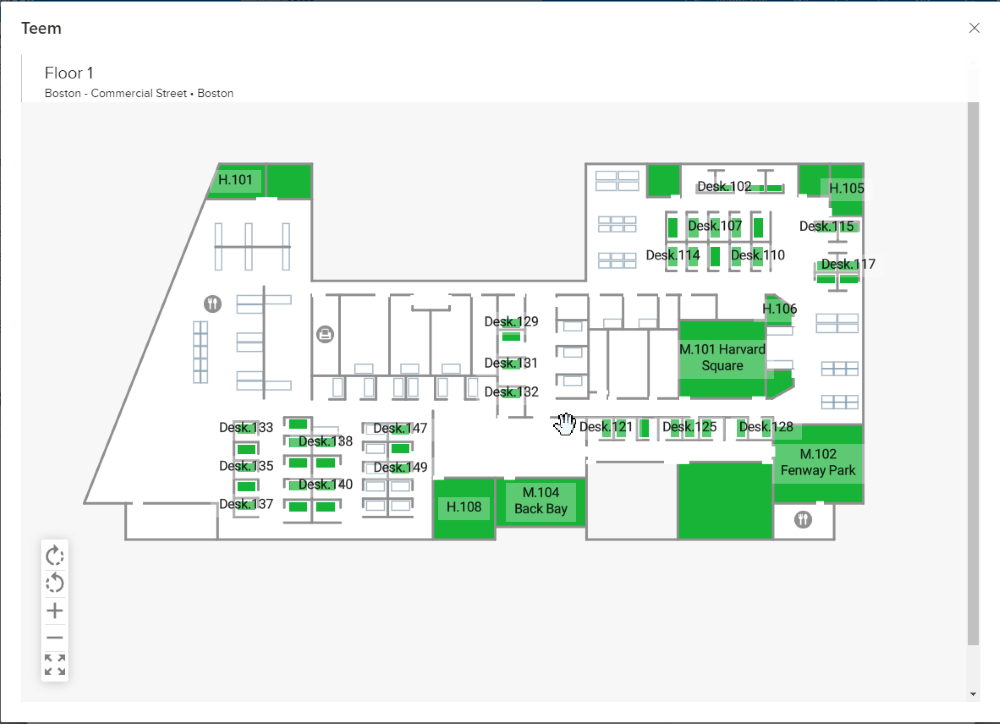
You can use the mouse to navigate the floorplan to drag and move the floorplan, zoom in or out, or click into any space to see details. You can also use the Map Tools on the bottom left of the floorplan to rotate the floorplan to the right, rotate the floorplan left, zoom in or out.
Select the Date and Time
Next, in the event, you can select the date and then either the All Day toggle or the From and To times. Additionally, Office 365 (Web) will display suggested times.
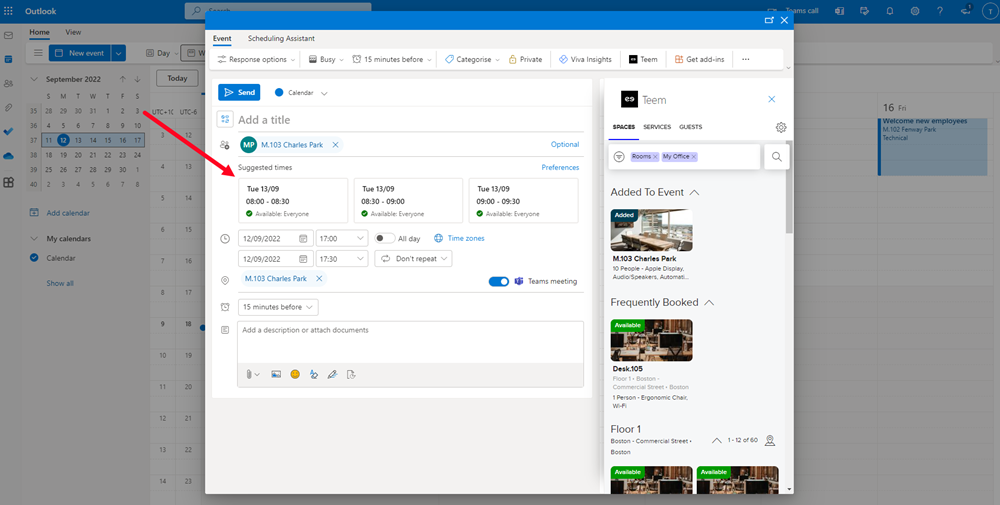
NOTE: The date cannot be set outside 30 days when booking a space through TEEM.
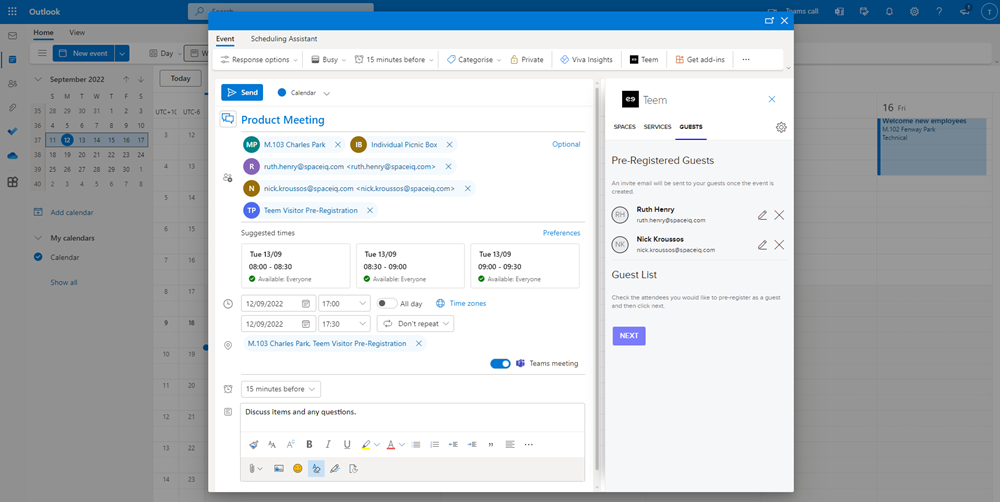
Inviting Co-workers, Guests, and the rest
When a guest who is outside of the organization, or email domain, is added to the space booking using the Google Chrome calendar extension, the number of guests will appear as a highlighted number on the Teem Extension on the right.
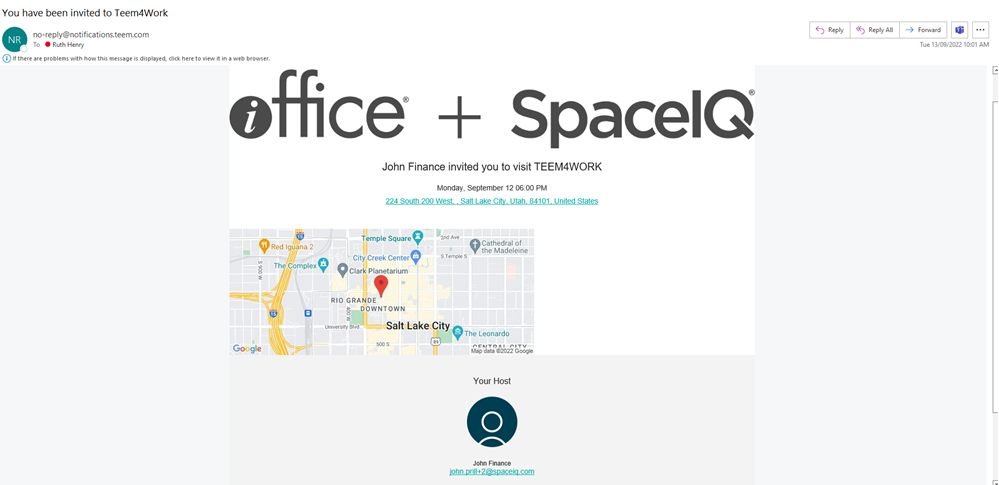
This feature is only available for customers with LobbyConnect set up on their Teem account. This feature helps organizers pre-register their guests when visiting the company so that when they arrive at the lobby, their check-in process is a faster experience.
Next, let's add in the guests.
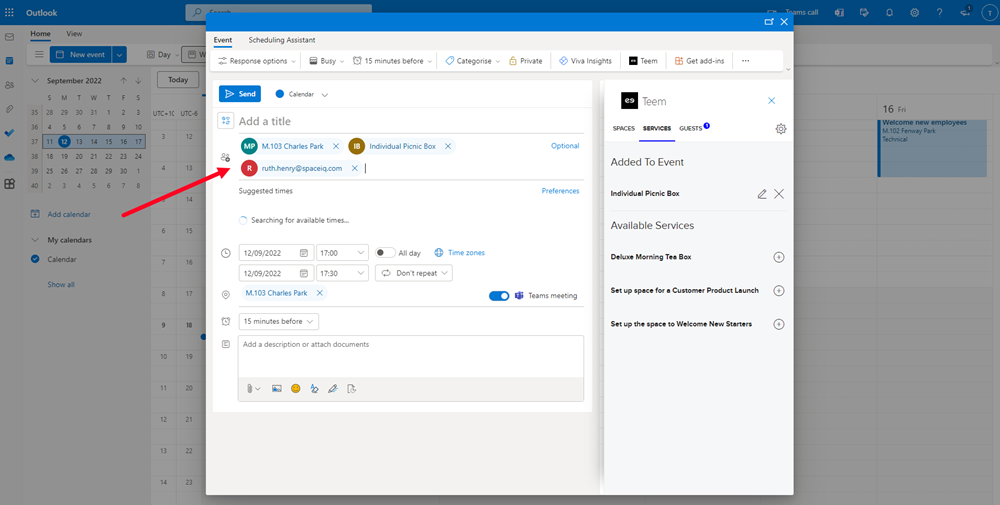
After the guests are added, they will be displayed in the Teem form, where you can pre-register your guests.
Pre-register Guests
Let's take a closer look at the Teem form, where you will see the Guests tab with the number of guests in the list.
Remember you must have all your guests in the event before you can pre-register them.
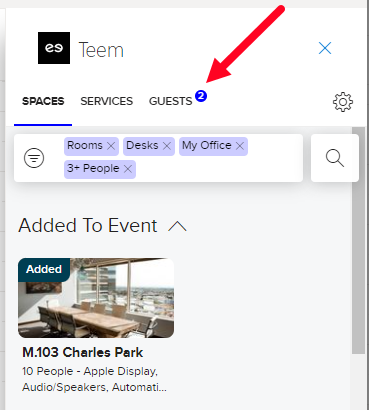
1. Click the Guests tab.

The Guest List displays.
2. Select the guest(s).
3. Click the NEXT button.
The confirmed guest and event information displays.
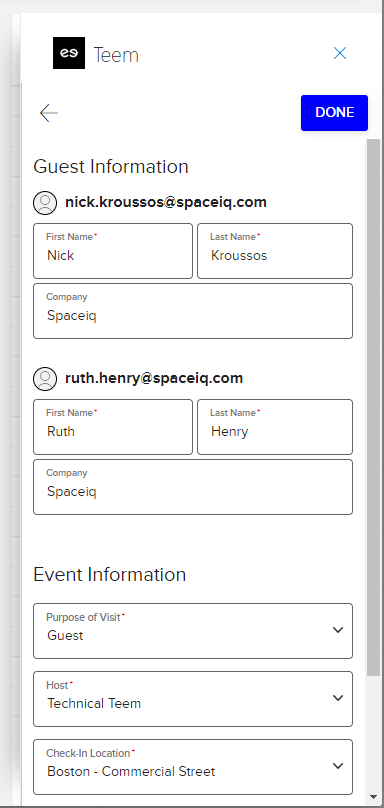
4. Make sure the guest information is correct, and if needed, make changes.
6. For the Event Information, complete the following:
6.1 From the Purpose of Visit drop-down, select the purpose. For example, Guest, Internal Visitors. Note that the Teem Administer sets up this list.
6.2 From the Host field, leave the default name or search for a Teem user account.
6.3 From the Check-in Location field, leave the default location or select another location.
5. At the end of the form, select the Send email invitation check box, and then if you want, include a custom note.
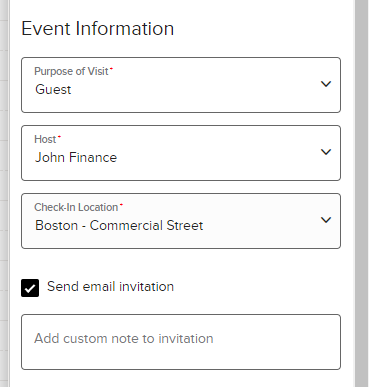
6. When ready, click the DONE button.
Your guest has been pre-registered, and when they arrive at the location, they can check in.
Add a Meeting Service
The Teem add-in lets you select meeting services such as catering or a particular room setup.
Your Teem Administrator will set up the meeting services.
Let's take a closer look at the Teem form, where you will see the Services.
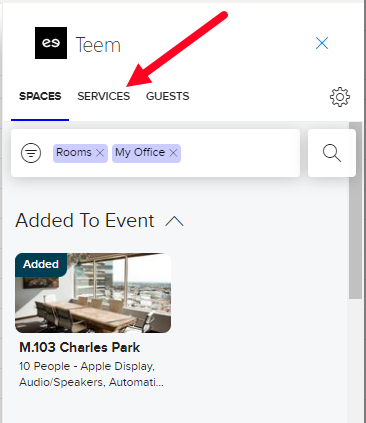
1. Click the Services tab.
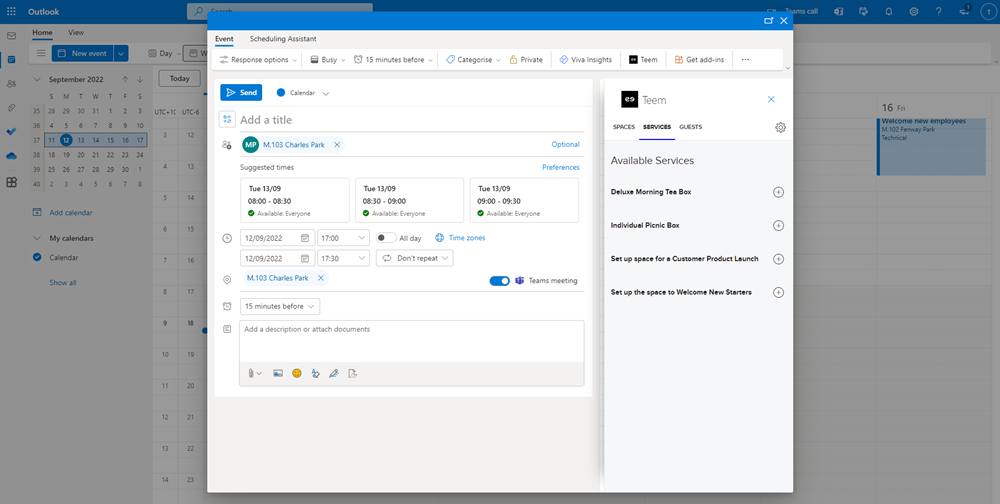
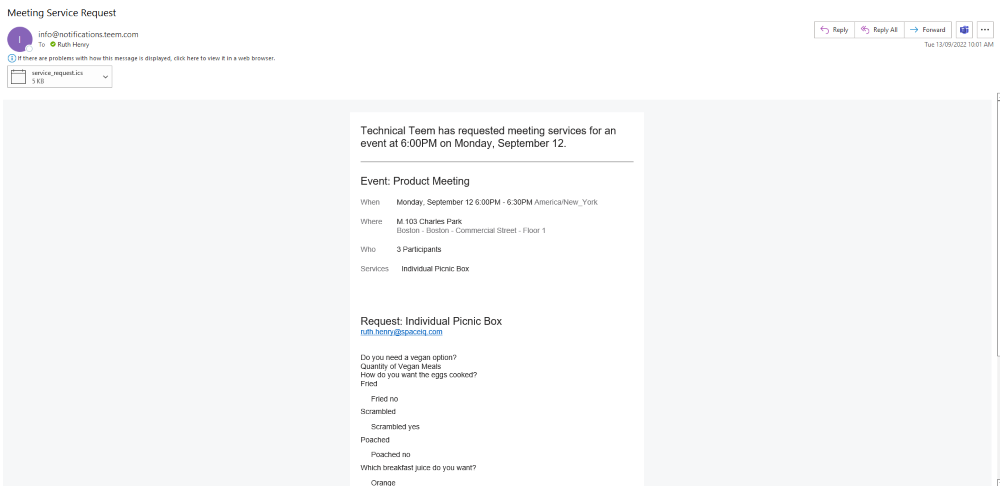
2. From the available services, click a Service. In this example, let's select the Individual Picnic Box.
The service form displays.
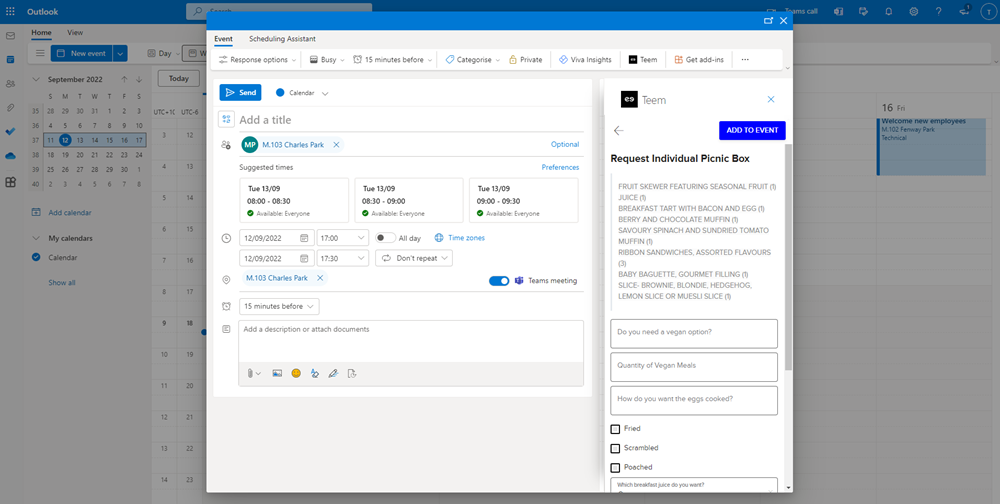
3. Complete the service form.
The service form will contain different questions depending on how the Teem Administrator has set up the forms.
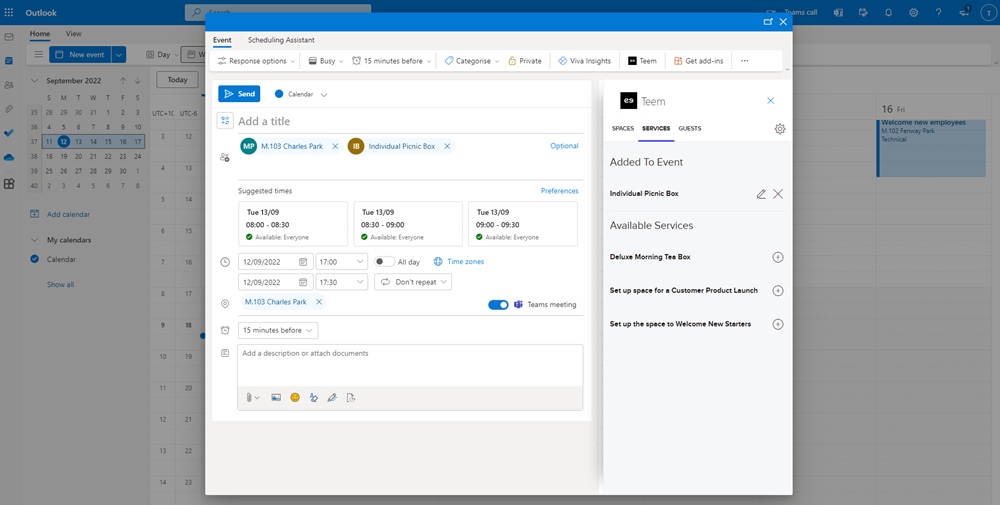
4. Click the ADD TO EVENT button.
Add a Title and Content for the Email
Of course, you will want to include a title and description for your event.
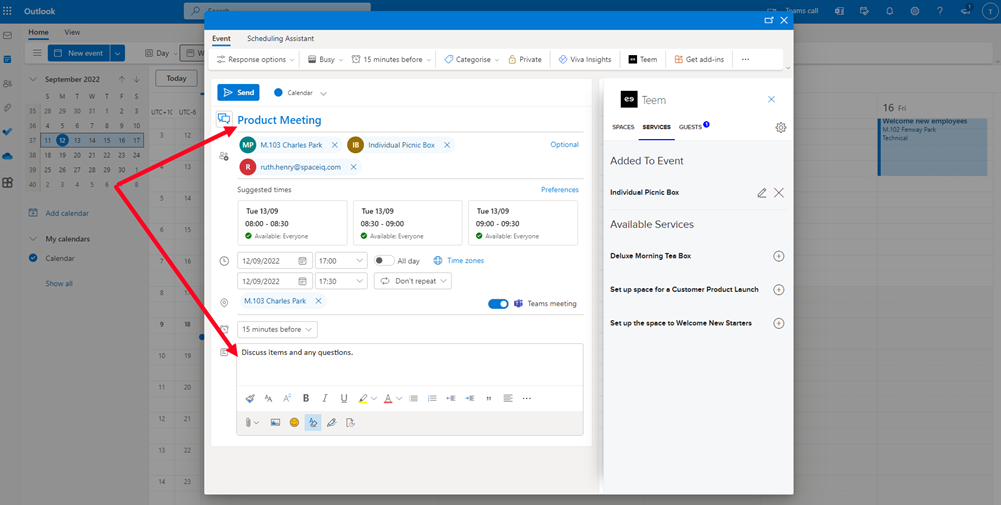
Send out your Event
Finally, you are ready tho click the Send button.
Event Emails for a Room
Let's have a look at the emails that are sent out.
Pre-registered Guest Email
This is the pre-registered guest email, and your logo will display where the iOFFICE+SpaceIQ logo is.
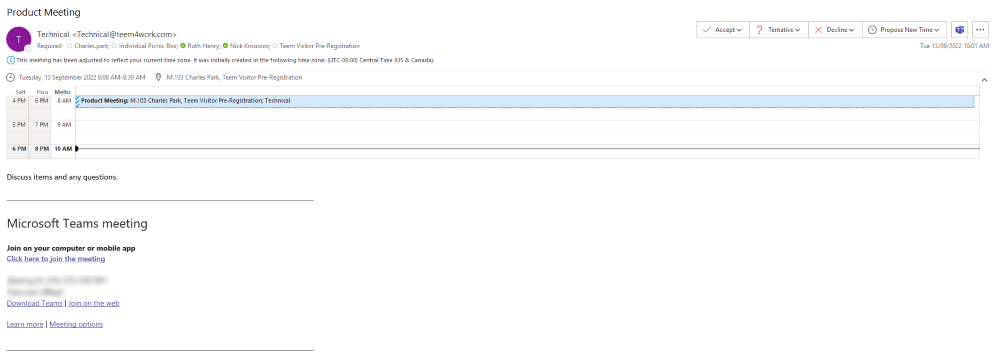
Calendar Email
This calendar email which you can accept or decline. Accepting the meeting will it to the Outlook personal calendar.
Meeting Service Confirmation Email
The meeting service confirmation email is sent out so that your guest knows what catering, etc, will be offered at your event.